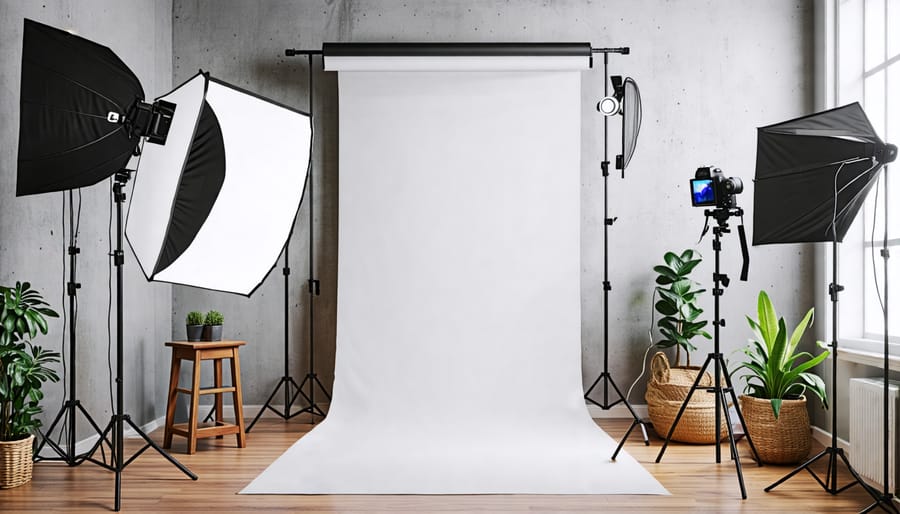
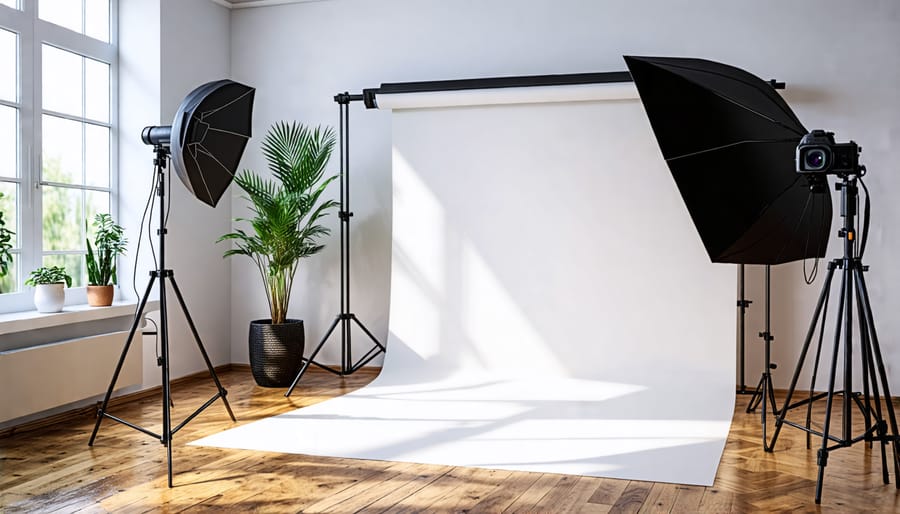
Transform a spare room into a dedicated photo studio by removing furniture, covering windows for light control, and setting up a basic backdrop stand and seamless paper or muslin backdrop. Invest in a quality lighting kit with softboxes or umbrellas to shape the light, and consider continuous LED lights for versatility and ease of use. Utilize reflectors, diffusers, and flags to further manipulate light and shadow, and experiment with different lighting setups like Rembrandt, butterfly, or split lighting to achieve various moods and effects. Organize your equipment with shelving units, label everything clearly, and establish separate work zones for shooting, gear storage, and post-processing to optimize efficiency in your home studio space.
Essential Equipment for Your Home Studio
Camera and Lenses
When choosing a camera for your studio setup, consider full-frame DSLR or mirrorless bodies that offer excellent image quality, high resolution, and strong low-light performance. Models like the Canon EOS 5D Mark IV, Nikon D850, Sony A7R IV, or Fujifilm GFX 50S are well-suited for studio work. Pair your camera with high-quality camera lenses that match your preferred focal lengths and shooting style. For portraits, a versatile 24-70mm f/2.8 zoom and fast prime lenses like an 85mm f/1.4 or 135mm f/2 are excellent choices. Macro lenses in the 90-105mm range are ideal for product photography, while wide-angle lenses like a 35mm f/1.4 can be useful for environmental portraits or capturing larger sets. Investing in quality glass will ensure sharp, detailed images that meet professional standards.
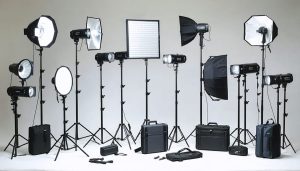
Lighting Equipment
When setting up a photography studio, lighting is one of the most critical elements to consider. The right studio lighting can make all the difference in achieving professional-looking results. Continuous lights are a popular choice for beginners, as they allow you to see the lighting effects in real-time and make adjustments accordingly. These lights are typically LED or fluorescent and come in various sizes and power outputs.
For more advanced setups, strobes (also known as flash units) offer more power and control over the lighting. Strobes emit a brief, intense burst of light, which helps freeze motion and provides a crisp, well-lit image. When choosing strobes, consider factors such as power output, recycle time, and the ability to sync with your camera.
Softboxes and umbrellas are essential modifiers that help shape and soften the light from your continuous lights or strobes. Softboxes come in different sizes and shapes, with larger ones producing a softer, more diffused light that’s ideal for portraiture. Umbrellas, on the other hand, are more compact and affordable, making them a great option for those working in smaller spaces or on a budget.
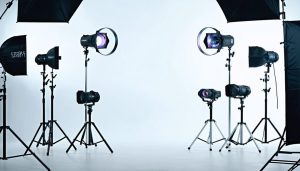
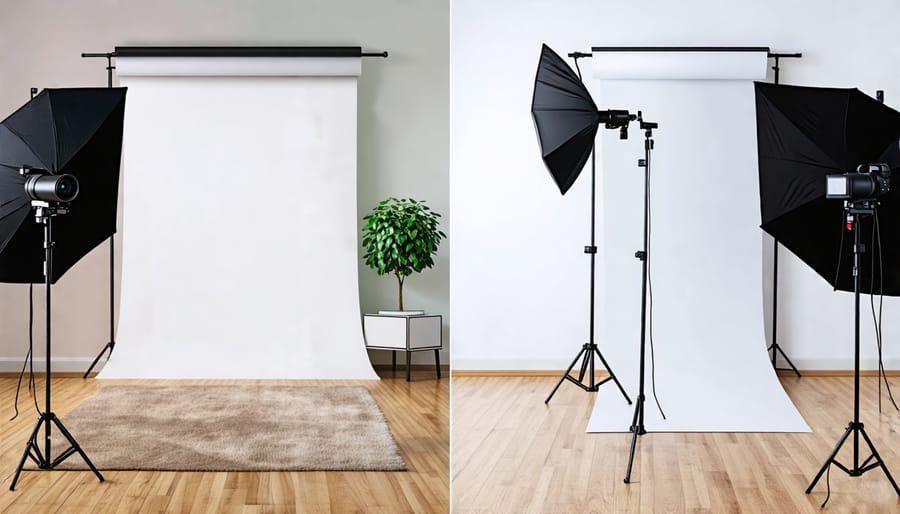
When building your lighting kit, it’s a good idea to start with a basic three-point lighting setup, which includes a key light, fill light, and backlight. As you gain experience and confidence, you can expand your kit with additional lights and modifiers to achieve more creative and complex lighting setups.
Choosing the Right Space
Size and Layout
The amount of space you need for your photography studio depends on the type of photography you plan to do. For portrait photography, a space of at least 10×10 feet is recommended to accommodate your subject, lighting, and backdrop. Product photography can often be done in a smaller space, such as a dedicated tabletop setup or even a converted closet.
When designing your studio layout, consider the flow of your space and how you’ll move around during shoots. Place your backdrop and lighting strategically to create a functional and efficient workspace. If possible, designate separate areas for shooting, gear storage, and post-processing.
For home studios, utilizing natural light from windows can be a great option. Set up your shoot space adjacent to a large window and use reflectors or diffusers to control the light. If you’re using artificial lighting, arrange your lights in a triangle formation around your subject for even illumination. Experiment with different lighting setups to find what works best for your style of photography.
Natural Light vs. Artificial Light
Natural window light offers a soft, flattering quality that’s ideal for portraits and still life. It’s free and can create beautiful catchlights in subjects’ eyes. However, it’s less predictable and controllable compared to artificial lighting. Studio strobes or continuous lights provide consistent illumination regardless of weather or time of day. They allow precise control over brightness, color temperature, and light shaping with modifiers like softboxes or umbrellas. The downside is the cost of equipment and the learning curve to master artificial lighting setups. Ultimately, many photographers use a combination of both natural and artificial light to achieve their desired aesthetic.
DIY Backdrop Ideas
Painted Canvases
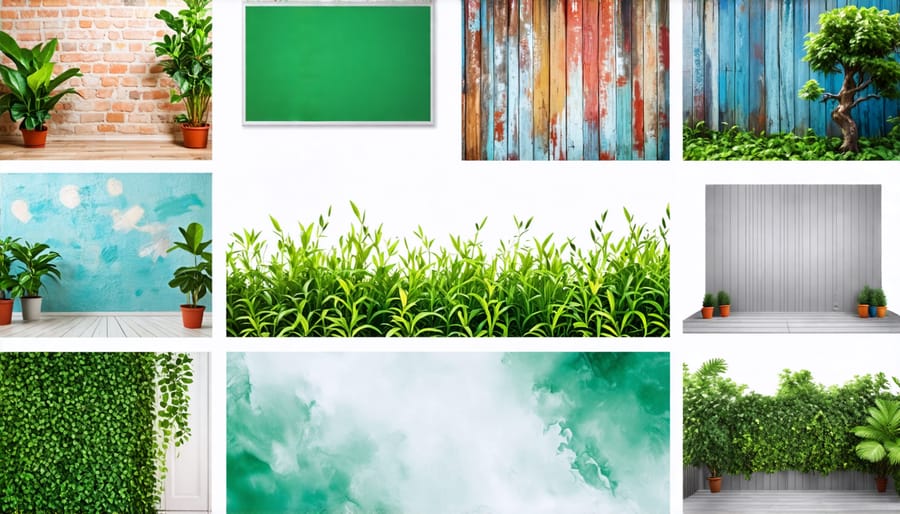
Painted canvases offer a unique and customizable backdrop option for your photography studio. To create your own, start by selecting a pre-stretched canvas in your desired size. Choose acrylic paints in colors that complement your photographic style, such as neutral tones for a classic look or bold hues for a more vibrant aesthetic. Apply the paint using a variety of brushes and techniques, such as blending, splattering, or creating texture with a sponge. Experiment with different color combinations and patterns to achieve various moods and effects. Once dry, your painted canvas is ready to serve as a distinctive backdrop that reflects your artistic vision.
Fabric and Textured Materials
Incorporating fabric and textured materials as backdrops can add depth, dimension, and visual interest to your studio photography. Curtains and sheets in various colors and fabrics, from sheer to heavy, create soft, ethereal backgrounds that beautifully diffuse light. Textured materials like weathered wood planks, exposed brick, or even wallpaper can provide a more rustic, industrial, or patterned look, depending on your aesthetic preferences. Experiment with draping, hanging, or mounting these materials to achieve different effects and moods in your images. With a diverse collection of backdrops, you’ll have the flexibility to craft the perfect setting for any subject, from portraits to still life arrangements.
Green Screens
Green screens are a versatile tool for photographers, allowing you to easily replace backgrounds and create unique composites. By using a solid green backdrop, you can digitally key out the background in post-production and replace it with any desired image or video. This technique saves time and money compared to shooting on location or building physical sets. To set up a green screen, you’ll need a wrinkle-free green backdrop, even lighting to avoid shadows, and a space large enough to accommodate your subject and equipment. With a bit of practice, green screens open up endless creative possibilities for your photography studio.
Compact Storage Solutions
Gear Cabinets and Shelves
Gear cabinets and shelves are essential for keeping your photography studio organized and efficient. Invest in sturdy, modular shelving units that can accommodate a variety of equipment sizes and shapes. Label each shelf or drawer clearly to quickly locate items when needed. Consider using transparent storage boxes for smaller accessories, so you can easily see what’s inside. Repurpose an old filing cabinet for storing backdrops or use rolling carts to keep frequently used gear within reach. Wall-mounted pegboards are perfect for hanging cords, reflectors, and other lightweight items. By designating a place for everything, you’ll maintain a tidy workspace and streamline your workflow.
Collapsible Setups
Collapsible setups offer photographers the convenience of easy storage and transport. Portable backdrops, typically made of muslin or vinyl, can be quickly set up and taken down, allowing for versatile shooting in various locations. Collapsible light stands are lightweight yet sturdy, enabling you to position lights precisely where needed without taking up valuable space when not in use. Foldable tables provide a stable surface for props, equipment, or products during shoots, and can be easily stored away afterwards. These space-saving solutions are perfect for photographers with limited studio space or those who frequently work on location.
Studio Arrangement Ideas
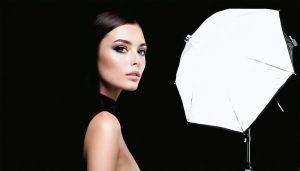
Portrait Photography Setup
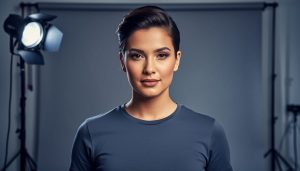
For stunning studio portraits, position your subject about 2-3 feet in front of a solid-colored backdrop. Set up your main light, such as a softbox or umbrella, at a 45-degree angle to your subject, slightly above their eye level. This creates a flattering, directional light that sculpts the face. To soften shadows and add catchlights in the eyes, place a reflector or fill light on the opposite side. Experiment with a hair light positioned behind your subject to separate them from the background and add depth. Remember, the key to great portrait photography is to create a balanced interplay of light and shadow that enhances your subject’s features. Don’t be afraid to adjust your lighting setup as needed to achieve the desired mood and effect. With practice and experimentation, you’ll find the optimal arrangement for your unique studio portrait style.
Product Photography Setup
Setting up your product photography area is crucial for capturing high-quality images. Start with a sturdy table or workbench that provides ample space for your products and equipment. A white seamless background, like a sweep or infinity curve, works well for most products. Position your main light, such as a softbox or umbrella, at a 45-degree angle to the product for even illumination. Add fill lights on the sides to reduce shadows and highlight details. Consider using a light tent or light box for smaller products, which diffuses the light and minimizes reflections. Experiment with different angles and heights to find the most flattering perspective for each product. Don’t forget to include a scale reference object if needed. With patience and practice, you’ll develop an eye for arranging your lights and surfaces to create professional-looking product photos right in your home studio.
Pet Photography Setup
When photographing pets, aim for a simple backdrop that won’t distract from your furry subject. A roll of seamless paper or a large piece of fabric in a neutral color works well. Ensure the floor is non-slip for your pet’s safety and comfort. Natural light from a large window is ideal, but if that’s not available, use softboxes or umbrellas to create even, diffused lighting. Keep treats and toys on hand to capture your pet’s attention and elicit natural expressions. For smaller animals, consider raising them on a platform to bring them closer to eye level. Most importantly, be patient and create a calm environment. Allow your pet to explore the space and get comfortable before starting the shoot. With a little preparation and a lot of love, you’ll capture beautiful portraits that showcase your pet’s unique personality.
Setting up a home photography studio can be an exciting and rewarding experience, allowing you to explore your creativity and capture stunning images in a controlled environment. By understanding the key elements of a studio setup, such as lighting, backdrops, and equipment, you can create a versatile space that caters to your specific photography needs. Remember, the beauty of a home studio lies in its flexibility and the opportunity to experiment with different configurations until you find what works best for you. Don’t be afraid to try new ideas, mix and match equipment, and push the boundaries of your creativity. With practice and persistence, you’ll develop a studio setup that not only enhances your photography skills but also reflects your unique style and vision. So, go ahead and start building your dream photography studio at home – the possibilities are endless!