Master the interplay of shadows and highlights to create depth, dimension and drama in your images. Experiment with hard and soft light sources to sculpt your subjects and evoke different moods. Control light direction to emphasize texture, contour and form for more impactful compositions. Harness the transformative power of color temperature to infuse your photos with warmth or coolness that stirs the emotions.
The Fundamentals of Light
Hard vs Soft Light
Hard light creates strong, well-defined shadows and highlights, resulting in dramatic contrast. It’s produced by small, intense light sources like the midday sun or a bare speedlight. Hard light accentuates textures and shapes, making it ideal for edgy portraits, abstract compositions, and emphasizing form. However, it can be unflattering for some subjects, exaggerating imperfections.
Soft light, on the other hand, wraps around the subject, producing subtle gradations between light and shadow. It’s created by large, diffused light sources like overcast skies, softboxes, or bounced flash. Soft light minimizes texture and creates a dreamy, ethereal atmosphere. It’s flattering for portraits, particularly of women and children, as it smooths skin and creates a gentle glow.
The size of the light source relative to the subject determines whether the light is hard or soft. The closer and larger the light source, the softer the light. You can soften hard light by diffusing it through a translucent material, bouncing it off a large surface, or moving the light source closer to your subject.
Experiment with both hard and soft light to create different moods in your images. A skilled photographer knows when to use each type of light for maximum impact, and how to shape and control light to achieve their desired aesthetic.

Color Temperature
Color temperature is a key concept in photography that refers to the warmth or coolness of the light in a scene, measured in degrees Kelvin (K). Lower color temperatures (around 2700-3000K) produce warm, amber hues, while higher temperatures (5000K and above) result in cool, blue tones. Daylight typically falls around 5500K, offering a neutral white balance.
Understanding color temperature allows photographers to control the mood and atmosphere of their images. Warm tones can evoke feelings of comfort, intimacy, and nostalgia, perfect for portraits or cozy interior shots. Cool tones, on the other hand, can create a sense of tranquility, freshness, or even melancholy, ideal for landscapes or moody scenes.
To achieve the desired color temperature, photographers can use white balance settings on their camera or adjust it in post-processing. When shooting in auto white balance mode, cameras attempt to neutralize color casts, but this may not always align with the photographer’s creative vision. By intentionally choosing warmer or cooler white balance presets, or manually setting a specific Kelvin value, photographers can take control of the color temperature and craft images that convey the intended mood and atmosphere. Experimenting with color temperature can lead to stunning, emotive results that captivate viewers and tell compelling visual stories.
Natural Light Techniques

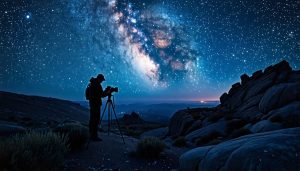
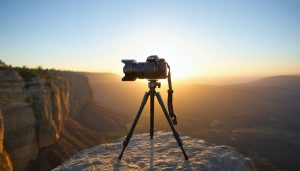
Golden Hour Magic
The golden hours, occurring shortly after sunrise and before sunset, bathe the world in a warm, ethereal glow that can elevate your photographs to new heights. This magical light has a softer quality and a more pleasing color temperature compared to the harsh midday sun. Shadows become longer and more pronounced, adding depth and dimension to your compositions.
To make the most of the golden hour, plan your shoots accordingly and arrive at your location early. Use a sun tracking app to determine the precise timing of the golden hour in your area. Position your subjects to take advantage of the directional light, either backlighting them for a luminous halo effect or side-lighting them for added texture and depth.
Experiment with different angles and perspectives to showcase how the golden light interacts with your scene. Reflective surfaces like water or glass can create stunning reflections and add a dreamy atmosphere to your images. Don’t forget to adjust your white balance settings to capture the warm tones accurately.
The golden hour is fleeting, so work efficiently and be prepared to adapt to the rapidly changing light conditions. With a bit of planning and creativity, you can harness the incredible potential of this special time of day to create truly unforgettable images.
Overcast Advantage
Overcast days are a photographer’s best friend when it comes to capturing beautifully lit subjects. The clouds act as a giant softbox, diffusing the sunlight and creating a soft, even illumination that wraps around your subject. This eliminates harsh shadows and bright highlights, making it easier to achieve a well-exposed image. Overcast light is particularly flattering for portraits, as it minimizes unflattering shadows on the face and brings out the colors in your subject’s eyes. It’s also ideal for capturing the subtle details and textures in nature, such as the delicate petals of a flower or the intricate patterns of a leaf. When shooting on an overcast day, you may need to adjust your camera’s low light settings to ensure a proper exposure, but the resulting images will be well worth the effort.
Reflectors and Diffusers
Reflectors and diffusers are invaluable tools for photographers seeking to control natural light. Reflectors, typically white, silver, or gold, bounce light back onto the subject, filling in shadows and adding subtle warmth or coolness depending on the reflector’s color. They’re particularly useful for outdoor portraits, where harsh shadows can be softened by strategically positioning a reflector.
Diffusers, on the other hand, soften and spread light, reducing contrast and creating a more even illumination. Translucent fabric or specially designed diffusion panels placed between the light source and the subject can turn harsh, direct sunlight into a soft, flattering glow. Whether you’re shooting portraits, still life, or landscapes, experimenting with reflectors and diffusers can help you master the art of manipulating natural light to enhance your images.
Mastering Artificial Light
On-Camera Flash Basics
Learning to balance your on-camera flash with ambient light is key to capturing natural-looking photos in low-light situations. Start by setting your camera to manual mode and dialing in the ambient exposure first. Then, add flash to taste, using your flash exposure compensation to adjust the brightness. Bouncing the flash off nearby surfaces like walls or ceilings can create a softer, more diffused light that blends seamlessly with the environment.
Experiment with different shutter speeds to control ambient light while letting the flash freeze any subject movement. A slower shutter can create interesting motion blur effects in the background while your subject stays sharp. For portraits, try using high speed sync (HSS) to enable flash at fast shutter speeds, perfect for overpowering bright sunlight to fill in shadows.
Remember, the goal is to make your flash look invisible, as if the light occurred naturally in the scene. Practice these techniques in various lighting conditions to master the art of balancing flash with available light. With time, you’ll develop an intuitive sense for when and how to best use your on-camera flash to elevate your images while maintaining a natural look.
Studio Strobe Setups
When setting up studio strobes for classic portrait and product photography, the key is to create a balanced, flattering light that highlights your subject while minimizing unflattering shadows. One of the most fundamental and versatile setups is the 3 point lighting system, which consists of a key light, fill light, and back light.
Position your key light, which is the main light source, at a 45-degree angle to your subject, slightly above their eye level. This creates a pleasing, sculpting effect on facial features. The fill light, placed on the opposite side of the key light, should be softer and less intense, helping to fill in shadows and balance the overall exposure. Lastly, the back light, positioned behind the subject, helps to separate them from the background and add a sense of depth.
For product photography, start with a large, diffused light source directly above the product to minimize shadows. Additional lights can be placed on either side of the product at 45-degree angles to bring out texture and shape. Experiment with light modifiers such as softboxes, umbrellas, and reflectors to control the quality and direction of the light.
Remember, the key to mastering studio strobe setups is to experiment, observe how the light interacts with your subject, and make adjustments until you achieve the desired effect. With practice, you’ll develop an intuitive understanding of how to create stunning, professional-looking images using artificial light.
Continuous LED Lighting
In recent years, constant LED light panels have become increasingly popular among photographers and videographers. These versatile lighting tools offer a range of benefits, making them a valuable addition to any photographer’s lighting equipment arsenal. One of the primary advantages of LED panels is their ability to provide a continuous, flicker-free light source, allowing for easier monitoring of the lighting effect on your subject. This is particularly useful when shooting video or when precise lighting control is essential.
LED panels also offer a high degree of color accuracy, ensuring that the colors in your images remain true-to-life. Many panels feature adjustable color temperature, enabling you to match the light to the ambient conditions or create specific moods. The compact size and lightweight nature of LED panels make them highly portable, perfect for on-location shoots or small studio setups. Additionally, their low heat emission and energy efficiency mean you can use them for extended periods without discomfort or excessive power consumption. With the ability to dim the light output and shape the light using modifiers, constant LED light panels provide photographers with a wide range of creative options for crafting the perfect illumination in any scenario.
Creative Lighting Techniques
Silhouettes and Shadows
Silhouettes and shadows can add a captivating sense of drama and mystery to your photographs. By positioning your subject in front of a strong backlight, you can create striking silhouettes that emphasize shape and form over detail. Experiment with different light sources, such as the sun during golden hour or a bright window indoors, to craft intriguing outlines of people, animals, or objects.
Shadows, too, offer endless creative possibilities. Observe how the interplay of light and shadow can transform an ordinary scene into something extraordinary. Look for interesting patterns, lines, and textures created by shadows cast on walls, floors, or even your subject itself. Use shadows to add depth, contrast, and a hint of narrative to your compositions.
To master the art of silhouettes and shadows, pay close attention to the direction and intensity of your light source. A strong, focused light will yield crisp, well-defined shadows, while a softer, more diffused light will create gentler, more subtle effects. Don’t be afraid to move around and try different angles to find the most compelling interplay of light and dark.
Remember, the key to success with silhouettes and shadows is to embrace the power of simplicity. By stripping away details and focusing on bold shapes and contrasts, you can create images that are both visually striking and emotionally evocative. So go ahead and play with light and shadow – you might just discover a whole new dimension to your photography.
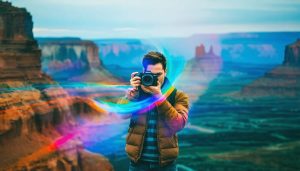
Colored Gels for Mood
Colored gels are a powerful tool for infusing your photos with mood and style. By placing these translucent sheets of colored plastic in front of your light sources, you can dramatically transform the atmosphere of your shots. For example, a deep blue gel can create a cool, nighttime feel, while a warm orange can simulate golden hour or candlelight. Experiment with different colors to evoke specific emotions – red for passion, green for an eerie vibe, or pink for a dreamy look. You can also combine multiple gels to create unique color blends. When using gels, be mindful of your white balance settings to ensure colors render accurately. Start with subtle gel effects and gradually build intensity to find the perfect balance for your creative vision. With a bit of practice and experimentation, colored gels will become an indispensable part of your lighting toolkit, enabling you to craft images with stunning visual impact.

Light Painting Magic
Light painting is a captivating photography technique that allows you to create surreal, ethereal images by moving light sources during long exposures. With the camera set to a slow shutter speed, you can use flashlights, LED lights, or even sparklers to “paint” patterns, words, or shapes into your frame. The key is to keep the camera steady, either on a tripod or a stable surface, while you carefully control the movement of your light source. Experiment with different colors, intensities, and patterns to craft unique compositions. Light painting is especially magical when combined with night photography, as the darkness provides a perfect canvas for your luminous creations. Let your creativity run wild and embrace the unpredictable nature of this technique—you never know what stunning masterpieces you might conjure up with a little light and a lot of imagination!
In conclusion, mastering the art of lighting in photography is a continuous journey of experimentation and discovery. By understanding the fundamentals of light and applying the techniques discussed in this article, you’ll be well-equipped to tackle a wide range of lighting scenarios. However, don’t be afraid to step out of your comfort zone and explore unconventional lighting setups. Play with shadows, silhouettes, and color temperature to create moody or surreal effects. Combine natural and artificial light sources in unexpected ways. The possibilities are endless, and the only limit is your imagination. Remember, photography is not just about capturing reality but also about expressing your unique artistic vision. So grab your camera, embrace the power of light, and let your creativity shine through in every shot.