Step into the vibrant world of C-print photography, where traditional chromogenic processing meets modern digital precision to create stunning, gallery-quality prints. As one of the most enduring photographic printing techniques, C-prints remain the gold standard for color reproduction, delivering rich, saturated images with remarkable depth and archival longevity.
Born in the darkroom but evolved for the digital age, C-print technology harnesses light-sensitive paper layers containing silver halides and specialized dyes to produce prints with unmatched color fidelity and tonal range. Professional photographers prize these prints for their exceptional shadow detail, highlight retention, and ability to capture subtle color gradations that other processes simply can’t match.
Whether you’re a gallery artist seeking museum-quality presentations or a portrait photographer delivering heirloom-worthy prints to clients, understanding C-print technology opens up new possibilities for bringing your digital images into the physical world. This time-tested process bridges the gap between digital capture and tangible art, offering a perfect blend of traditional photographic charm and modern precision.
What Makes C-Print Photography Special
The Science Behind C-Prints
The chromogenic print, or C-print, process relies on a fascinating interplay of chemistry and light sensitivity. At its core, the process involves three distinct layers of light-sensitive emulsion, each responding to different colors: red, green, and blue. When exposed to light, these layers create corresponding cyan, magenta, and yellow dyes through a chemical reaction.
The magic happens in the paper itself, which contains silver halide crystals suspended in gelatin. During exposure, these crystals create a latent image that becomes visible only after processing. The development stage triggers a series of chemical reactions where the exposed silver halides are converted into metallic silver, while simultaneously activating color couplers that form the final dyes.
What makes C-prints particularly special is their color coupling process. Unlike digital prints, where colors are laid down directly, C-prints build their colors through chemical reactions in specific layers. This results in rich, deep colors with subtle gradations that many photographers prize. The process also creates true continuous tones, meaning there’s no visible dot pattern or pixelation in the final print, even under magnification.
Digital vs. Traditional C-Prints
While traditional C-prints are created in darkrooms using chemicals and light-sensitive paper, digital C-prints leverage modern technology to achieve similar results. Traditional processes involve projecting negatives onto photographic paper and developing them through chemical baths, resulting in rich, deep colors and excellent tonal range. This method remains popular among purists who value the hands-on approach and unique characteristics of darkroom printing.
Digital C-prints, on the other hand, use advanced laser or LED exposure systems to create prints from digital files. These modern machines precisely control light exposure on photographic paper, which then undergoes chemical processing similar to traditional methods. The digital approach offers several advantages, including consistency between prints, faster production times, and the ability to make adjustments without reprinting.
However, each method has its distinct qualities. Traditional prints often exhibit subtle nuances and a certain depth that some photographers find irreplaceable, while digital C-prints offer exceptional sharpness and precise color control. Many contemporary photographers choose digital C-prints for their reliability and efficiency, though some maintain hybrid workflows, combining the best of both worlds.
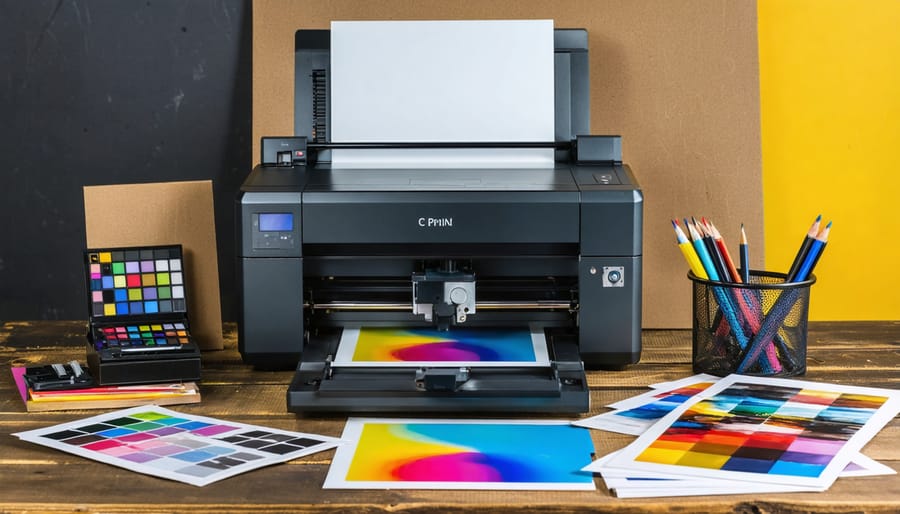
Essential Equipment for C-Print Photography
Printer Requirements
To achieve professional C-print results, you’ll need a printer specifically designed for photographic output. While it’s possible to create pro-quality prints at home, choosing the right equipment is crucial.
The most reliable printers for C-prints are those featuring at least eight ink colors, including dedicated light cyan and light magenta cartridges. Top recommendations include the Epson SureColor P900, Canon imagePROGRAF PRO-1000, and Canon PIXMA PRO-200. These models offer exceptional color accuracy and remarkable detail reproduction.
Key features to look for include:
– Minimum 4800 x 2400 dpi resolution
– Pigment-based ink systems
– Support for paper sizes up to at least 13 x 19 inches
– Advanced color management capabilities
– Borderless printing options
Your printer should also support various media types, particularly photo-specific papers. Look for models with dedicated photo black and matte black inks that switch automatically based on your paper choice. While professional-grade printers represent a significant investment, they’re essential for achieving the deep blacks, subtle color gradations, and fine detail that characterize quality C-prints.
Regular maintenance features like automated head cleaning and alignment are also important considerations, as they help ensure consistent print quality over time.
Paper Selection Guide
Selecting the right paper for your C-prints can dramatically impact the final result of your photographs. The three main types of C-print papers each offer distinct characteristics that suit different photographic styles and purposes.
Glossy papers remain the most popular choice, delivering vibrant colors and deep blacks with exceptional clarity. These papers excel in reproducing fine details and are particularly suitable for images with sharp contrasts or intricate patterns. However, they can be challenging to view under direct lighting due to reflections.
Pearl or lustre papers strike an excellent balance between glossy and matte finishes. They feature a subtle texture that reduces glare while maintaining strong color saturation and contrast. Many professional photographers prefer pearl papers for portraits and wedding photography because they minimize fingerprints and provide a sophisticated, semi-gloss appearance.
Matte papers offer a non-reflective surface that’s perfect for art exhibitions and gallery displays. While they may not produce colors as vibrant as glossy papers, they excel in creating subtle tonal gradations and work beautifully for black and white photographs. The soft, elegant finish is particularly effective for artistic or atmospheric images.
When choosing your paper, consider factors like display conditions, subject matter, and desired aesthetic impact. Test prints on different papers can help you understand how each surface affects your specific images, allowing you to make informed decisions for your projects.
Mastering C-Print Technique
Color Management
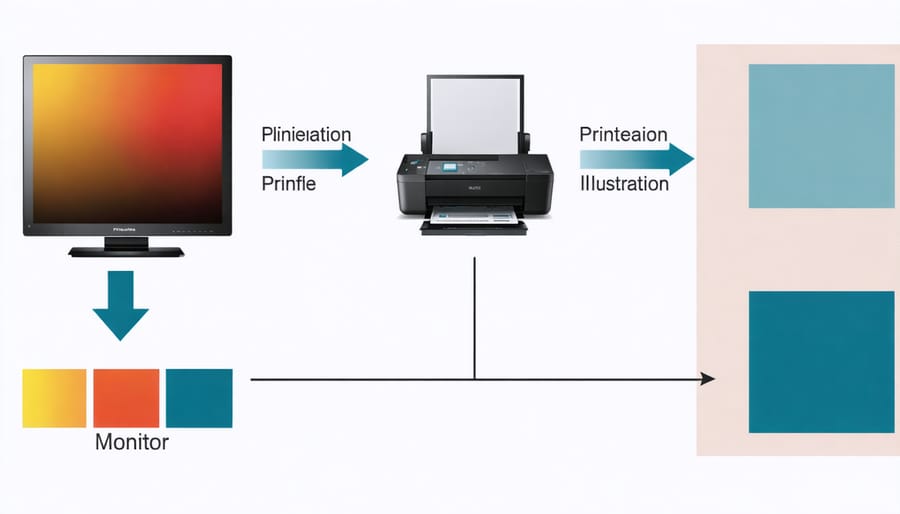
Achieving accurate color reproduction in C-print photography requires careful attention to color management and calibration settings. Establishing a consistent color management workflow is essential for ensuring your prints match what you see on screen.
Start by calibrating your monitor using a colorimeter or spectrophotometer. These devices measure and adjust your display’s color output to ensure accuracy. Aim to calibrate at least once a month, as monitor colors can drift over time.
When preparing files for C-printing, work in the appropriate color space – typically Adobe RGB or ProPhoto RGB, which offer wider gamuts than sRGB. Your printer service will have specific color profile recommendations; always ask for their preferred specifications to avoid unexpected results.
Pay special attention to soft proofing in your editing software. This preview helps you visualize how your image will look when printed, accounting for paper type and printer characteristics. Enable black point compensation to maintain shadow detail, and use rendering intent appropriate for your image – typically perceptual for photographs with lots of out-of-gamut colors, or relative colorimetric for images with mostly in-gamut colors.
Remember to maintain consistent lighting conditions when evaluating prints. Standard D50 (5000K) lighting is ideal for color-critical work, as it provides a neutral reference point for comparing digital and printed images.
Print Settings
To achieve optimal results in c-print photography, proper printer settings are crucial. Start by selecting the highest quality print mode available on your printer, typically labeled as “Photo Quality” or “Maximum DPI.” For most professional c-prints, a resolution of 300 DPI is standard, though some situations may call for 240 DPI for larger prints.
Color management settings deserve special attention. Set your color space to Adobe RGB or sRGB, depending on your workflow and output requirements. Enable your printer’s color management system and choose “Perceptual” rendering intent for most photographic prints, as it maintains natural-looking color relationships.
Paper type settings should precisely match your chosen media. Incorrect paper settings can lead to oversaturation, poor color accuracy, and inconsistent drying times. When printing on glossy paper, enable any available gloss optimizer settings to prevent bronzing and ensure even surface finish.
For borderless printing, set your printer’s expansion setting to “Min” to avoid unnecessary image cropping. Monitor your printer’s temperature and humidity settings if available – optimal conditions are typically 20-25°C (68-77°F) with 45-60% relative humidity.
Print speed settings should err on the slower side for maximum quality. While this increases print time, it allows for more precise dot placement and better color gradation. Finally, consider enabling any available “High Quality” or “Fine Detail” enhancement features, but test these settings first as they can sometimes over-sharpen images.
Common Mistakes to Avoid
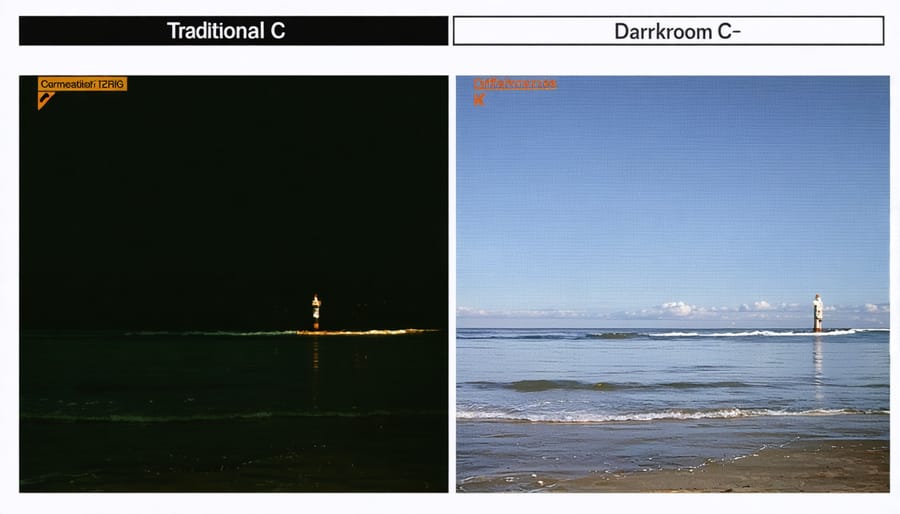
When creating C-prints, even experienced photographers can encounter several common pitfalls that affect the final output quality. One frequent mistake is improper color calibration of monitors and printers, leading to significant differences between what you see on screen and the printed result. Always calibrate your equipment regularly and work in a controlled lighting environment.
Temperature control during processing is another critical factor often overlooked. Fluctuations in chemical temperatures can cause color shifts and inconsistent results. Maintain your processing chemicals within the recommended temperature range, typically between 75-80°F (24-27°C).
Many photographers make the error of rushing through the exposure process. Inadequate exposure time can result in weak colors and poor shadow detail. Conversely, over-exposure leads to muddy prints with blocked highlights. Take the time to perform proper test strips to determine optimal exposure times.
Storage of chemistry is frequently mishandled. Using expired or improperly stored chemicals can lead to contamination and inconsistent results. Always check expiration dates, store solutions in appropriate containers, and keep them away from light and heat.
Another common mistake is inadequate washing between processing steps. Residual chemicals can cause long-term deterioration of prints. Follow recommended washing times and use proper agitation techniques to ensure thorough chemical removal.
Lastly, avoid touching the emulsion side of the paper with bare hands. The oils from your skin can leave permanent marks on the print. Always handle papers by their edges and use clean, lint-free gloves when necessary.
Preserving Your C-Prints
Storage Solutions
Proper storage is crucial for preserving the quality and longevity of your C-prints. To maintain their vibrant colors and prevent deterioration, implementing the right photo storage solutions is essential. Store your prints in a cool, dry environment with temperatures between 65-70°F (18-21°C) and relative humidity between 30-40%. Avoid basements and attics where temperature and humidity fluctuate dramatically.
Use acid-free archival materials for storage, including boxes, folders, and tissue paper. These materials prevent yellowing and chemical degradation that can occur with standard paper products. When handling prints, always wear cotton gloves to prevent oils from your fingers from damaging the surface.
For valuable prints, consider using archival sleeves made from polyester, polypropylene, or polyethylene. These materials provide excellent protection while allowing you to view the prints without direct handling. Stack prints horizontally rather than vertically, and avoid overcrowding to prevent mechanical damage. Keep prints away from direct sunlight and fluorescent lighting, which can cause fading and color shifts over time.
Handling and Display Tips
To maintain the quality of your C-prints over time, proper handling and display techniques are essential. Always handle prints by their edges, wearing clean cotton gloves when possible to prevent fingerprints and oil transfer. Store prints flat in acid-free archival boxes or portfolios when not displayed, and avoid rolling them as this can create permanent creases.
When displaying C-prints, choose locations away from direct sunlight and high humidity. UV-filtered glass or acrylic can protect prints from harmful light exposure while maintaining visual clarity. Keep ambient room temperature between 65-75°F (18-24°C) with relative humidity around 40-50% for optimal preservation.
For framing, use acid-free matting materials and ensure proper spacing between the print and glazing to prevent sticking. If you notice any color shifts or fading, consider rotating displayed prints periodically or moving them to a different location with less light exposure.
Clean prints gently using a soft, dry brush or compressed air to remove dust. Never use liquid cleaners or attempt to wipe the surface, as this can damage the emulsion layer. When transporting prints, use rigid protective sleeves or cases to prevent bending and surface scratches.
C-print photography represents a remarkable blend of traditional photographic principles and modern technological advancement. Throughout this article, we’ve explored how this time-tested printing process continues to deliver exceptional quality, stunning color accuracy, and remarkable durability that digital alternatives often struggle to match.
From understanding the fundamentals of chromogenic printing to mastering the technical aspects of exposure and color balance, C-prints offer photographers a reliable method to bring their creative vision to life. The process’s versatility accommodates both traditional darkroom techniques and contemporary digital workflows, making it accessible to photographers of all backgrounds and skill levels.
Whether you’re a seasoned professional or an emerging photographer, C-print photography deserves serious consideration as part of your artistic toolkit. The richness of colors, exceptional detail reproduction, and archival quality make it an excellent choice for exhibitions, portfolio pieces, or cherished personal works.
We encourage you to experiment with C-print photography in your practice. Start with small test prints, work closely with professional labs, and don’t be afraid to push the boundaries of what’s possible. The satisfaction of holding a perfectly executed C-print – with its deep blacks, vibrant colors, and subtle tonal gradations – is truly unmatched in the world of photographic printing.
Remember, mastery comes with practice and patience. As you develop your skills, you’ll discover why many photographers continue to choose C-prints as their preferred medium for bringing images to life.