Light shapes stories. In the intricate dance between shadows and highlights, photographers don’t just capture images – they craft emotions, depth, and narrative through their mastery of illumination. Whether you’re shooting in a professional studio or crafting dramatic portraits in your garage, understanding how to manipulate light transforms ordinary photographs into compelling visual stories.
Mastering lighting in photography demands both technical precision and artistic intuition. It’s about recognizing how different light sources interact, understanding the subtle interplay between hard and soft light, and knowing exactly when to break the traditional rules for creative impact. From the golden warmth of natural sunlight to the precise control of studio strobes, each light source becomes a powerful tool in your creative arsenal.
This guide will take you through the essential principles of photographic lighting, from understanding the fundamental qualities of light to advanced techniques used by industry professionals. You’ll learn how to shape, direct, and control light to create images that don’t just document moments – they tell stories that resonate with viewers on an emotional level.
By mastering these lighting techniques, you’ll develop the confidence to tackle any lighting challenge, whether you’re shooting portraits, products, or environmental scenes. Let’s illuminate the path to extraordinary photography.
The Fundamentals of Cinematic Lighting
Quality vs. Quantity of Light
Understanding the difference between quality and quantity of light is crucial for creating impactful photographs. Light quality refers to how hard or soft the light appears, while quantity relates to its intensity or brightness. Hard light, created by small, direct light sources like the midday sun or a bare flash, produces sharp shadows and high contrast. This type of lighting can dramatically emphasize texture and create bold, striking images.
Soft light, on the other hand, comes from large light sources or diffused light, such as overcast skies or softboxes. It wraps around subjects, creating gentle transitions between highlights and shadows, making it ideal for portraits and creating a more flattering, intimate mood.
Light intensity also plays a vital role in setting the emotional tone of your images. Bright, intense light can convey energy, happiness, or tension, while dim lighting often creates mystery, romance, or melancholy. The key is matching these characteristics to your creative vision. For instance, harsh midday sun might perfectly capture the gritty atmosphere of street photography, while soft, golden-hour light could better suit a dreamy landscape shot.

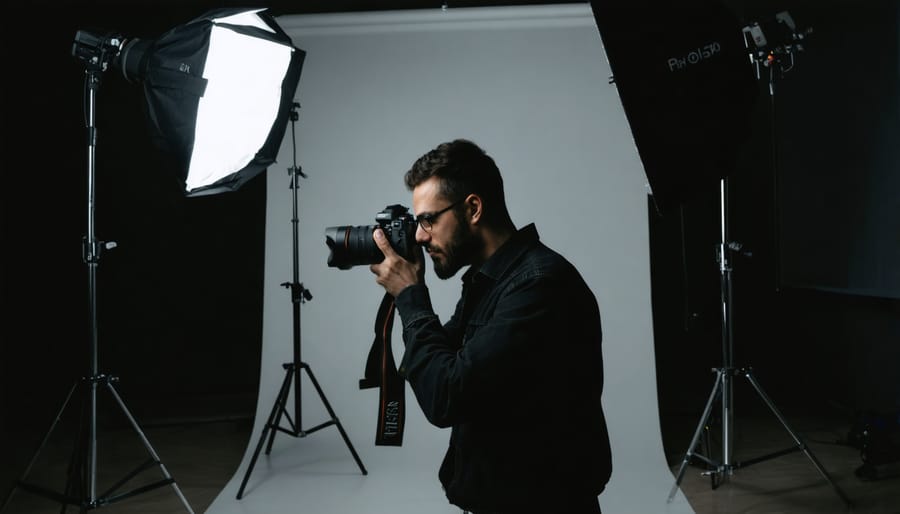
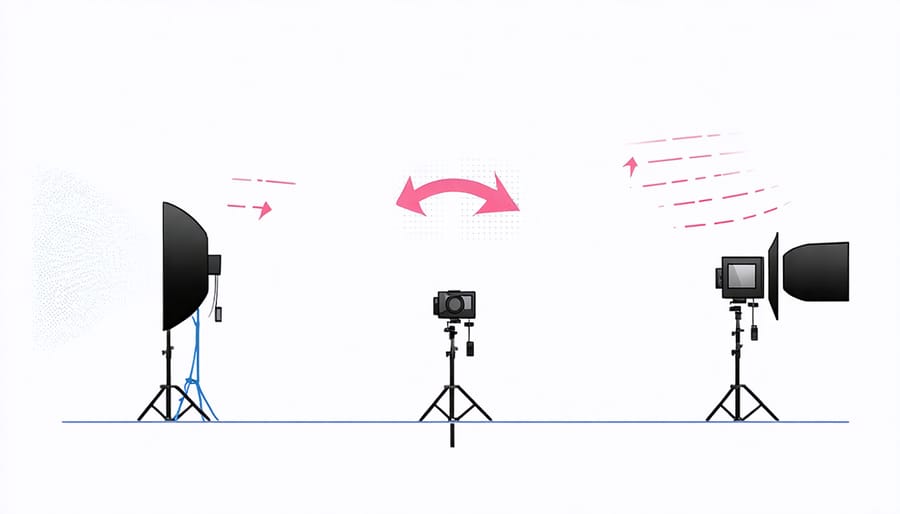
The Three-Point Lighting Setup
The three-point lighting basics form the foundation of professional photography lighting, creating depth, dimension, and mood in your images. This classic setup consists of three essential lights: key light, fill light, and back light, each serving a distinct purpose.
Your key light is the primary source of illumination, typically positioned at a 45-degree angle to your subject. This light establishes the main shadows and defines the overall mood of your shot. Think of it as your sun – it’s the strongest light source that sets the tone.
The fill light, placed opposite the key light, softens shadows and reveals details in darker areas. It’s usually set to about half the intensity of your key light, preventing harsh contrasts while maintaining natural-looking depth. For softer results, try bouncing this light off a reflector or white surface.
Finally, the back light (or rim light) separates your subject from the background by creating a subtle highlight around their edges. Position it behind and slightly above your subject for that professional edge-defining glow that makes your subject pop from the background.
Essential Lighting Patterns for Dramatic Effect
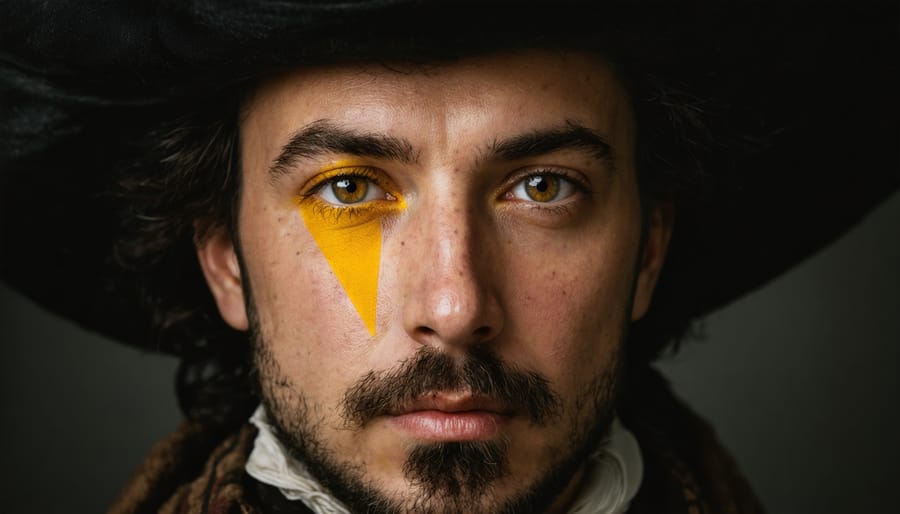
Rembrandt Lighting
Named after the Dutch master painter, Rembrandt lighting creates a distinctive triangle of light on the subject’s cheek opposite to the main light source. This classic technique produces dramatic, three-dimensional portraits with a perfect balance of light and shadow, adding depth and character to your images.
To achieve Rembrandt lighting, position your main light source approximately 45 degrees to the side and slightly above your subject’s face. The key is to create that characteristic triangle of light on the shadowed side of the face, which should be approximately the same width and length as the subject’s nose. The triangle should also be clear and well-defined, not muddy or broken.
A common setup includes a key light as your main source and a fill light or reflector on the opposite side to soften shadows. Start with your key light at about a 45-degree angle horizontally and vertically from your subject. Then, adjust the position until you see the telltale triangle forming on the shadowed cheek.
Remember that facial features and bone structure vary among subjects, so you’ll need to fine-tune the light positioning for each person. The beauty of Rembrandt lighting lies in its versatility – it works exceptionally well for both dramatic corporate headshots and moody creative portraits. When executed properly, this lighting pattern adds a timeless, painterly quality to your photographs that never goes out of style.
Split Lighting
Split lighting is one of the most dramatic lighting techniques in photography, creating a stark division of light and shadow that cuts right down the middle of your subject’s face. This powerful method instantly adds mystery, depth, and a touch of film noir drama to your images.
To achieve split lighting, position your light source at a 90-degree angle to your subject, level with their face. Only one side of the face will be illuminated while the other remains in shadow, creating a bold contrast that immediately draws viewer attention. This technique works particularly well for portraits that aim to convey strength, contemplation, or inner conflict.
While simple in concept, mastering split lighting requires careful attention to detail. The transition line between light and shadow should typically fall along the middle of the nose. Too much forward positioning of the light will illuminate more of the face, while too far back will create deeper shadows that might obscure important features.
For added drama, try experimenting with the ratio between the lit and shadow sides. A completely dark shadow side creates maximum contrast and mystery, while using a reflector or fill light on the shadow side can help retain some detail while maintaining the split effect. This technique is especially effective for black and white photography, where the interplay of light and shadow becomes the primary visual element.
Remember that split lighting isn’t suitable for every subject or situation. It’s most effective when you want to create mood, emphasize texture, or portray a sense of duality in your subject.
Butterfly Lighting
Butterfly lighting, also known as Paramount lighting, is one of the most flattering lighting setups in portrait photography, famously used during Hollywood’s golden age to capture the timeless glamour of movie stars. This elegant technique gets its name from the distinctive butterfly-shaped shadow that appears under the subject’s nose.
To achieve this classic look, position your main light source directly above and slightly in front of your subject’s face, pointing downward at roughly a 45-degree angle. The height is crucial – you want the shadow under the nose to be small and defined, not elongated. Your subject should face the camera straight on or with a slight turn of the head.
For optimal results, place your subject about two to three feet from a plain background and ensure their chin is slightly raised. This creates those characteristic shadows under the cheekbones that define and slim the face. While basic butterfly lighting can work with just one light, adding a reflector beneath the chin helps soften harsh shadows and provides a gentle fill light.
Common mistakes to avoid include positioning the light too high (which creates unflattering eye shadows) or too far forward (which eliminates the signature butterfly shadow). Start with soft light sources like beauty dishes or softboxes for more forgiving results, especially when photographing subjects with deeper-set eyes or prominent features.
Mastering Natural Light for Cinematic Results
Golden Hour Magic
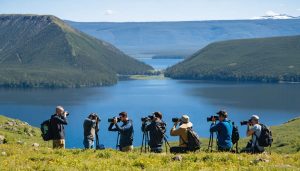
The magical period just before sunset and after sunrise, known as the golden hour, offers photographers an unparalleled opportunity to capture stunning images bathed in warm, directional light. Shooting during golden hour provides a natural advantage, as the low angle of the sun creates longer shadows, softer contrast, and a golden glow that can transform ordinary scenes into extraordinary photographs.
To make the most of this precious time window, preparation is key. Arrive at your location at least 30 minutes before the golden hour begins to scout compositions and set up your equipment. The ideal golden hour timing varies by season and location, so use smartphone apps designed for photographers to predict exact times.
During golden hour, experiment with backlighting to create dramatic silhouettes or capture rim lighting around your subjects. The warm tones are particularly flattering for portrait photography, while landscape photographers can leverage the directional light to add depth and dimension to their compositions.
Consider using a wider aperture to capture the ethereal quality of the light, and don’t be afraid to underexpose slightly to preserve the rich golden tones. Position your subjects to take advantage of the side-lighting, which can reveal texture and form in ways that aren’t possible during other times of day.
Remember that golden hour conditions change rapidly, so work efficiently and be prepared to adjust your settings as the light evolves. The effort of waking up early or waiting until sunset will be rewarded with images that possess a magical quality difficult to replicate at any other time.
Working with Harsh Light
Harsh light, often considered a photographer’s nemesis, can actually become your creative ally with the right approach. Whether you’re dealing with bright midday sun or stark artificial lighting, these challenging conditions can lead to dramatic and compelling images when handled properly.
Start by embracing shadows and contrast. Strong directional light creates defined shadows that can add depth and drama to your compositions. Position your subject to take advantage of these shadows – try placing them where light and shadow meet to create striking split lighting effects.
When shooting in bright sunlight, look for natural diffusers like thin clouds or translucent surfaces. Alternatively, create your own shade using reflectors or diffusion panels. A white reflector can bounce light back into shadowed areas, helping to balance the harsh contrast.
Don’t shy away from backlight scenarios. Position your subject with the strong light source behind them to create dramatic silhouettes or rim lighting effects. This technique works particularly well during golden hour when the sun is low on the horizon.
For portrait photography in harsh conditions, seek out open shade near buildings or trees. This provides more even lighting while still maintaining the ambient brightness of the scene. If you must shoot in direct sunlight, use fill flash at reduced power to soften harsh shadows on faces.
Remember that your camera’s dynamic range is limited compared to human vision. Use spot metering to expose for the highlights or shadows, depending on your creative vision, and don’t be afraid to let some areas fall into complete shadow or blow out to create mood.
Essential Lighting Gear and Modifiers
Must-Have Light Sources
Every photographer needs a versatile collection of essential photography equipment to handle various lighting scenarios. Let’s explore the must-have light sources that will form the backbone of your lighting kit.
Starting with continuous lights, LED panels have become increasingly popular due to their versatility and low heat output. A quality LED panel with adjustable color temperature and intensity gives you precise control over your lighting setup. For beginners, a basic 1×1 LED panel is an excellent starting point.
Speedlights (flash units) are another crucial tool, offering portability and power in a compact package. Consider investing in at least two speedlights – one for your main light and another for fill or accent lighting. Look for units with TTL capability and wireless triggering for maximum flexibility.
For studio work, strobes are indispensable. A pair of 400-600Ws monolights will handle most situations, from portraits to product photography. Choose models with built-in modeling lights to help visualize your lighting setup before shooting.
Natural light modifiers are often overlooked but essential. A collapsible reflector kit with white, silver, and gold surfaces helps harness and shape available light. Add a translucent diffuser panel to soften harsh sunlight or create ethereal window lighting.
Don’t forget about practical lights – everyday light sources like desk lamps, string lights, or even your smartphone’s LED light can add creative elements to your images. These common items can introduce interesting practical effects and add depth to your lighting compositions.
Modifiers and Their Effects
Light modifiers are essential tools that can transform harsh, direct light into something more flattering and controllable. Choosing the right modifiers can make the difference between amateur-looking photos and professional-quality images.
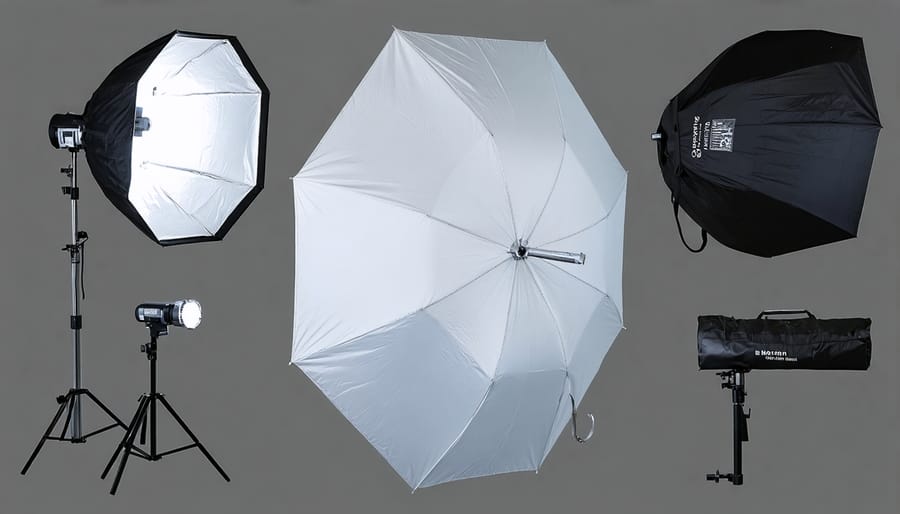
Softboxes are among the most versatile modifiers, creating soft, wraparound light that’s perfect for portraits. They come in various shapes and sizes, with larger softboxes producing softer light spread over a wider area. For example, a 4×6 foot softbox can beautifully illuminate a full-body portrait, while a 2×2 foot version works well for headshots.
Umbrellas offer an affordable and portable solution, available in two main varieties: reflective and shoot-through. Reflective umbrellas bounce light back toward your subject, creating a broader light spread, while shoot-through umbrellas diffuse light directly. They’re particularly effective for event photography where quick setup is crucial.
Beauty dishes produce a distinctive light quality that’s between soft and hard, creating stunning contrast while maintaining smooth transitions. They’re favored in fashion photography for their ability to enhance facial features and skin texture.
Grid modifiers help control light spread and prevent spill, making them invaluable for dramatic portraits or highlighting specific areas of your subject. A 20-degree grid creates a focused beam, while a 40-degree option offers wider coverage while maintaining directional control.
Remember that each modifier affects not just the softness of light, but also its direction, spread, and falloff characteristics. Experimenting with different combinations will help you develop your signature lighting style.
Common Lighting Mistakes and Solutions
Even experienced photographers can fall into common lighting pitfalls, but understanding these mistakes and their solutions can dramatically improve your images. Let’s explore some frequent challenges and how to overcome them.
One of the most common mistakes is relying too heavily on direct, harsh lighting. This creates unflattering shadows and high contrast that can ruin portraits or still life shots. Instead, diffuse your light source using softboxes, umbrellas, or even a simple white sheet to create softer, more flattering illumination.
Many photographers struggle with inconsistent lighting across a series of shots. This often happens when mixing natural and artificial light sources without proper color temperature matching. The solution is to either commit to one light source or use color correction gels to balance your artificial lights with ambient lighting.
Underexposing or overexposing backgrounds is another frequent issue. When focusing on properly lighting your subject, it’s easy to forget about the background. Use fill lights or reflectors to balance the exposure between your subject and background, or consider using flags to control light spill where needed.
Another mistake is positioning lights at unflattering angles. For example, placing a light source directly above your subject can create raccoon-eye shadows. Instead, experiment with the 45-degree rule: position your main light at a 45-degree angle to your subject, both horizontally and vertically, for more appealing results.
Poor light metering is a common technical mistake that leads to exposure problems. Rather than relying solely on your camera’s built-in meter, use a handheld light meter to measure both incident and reflected light for more accurate exposure settings.
Lastly, many photographers overlook the importance of proper light ratios between their main and fill lights. A typical mistake is using equal power for both, which can make images look flat. Instead, maintain a ratio where your main light is about twice as powerful as your fill light to create depth and dimension in your images.
Remember, these mistakes are learning opportunities. Practice identifying and correcting them will help you develop a more intuitive understanding of lighting techniques.
Mastering lighting in photography is a journey that combines technical knowledge with artistic vision. As we’ve explored throughout this guide, understanding the fundamentals of light behavior, knowing your equipment, and practicing various lighting techniques are essential steps toward creating compelling images. Remember that the best photographers aren’t necessarily those with the most expensive gear, but rather those who understand how to manipulate and work with light effectively.
Start by practicing the basics – understanding the direction, quality, and intensity of light. Experiment with natural light before moving on to artificial lighting setups. Keep a photography journal to document your lighting choices and their outcomes, helping you learn from both successes and mistakes.
Don’t be afraid to break the conventional rules once you’ve mastered them. Some of the most striking photographs come from creative experimentation and pushing boundaries. Whether you’re shooting portraits, landscapes, or still life, remember that lighting is your most powerful tool for creating mood, depth, and visual impact.
Most importantly, be patient with yourself. Developing an eye for lighting takes time and practice. Start with simple one-light setups and gradually build complexity as your confidence grows. Join photography communities, share your work, and remain open to feedback. With dedication and consistent practice, you’ll develop an intuitive understanding of light that will transform your photography from good to exceptional.
Keep shooting, keep learning, and most importantly, keep exploring the endless possibilities that lighting presents in photography.