In wildlife photography, mastering post-processing fundamentals transforms raw captures into compelling visual stories while preserving natural authenticity. From subtle adjustments in shadow recovery that reveal hidden details in a bird’s plumage to precise noise reduction techniques that maintain fur texture in low-light shots, post-processing breathes life into wildlife moments. Professional wildlife photographers understand that successful editing requires a delicate balance: enhancing the drama and impact of animal encounters while maintaining the integrity of natural colors, textures, and behaviors. Whether working with RAW files from an African safari or local backyard wildlife, thoughtful post-processing decisions separate amateur snapshots from professional-quality wildlife portraits that captivate viewers and honor the genuine beauty of our natural world.
Essential Raw File Preparation
Raw vs. JPEG in Wildlife Photography
When it comes to wildlife photography, shooting in RAW format gives you significantly more flexibility during post-processing compared to JPEG. While JPEG files are smaller and ready to use straight out of camera, they contain only a fraction of the image data captured by your sensor. RAW files, on the other hand, preserve all the original information, allowing you to make substantial adjustments without degrading image quality.
This becomes particularly valuable in wildlife photography, where lighting conditions can be challenging and unpredictable. With RAW files, you can recover details in shadowy areas where animals might be hiding, adjust white balance to correct for different lighting conditions, and salvage slightly overexposed highlights in bright plumage or fur.
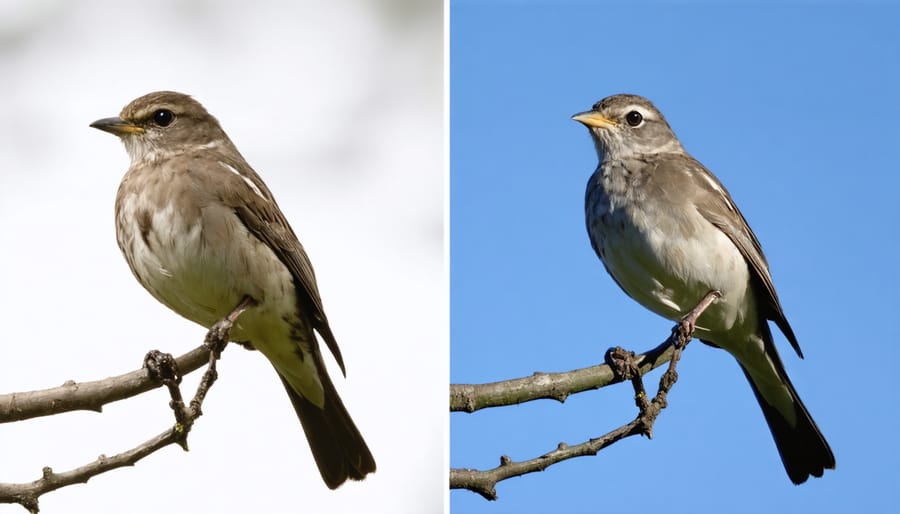
Consider a scenario where you’ve photographed a bird in dappled forest light. With a RAW file, you can selectively adjust exposure across different parts of the image, bringing out detail in both the shadowed underside and the sunlit portions of the bird. The same shot in JPEG might leave you with irretrievable lost details in these challenging lighting conditions.
While RAW files require more storage space and processing time, the editing flexibility they provide makes them invaluable for wildlife photographers seeking the highest quality results.
Initial Image Assessment
Before diving into post-processing, take time to carefully evaluate your wildlife images and establish an efficient editing workflow. Start by examining your photo at 100% zoom to check critical focus on the subject’s eyes and overall image sharpness. Look for distracting elements in the background that might need attention, such as bright spots or unwanted branches.
Pay special attention to the exposure – are there blown highlights in light-colored feathers or fur? Check shadow areas for important details that might need recovering. Consider the composition and whether subtle cropping could improve the image’s impact while maintaining natural proportions.
Evaluate the white balance by looking at neutral areas and the overall mood of the scene. Wildlife photos often benefit from slightly warm tones, but avoid going too far from reality. Make note of any sensor dust spots or noise in darker areas that will need cleaning up.
Remember that successful wildlife photo enhancement maintains authenticity while bringing out the natural beauty of your subject. Create a mental checklist of adjustments needed, prioritizing changes that preserve the documentary nature of wildlife photography.
Core Adjustments for Wildlife Impact
Exposure and Shadow Recovery
Wildlife photography often presents challenging lighting conditions, making exposure and shadow recovery crucial skills in post-processing. When photographing animals in their natural habitat, you’ll frequently encounter high-contrast scenes where bright skies meet shadowy forests, or harsh midday sun creates deep shadows on your subjects.
Start by examining your RAW file’s histogram to understand the image’s dynamic range. If you’ve slightly underexposed to preserve highlight details, you can recover shadow information using your editing software’s exposure and shadow sliders. For instance, when working with a photo of a bird in dappled light, gradually increase the shadows while maintaining highlight detail in the feathers.
The key is finding the right balance. Avoid pushing shadow recovery too far, as this can introduce unwanted noise and make the image appear artificial. Instead, aim for natural-looking results that reveal essential details while maintaining the atmospheric qualities of the original scene.
Local adjustments are particularly valuable for wildlife photos. Use adjustment brushes or graduated filters to selectively brighten specific areas, such as an animal’s eye or underside, without affecting the entire image. When working with backlit subjects, carefully lift the shadows while preserving the beautiful rim lighting that adds depth to your subject.
Remember that successful exposure recovery starts in the field – always shoot in RAW format and expose for the highlights when possible, giving yourself maximum flexibility during post-processing.
Selective Sharpening for Fur and Feathers
When it comes to wildlife photography, selective sharpening of fur and feathers can make the difference between a good image and a stunning one. Unlike general sharpening, this technique requires a targeted approach to enhance texture while maintaining the natural appearance of your subject.
Start by creating a duplicate layer of your image and using the High Pass filter with a radius between 1.0 and 2.0 pixels. Set this layer’s blend mode to Overlay or Soft Light, then mask out everything except the fur or feather areas you want to enhance. This preserves the natural softness of other elements while bringing out the fine details in your subject’s coat or plumage.
For fur, focus on directional sharpening that follows the natural growth pattern. Use a combination of the Detail slider in your raw processor and local adjustments to emphasize individual hair strands without creating artificial-looking results. With feathers, pay special attention to barb detail while avoiding over-sharpening that can create harsh edges or digital artifacts.
A useful technique is to vary the opacity of your sharpening layer based on the texture’s prominence in the original image. Areas catching direct light often need less enhancement than shadowed regions. Remember to step back periodically and view your image at different zoom levels to ensure the sharpening looks natural and balanced across the entire subject.
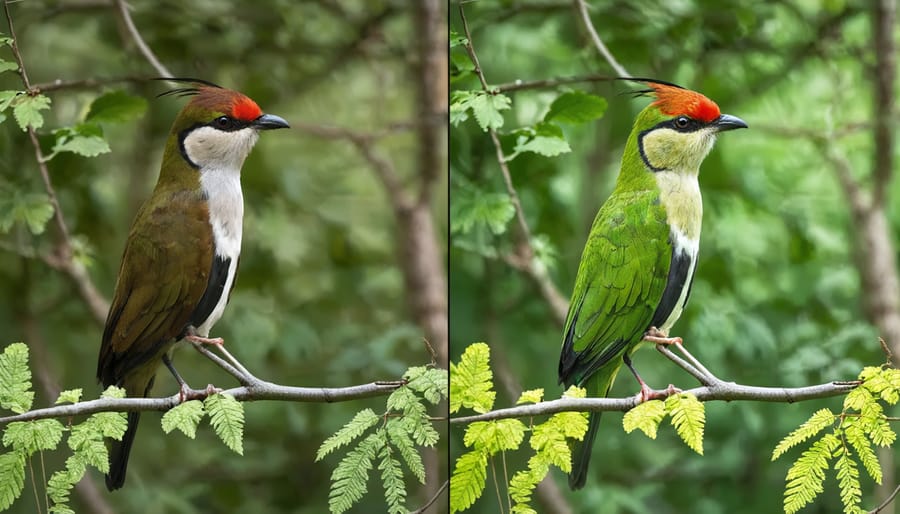
Color Enhancement for Natural Results
When enhancing colors in wildlife photography, the key is to maintain the delicate balance between visual impact and natural authenticity. Start by making subtle adjustments to the white balance to ensure accurate color representation of your subject and its environment. This helps establish a solid foundation for further enhancements.
Consider using selective color adjustments rather than global changes. For instance, when working with bird photographs, you might want to enhance specific feather colors without affecting the background vegetation. Tools like the HSL (Hue, Saturation, Luminance) panel in most editing software allow you to target specific color ranges with precision.
Vibrance is often a better choice than saturation for wildlife images, as it intelligently enhances muted colors while preventing already-saturated areas from becoming unrealistic. This is particularly useful for bringing out subtle variations in fur textures or scale patterns.
Advanced color grading techniques can help create mood while maintaining authenticity. For example, slightly warming sunrise shots of animals can enhance the golden hour feeling without making the scene appear artificial.
Remember to regularly toggle your adjustments on and off to check if you’re maintaining natural appearance. When in doubt, err on the side of subtlety – the goal is to enhance what nature has already provided, not to reinvent it. Consider creating custom presets for different wildlife scenarios, but always fine-tune them for each specific image.
Advanced Wildlife Enhancement Techniques
Eye Enhancement and Focus
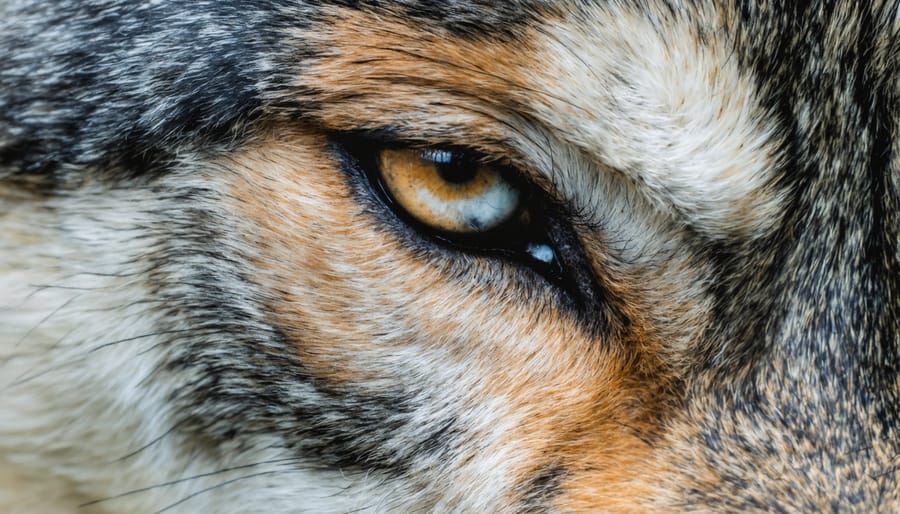
In wildlife photography, the eyes are often described as the window to an animal’s soul, and making them stand out can transform a good photo into an exceptional one. Using professional editing tools, you can enhance eye detail while maintaining the natural appearance that’s crucial for wildlife photography.
Start by creating a new adjustment layer specifically for the eyes. Using a small, soft brush, carefully mask the eye area, including the surrounding features that contribute to the animal’s expression. Increase clarity and sharpness moderately – aim for a 10-15% boost initially, as overdoing it can make the image appear artificial.
For catch lights (the reflective spots in the eyes), use selective brightness adjustments to make them more prominent without appearing artificial. If the original catch lights are weak, resist the temptation to add artificial ones, as this can compromise the photo’s authenticity.
Color enhancement should be subtle. Many wildlife subjects have intricate eye colors – from the amber eyes of big cats to the striking blues of primates. Use selective saturation adjustments to bring out these natural hues, but keep the enhancement within realistic bounds. A good rule of thumb is to increase saturation by no more than 15-20%.
Remember, the goal is to draw attention to the eyes naturally, not to create an obviously edited appearance. When viewers notice your subject’s captivating gaze before they notice any editing work, you’ve struck the right balance.
Background Control and Subject Separation
One of the most powerful ways to make your wildlife photos stand out is through effective background control and subject separation. In wildlife photography, a distracting background can easily compete with your subject, diminishing the impact of even the most striking animal portraits.
Start by using selective darkening and blurring techniques to create depth. By subtly darkening the background areas around your subject, you can create a natural vignette effect that draws the viewer’s eye toward the animal. The key is to make these adjustments gradual and realistic – nature rarely has stark contrasts.
Luminosity masks are particularly effective for separating your subject from the background. These allow you to make precise selections based on brightness values, helping you target specific areas without creating artificial-looking edges. When working with furry subjects, use careful brush work along the edges to maintain natural-looking transitions.
For images where the background is particularly busy, consider using the radial filter tool to create a subtle blur effect that mimics the natural depth of field of your lens. This technique works especially well for images where you couldn’t achieve the desired background blur in-camera due to lighting or distance constraints.
Remember to maintain the natural context of your subject. While it’s tempting to completely blur or darken the background, leaving some environmental context helps tell the story of where and how the animal lives in its natural habitat.
Dealing with Challenging Conditions
Wildlife photography often presents unique challenges that can be addressed during post-processing. Low-light situations are particularly common, as many animals are most active during dawn and dusk. When dealing with underexposed images, start by carefully adjusting the exposure and shadows, but be mindful not to introduce excessive noise. Using selective noise reduction on darker areas while preserving detail in well-lit portions can help maintain image quality.
Motion blur is another frequent challenge, especially when photographing fast-moving subjects. While there’s no magic fix for severe motion blur, you can often salvage slightly blurry images by applying selective sharpening. Focus on the animal’s eyes and face, as these are the most crucial elements for viewer engagement. For images with subject movement, using the motion blur tool creatively can sometimes transform an apparent mistake into an artistic representation of movement.
Challenging weather conditions like rain or fog can affect image clarity. In post-processing, adjusting clarity and dehaze tools can help cut through atmospheric interference while maintaining the natural ambiance. When working with backlit subjects, carefully recover shadow detail while managing highlights to preserve the natural rim lighting that can make wildlife photos spectacular.
Remember that some technical imperfections can add character to your wildlife images. The goal isn’t always perfect technical precision but rather capturing the essence of the moment authentically. Sometimes, embracing these challenges can lead to more compelling and emotionally resonant photographs.
Ethics in Wildlife Photo Editing
When it comes to wildlife photography, maintaining authenticity is paramount. While post-processing is a legitimate tool for enhancing images, it’s crucial to strike a balance between artistic expression and truthful representation of nature.
The golden rule in wildlife photo editing is simple: your adjustments should enhance the photo’s natural qualities without misleading viewers about what you actually witnessed. Basic adjustments to exposure, contrast, and white balance are generally acceptable, as they help compensate for camera limitations and match what the human eye saw in the field.
However, certain manipulations cross ethical boundaries. Adding or removing animals, changing behaviors, or drastically altering the environment can misrepresent natural history and potentially harm conservation efforts. Many wildlife photography competitions and publications have strict guidelines prohibiting such alterations.
Consider these ethical guidelines when editing:
– Keep adjustments subtle and natural-looking
– Maintain the integrity of animal behavior and habitat
– Document any significant edits when sharing or submitting photos
– Be transparent about your post-processing workflow
– Never add elements that weren’t present in the original scene
Remember that wildlife photography serves not just artistic purposes but also educational and documentary ones. Your images might be used to study animal behavior or promote conservation efforts, making accuracy crucial. When in doubt, err on the side of minimal manipulation to preserve the authenticity of these precious moments in nature.
Post-processing wildlife photography is both an art and a science, requiring patience, attention to detail, and a commitment to ethical representation. As we’ve explored throughout this guide, the key is to enhance your images while maintaining their natural authenticity. Remember that subtle adjustments often yield the most impactful results, whether you’re fine-tuning exposure, sharpening details, or adjusting colors to match what you witnessed in the field.
Practice is essential to developing your post-processing workflow. Start with basic adjustments and gradually incorporate more advanced techniques as your confidence grows. Keep reference photos of your subjects to ensure your edits remain true to nature, and don’t be afraid to experiment with different approaches to find what works best for your style.
Most importantly, always prioritize the integrity of your wildlife subjects in your editing decisions. Your goal should be to showcase the natural beauty and behavior of these magnificent creatures while maintaining the trust of your viewers. With dedication and consistent practice, you’ll develop a signature style that brings out the best in your wildlife photography while staying true to the moment you captured.