Transform ordinary portraits into striking visual narratives by mastering dramatic lighting techniques that push creative boundaries. Position a single LED light source at a 45-degree angle to create deep shadows and compelling dimensionality in your subject’s features. Craft ethereal effects by shooting through translucent fabrics or prisms, bending light into unexpected patterns that add mystery and depth to your compositions. Experiment with practical light sources—string lights, smartphone screens, or even passing car headlights—to capture authentic moments with unconventional illumination.
Light shapes stories, defines emotions, and elevates simple portraits into powerful artistic statements. Whether you’re working in a professional studio or creating magic in your living room, understanding how to manipulate both natural and artificial light opens endless creative possibilities. From split lighting that carves dramatic contrasts to ethereal backlight that creates luminous halos, each lighting choice becomes a deliberate brush stroke in your photographic canvas.
This exploration of creative lighting will revolutionize your approach to portrait photography, combining technical precision with artistic innovation to produce images that command attention and evoke emotion.
Natural Light Mastery
Window Light Magic
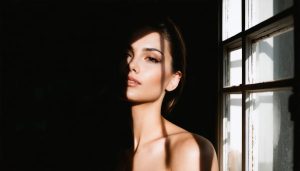
Window light is often referred to as nature’s softbox, and with good reason. When used creatively, it can transform ordinary spaces into dramatic photo studios. Position your subject near a large window, preferably during the softer morning or late afternoon light, to capture ethereal portraits with natural gradients and striking depth.
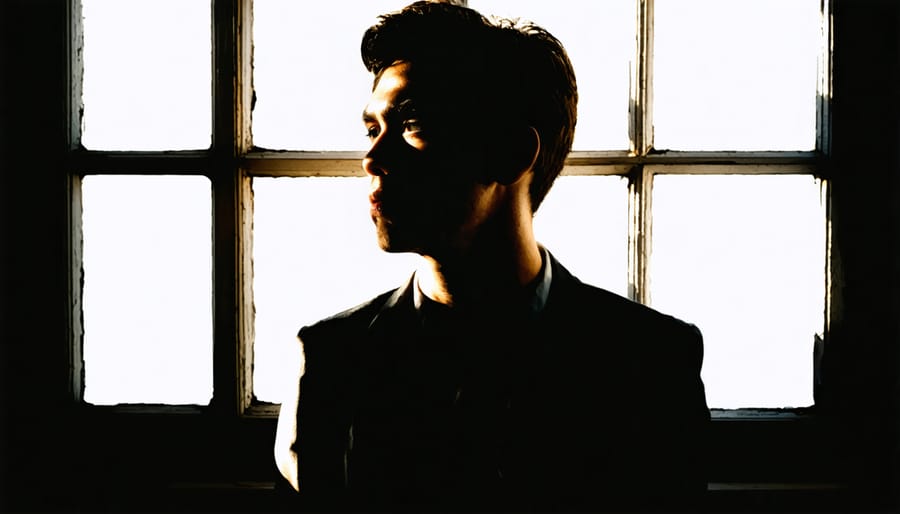
For compelling silhouettes, place your subject between the camera and the window, exposing for the bright background. This technique creates mysterious, mood-rich images where your subject appears as a dark outline against the luminous window light. Experiment with different poses and profiles to find shapes that tell a story through form alone.
Shadow play offers another dimension to window light photography. Use venetian blinds or lace curtains to cast interesting patterns on your subject. These shadows can add texture and visual interest to otherwise simple portraits. Try having your subject slowly move through the light patterns for a series of dynamic shots.
Don’t limit yourself to front lighting. Side window light creates dramatic Rembrandt-style lighting with one side of the face illuminated while the other falls into shadow. For softer effects, use a white reflector or even a light-colored wall opposite the window to bounce light back onto the shadow side.
The best part about window light photography is its accessibility – all you need is a window and good timing. Watch how the light changes throughout the day in your space, and soon you’ll discover the perfect moments for different creative effects.
Golden Hour Creativity
The golden hour offers more creative possibilities than just silhouettes and warm backlighting. To truly master this magical time of day, consider incorporating complementary techniques that elevate your portraits. Start by positioning your subject so that dappled light filters through trees or architecture, creating dynamic patterns across their face. This technique works particularly well when combined with proper evening photography settings to maintain detail in both highlights and shadows.
Try using a reflector at a 45-degree angle to bounce golden light onto your subject’s shadow side, creating balanced illumination while maintaining that coveted warm glow. For more dramatic results, position your subject in open shade with golden hour light illuminating the background, then use a flash at 1/4 power with a CTO gel to match the ambient light temperature.
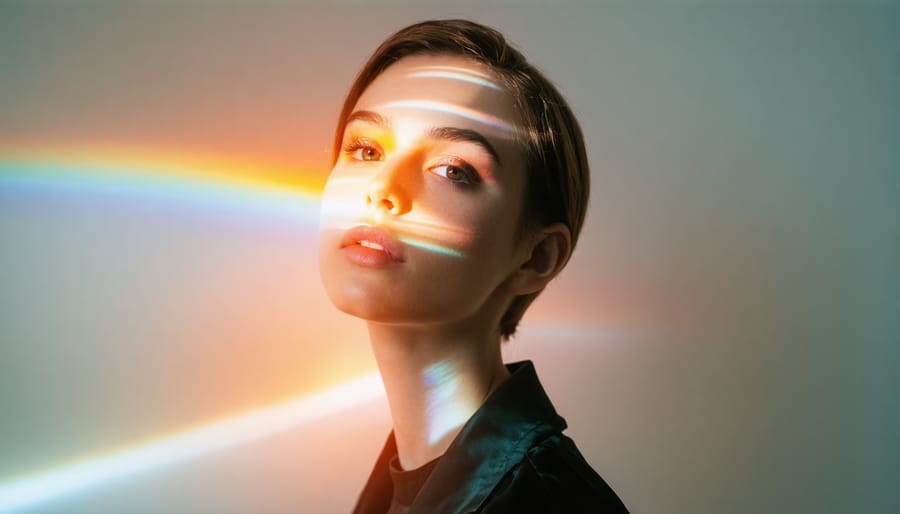
Another creative approach involves using foreground elements like flowers, leaves, or textured glass to create natural prisms and light artifacts. Hold these elements close to your lens while shooting through them, creating ethereal effects that complement the golden hour’s natural warmth.
Don’t forget to experiment with different perspectives. Shooting from below can create stunning portraits where your subject appears to be crowned by the setting sun, while shooting from above can capture beautiful pools of golden light surrounding your subject. Remember to move quickly and confidently during these shoots, as golden hour waits for no one.
Artificial Light Innovation
Color Gel Techniques
Color gels are magical tools that can transform an ordinary photo into a vibrant masterpiece. These transparent, colored sheets placed over your light sources open up a world of creative possibilities, especially in portrait and studio photography.
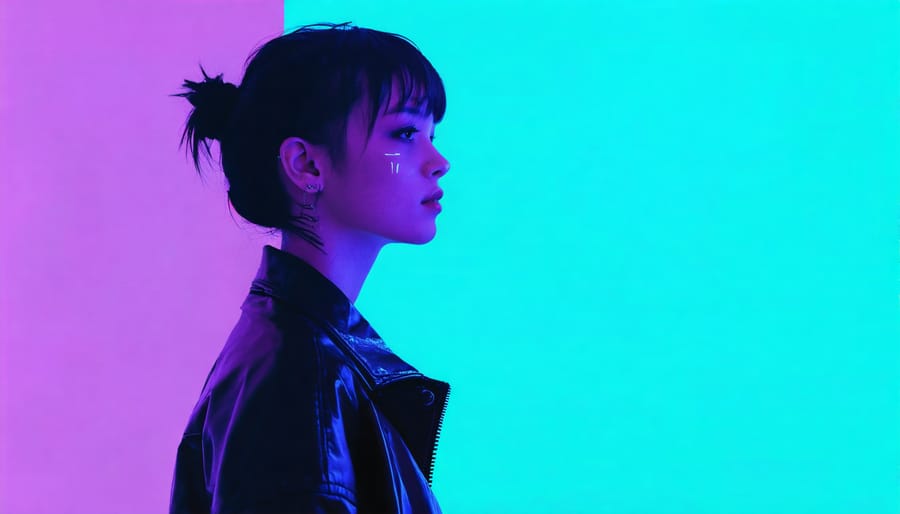
Start with a single gel on your main light to establish a dominant mood. Blue gels create a cool, mysterious atmosphere perfect for noir-style portraits, while warm oranges and reds can simulate sunset or add dramatic intensity. For a cyberpunk aesthetic, try combining magenta and teal gels on opposing lights to create striking color contrast.
A popular technique is using complementary colors – placing an orange gel on your key light and a blue gel on your background light creates depth and visual interest. This approach works particularly well for fashion and editorial shoots where you want to make your subject pop.
For more subtle effects, layer different gel densities. Using a quarter or half CTO (Color Temperature Orange) gel can warm up skin tones naturally without appearing artificial. When working with multiple lights, remember that gels reduce light output, so you’ll need to adjust your power settings accordingly.
Experiment with gel placement – partially covering your light source can create interesting color transitions and gradients. Try cutting gels into patterns or using them with grids to control light spread and create structured color effects that add dimension to your images.
Light Painting Portraits
Light painting portraits combine long exposure photography with creative light manipulation to produce stunning, ethereal images. By keeping your camera’s shutter open for several seconds while moving light sources through the frame, you can create magical effects that transform ordinary portraits into extraordinary art pieces.
To get started, you’ll need a dark environment, a tripod, and various light sources like LED wands, flashlights, or even smartphone lights. Set your camera to manual mode with a shutter speed between 5-30 seconds, depending on your creative vision. Your subject should remain perfectly still while you or an assistant “paint” with light around them.
Try outlining your subject with a small LED light for a glowing silhouette effect, or create angel wings behind them using sweeping motions with a larger light source. Steel wool spinning (with proper safety precautions) can create dramatic shower-like sparks around your subject, while colored LED strips can add vibrant streaks and patterns to your composition.
One popular technique involves illuminating your subject with a brief flash at the beginning or end of the exposure while using other lights to create patterns throughout the frame. Experiment with different colors, movements, and light intensities to develop your unique style.
Remember to focus on your subject before switching to manual focus, as autofocus may struggle in low light conditions. Start with simple patterns and gradually work your way up to more complex light painting designs as you gain confidence.
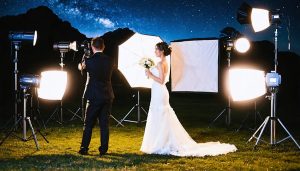
Multiple Light Setup Creativity
While mastering single light setup techniques is essential, combining multiple light sources can unlock a whole new realm of creative possibilities. Think of your lighting setup as an artist’s palette – each light source adds a unique brushstroke to your photographic canvas.
Try mixing continuous LED lights with strobes for interesting motion effects. Place a warm-geled strobe behind your subject while using a cool-toned LED panel in front to create striking color contrasts. For dramatic portraits, position a harsh key light at a 45-degree angle, then add a subtle rim light with a strip box, and fill the shadows with a large softbox at quarter power.
Get experimental with unconventional light sources. Combine traditional studio lights with practical elements like neon signs, fairy lights, or even smartphone screens. Place a colored gel on your main light while using natural window light as fill – the interplay between artificial and natural light can create compelling atmospheric effects.
Don’t forget about light painting possibilities. Set up your main lights for overall exposure, then use LED wands or flashlights during long exposures to add creative streaks or patterns. For product photography, try positioning a small LED panel underneath clear objects while lighting the top with a softbox for an ethereal glow.
Remember, the key to successful multiple light setups isn’t just about using more lights – it’s about understanding how different light qualities interact and complement each other to tell your visual story.
DIY Lighting Solutions
Household Items as Light Modifiers
Don’t let your limited budget stop you from creating stunning lighting effects – your home is full of potential light modifiers! A white bed sheet can transform into a beautiful diffuser, creating soft, wraparound light when placed between your subject and a light source. Kitchen parchment paper works similarly, offering a more portable option for smaller setups.
Create dramatic shadows and patterns using everyday items like venetian blinds, lace curtains, or even a simple kitchen colander. These objects can cast interesting patterns when placed between your light source and subject, adding depth and intrigue to your photographs.
CD cases or clear plastic containers can become makeshift color gels – just hold them at different angles to create unique light refractions and rainbow effects. For a more focused beam, try using aluminum foil to create a reflector or snoot. Simply shape it around your light source to direct the illumination exactly where you want it.
Clear glass items like vases or drinking glasses can create fascinating prismatic effects and light streaks. Try spraying them with water for added sparkle. Even mirrors from around your house can become powerful tools for bouncing and redirecting light, helping you achieve professional-looking results without expensive equipment.
Remember to experiment with different distances and angles – sometimes the most unexpected household items can create the most memorable lighting effects in your photography.
Budget Light Shaping Tools
Creating professional lighting effects doesn’t always require expensive equipment. With some ingenuity and everyday materials, you can craft impressive light-shaping tools that rival their professional counterparts. A white foam board from your local craft store can serve as an excellent reflector, bouncing light to fill shadows in your portraits. For a more focused beam, create a DIY snoot using black construction paper or cardboard rolled into a cone shape.
One of the most versatile DIY tools is the household window blind. When positioned between your light source and subject, it creates dramatic striped shadows that complement various creative backdrop techniques. Clear plastic wrap stretched over a wire frame can soften harsh light, mimicking the effect of expensive diffusion panels.
For controlled light patterns, try cutting shapes into cardboard and placing them in front of your light source. This DIY gobo technique creates interesting shadow patterns that add depth to your images. Even common household items like cheese graters or colanders can produce fascinating light patterns when used creatively.
Remember to secure these DIY tools safely, keeping them away from hot lights. With proper placement and experimentation, these budget-friendly alternatives can help you achieve professional-looking results while developing your creative lighting skills.
Environmental Lighting Tricks
Urban Lighting Elements
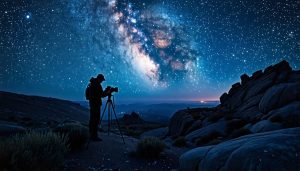
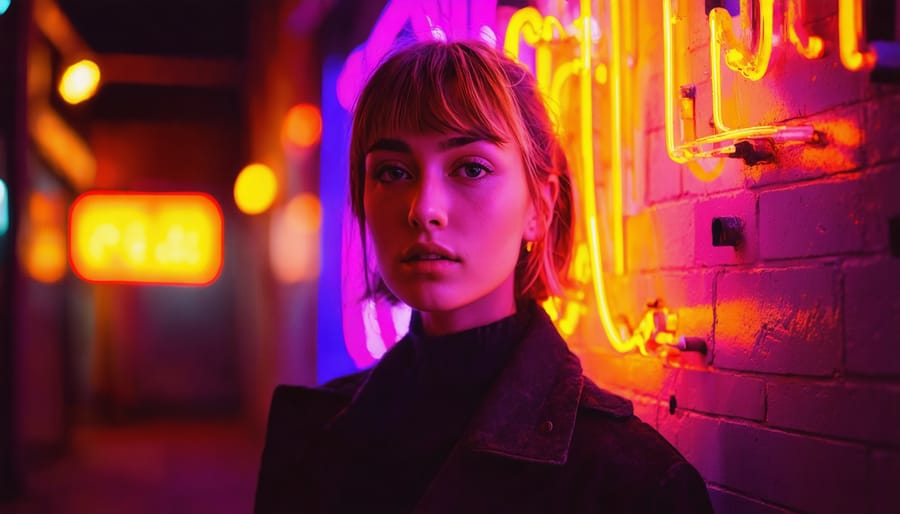
Urban environments offer a treasure trove of creative lighting opportunities for photographers willing to explore after dark. City lights transform ordinary scenes into magical compositions, with neon signs, storefront displays, and street lamps serving as ready-made light sources for dynamic shots. When working on night photography lighting, these urban elements can become powerful tools in your creative arsenal.
Try positioning your subject near illuminated shop windows to create dramatic side lighting, or use the glow of neon signs for vibrant color casts that add mood and atmosphere to your portraits. The reflective surfaces of wet streets after rain can double the impact of city lights, creating mirror-like effects that add depth to your compositions.
Don’t shy away from mixing different light sources. The contrast between warm street lamps and cool LED displays can create interesting color dynamics in your photos. Experiment with long exposures to capture light trails from passing cars, adding motion and energy to your urban portraits.
For a unique perspective, seek out geometric patterns created by building lights or use bokeh effects from distant city lights as a dreamy backdrop. Position your subject in silhouette against bright urban backgrounds, or use spot lighting from street lamps to create dramatic shadows and highlights that emphasize facial features or clothing textures.
Natural Elements as Light Modifiers
Nature offers an incredible array of free light modifiers that can transform your photography. Trees, for instance, create fascinating dappled light patterns when sunlight filters through their leaves, adding depth and intrigue to portraits. Position your subject in these natural spotlights for a magical, forest-like atmosphere, even in urban settings.
Buildings can serve as giant reflectors or light blockers, depending on your needs. Light-colored walls bounce soft, flattering light onto your subject, while tall structures can create dramatic shadows or act as natural flags to control harsh sunlight. Try positioning your subject in building alcoves or doorways to create natural framing with directional lighting.
Reflective surfaces in your environment can be powerful allies. Puddles after rain, glass windows, or polished metal surfaces can provide unexpected light bounces and creative reflections. During golden hour, try incorporating these surfaces to add warm, dimensional lighting to your shots. Even wet pavements can create stunning effects by reflecting ambient light and adding a glossy dimension to your frame.
For more controlled results, time your shoots when the sun interacts with these elements in specific ways. Early morning or late afternoon, when sunlight streams between buildings or through tree canopies, offers prime opportunities for dramatic natural lighting effects. Experiment with different angles and positions relative to these elements to discover unique lighting patterns that enhance your creative vision.
Troubleshooting Common Challenges
Even the most experienced photographers encounter lighting challenges, but with the right approach, these obstacles can become opportunities for creativity. Let’s tackle some common issues and their solutions.
One frequent challenge is harsh midday sunlight creating unflattering shadows. Combat this by using a translucent diffuser to soften the light, or seek out natural shade. Alternatively, position your subject so the sun acts as a backlight and use a reflector to bounce light back onto their face.
When dealing with mixed lighting sources, white balance can become tricky. Instead of fighting it, embrace the contrast between warm and cool tones to create mood. If needed, use color temperature orange (CTO) or color temperature blue (CTB) gels to harmonize different light sources.
Low-light situations often lead to grainy images or motion blur. Rather than immediately reaching for your flash, consider creative alternatives. Use available light sources like street lamps or shop windows as dramatic rim lighting. If using artificial light, bounce your flash off nearby surfaces to create softer, more natural-looking illumination.
Uneven lighting across group photos is another common challenge. Solve this by positioning your subjects in a curved formation rather than a straight line, ensuring equal distance from the main light source. For larger groups, consider using multiple light sources at different heights.
When shooting in small spaces, controlling light spill can be difficult. Create DIY light modifiers using black foam board or fabric to flag unwanted light. In tight quarters, experiment with phone lights or small LED panels instead of larger strobes.
Remember that “perfect” lighting isn’t always necessary for compelling images. Sometimes, embracing shadows, contrast, or even technically “incorrect” lighting can result in more dramatic and interesting photographs. The key is understanding how to work with whatever lighting situation you encounter and turning potential problems into creative opportunities.
Creative lighting in photography is an endless journey of discovery and experimentation. Throughout this guide, we’ve explored various techniques and approaches that can transform ordinary shots into extraordinary visual stories. From mastering natural light through windows to crafting dramatic effects with simple household items, the possibilities are truly limitless.
Remember that while technical knowledge is important, the most compelling images often come from breaking conventional rules and pushing boundaries. Don’t be afraid to mix different lighting techniques or create entirely new ones. Start with the basics we’ve covered – understanding light direction, quality, and intensity – then build upon these foundations with your unique vision.
The best way to grow as a photographer is through hands-on practice. Take time to experiment with each technique we’ve discussed, but don’t feel constrained by them. Sometimes the most interesting results come from “happy accidents” during experimentation. Keep a photography journal to document what works and what doesn’t, and always be open to learning from both successes and failures.
Whether you’re working with professional studio equipment or crafting DIY solutions, the key is to maintain a curious and creative mindset. Start with simple setups and gradually increase complexity as your confidence grows. Most importantly, enjoy the process of discovery – every photographer’s journey with light is unique and personal.
Remember, great lighting isn’t about having the most expensive equipment; it’s about understanding and manipulating light to tell your story effectively. Keep experimenting, keep learning, and keep pushing your creative boundaries.