Set your camera to manual mode and use a tripod to shoot long exposures, capturing more light and detail in low-light conditions. Experiment with exposures from 10 seconds up to several minutes for creative results.
Choose a wide aperture like f/2.8 or f/4 to allow maximum light into the lens, and set your ISO between 800-3200 depending on the scene. Check your histogram to ensure a balanced exposure.
Compose your shots thoughtfully, using elements like silhouettes, light trails, and the night sky to create compelling images. Include a strong foreground interest and consider the rule of thirds.
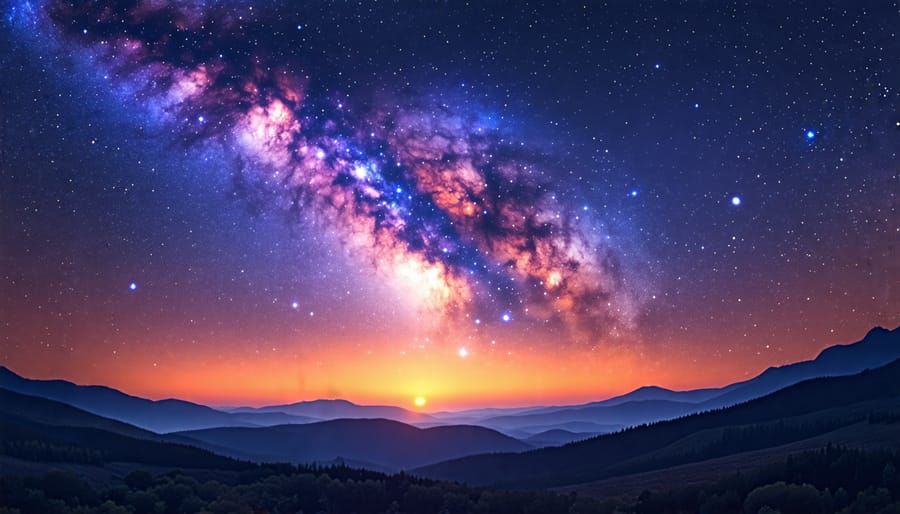
Photograph the Milky Way and star trails for stunning astro-landscapes. Aim to shoot during a new moon for the darkest skies, and use an aperture of f/2.8 or wider with exposures of 15-30 seconds.
In post-processing, adjust white balance for accurate colors, reduce noise in underexposed areas, and boost contrast for impact. Subtle local adjustments can enhance night photos without making them look unnatural.
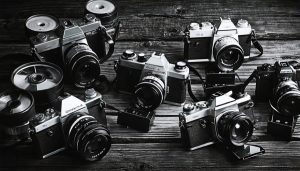
Essential Gear for Night Photography
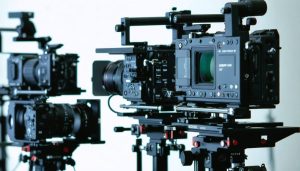
Cameras
When shooting at night, your camera’s features play a crucial role in capturing stunning images. Look for a camera with manual settings that allow you to control the aperture, shutter speed, and ISO independently. This flexibility enables you to fine-tune your exposure for the specific lighting conditions you encounter. Additionally, consider your camera’s high ISO performance, as you’ll often need to bump up the ISO to maintain a proper exposure in low light. Cameras with larger sensors typically handle higher ISOs better, producing cleaner images with less noise. Other helpful features include a built-in intervalometer for creating time-lapse sequences and the ability to shoot in RAW format, which provides more flexibility in post-processing. While any camera can be used for night photography, investing in one with these key features will expand your creative possibilities and help you achieve the results you envision.
Lenses
For night photography, fast, wide-angle lenses are your best friends. Wide-angle lenses, typically in the 14-35mm range, allow you to capture expansive scenes and fit more of the starry sky into your frame. Fast lenses with wide maximum apertures, such as f/1.4 or f/2.8, are essential for letting in as much light as possible in low-light conditions. This enables you to use faster shutter speeds to avoid star trails and keep ISO lower for cleaner images. Prime lenses often have wider apertures than zooms, making them excellent choices for night photography.
Tripods
A sturdy tripod is essential for night photography, as it keeps your camera stable during long exposures. Look for a tripod with strong, lightweight legs and a solid ball head that can support your camera’s weight. Consider factors like maximum height, folded size for portability, and weight capacity. Carbon fiber tripods are lightweight and durable, while aluminum options are budget-friendly. Make sure the tripod has a quick-release plate for easy camera attachment and removal. Some tripods also offer additional features like a built-in monopod or a center column that can be inverted for low-angle shots. Investing in a quality tripod will ensure sharp, blur-free night photos and expand your creative possibilities.
Remote Shutter Release
A remote shutter release is a handy accessory that allows you to trigger your camera’s shutter without physically touching the camera. By minimizing camera shake, a remote release helps you capture sharp images during long exposures, which are common in night photography. Wired or wireless, this tool is a must-have for serious night shooters.
Camera Settings for Night Photography
Shooting Mode
For successful night photography, switch your camera to manual mode. This gives you full control over your exposure settings – shutter speed, aperture, and ISO – which is crucial in low-light situations. In manual mode, you can use a slow shutter speed to allow more light into the camera, capturing detail in dark scenes. You’ll also have control over your aperture, balancing depth of field with the amount of light entering the lens. Finally, manual mode lets you adjust your ISO to make the camera more sensitive to light, though higher ISOs can introduce noise. With manual settings, you can fine-tune your exposure to achieve the perfect balance for each unique night scene.
Aperture
When shooting at night, aperture plays a crucial role in determining both the amount of light captured and the creative effects achieved. Wide apertures, such as f/2.8 or f/1.8, allow more light to reach the sensor, making them ideal for low-light conditions. This can help keep ISO lower for reduced noise and enable faster shutter speeds to minimize blur from camera shake or subject movement.
However, narrower apertures like f/8 or f/11 can also be used creatively in night photography. While they require longer exposures, smaller apertures create a larger depth of field, ensuring sharpness from foreground to background. This is particularly useful for landscape shots where you want both nearby elements and distant stars or city lights in focus. Experiment with different apertures to control the balance between light gathering and depth of field for your desired night photography look.
Shutter Speed
When shooting at night, shutter speed plays a crucial role in determining the exposure and the overall look of your image. For most night scenes, you’ll want to use a long exposure, which means keeping the shutter open for several seconds or even minutes. This allows more light to reach the sensor, resulting in a brighter image. However, when photographing the stars, you’ll need to find a balance between capturing enough light and avoiding star trails caused by the Earth’s rotation. As a general rule, divide 500 by your lens’s focal length to determine the maximum shutter speed that will keep the stars sharp. For example, with a 24mm lens, you can use a shutter speed of up to about 20 seconds (500/24 ≈ 20). Experiment with different shutter speeds to find the sweet spot for your desired aesthetic.
ISO
ISO determines your camera’s sensitivity to light. Higher ISO values, like 1600 or 3200, increase sensitivity, allowing faster shutter speeds in low light. However, high ISOs also introduce digital noise, resulting in grainy or speckled images. As a starting point, try ISO 800-1600 for night scenes with some ambient light, and 3200-6400 for extremely dark conditions like astrophotography. Experiment to find the right balance between light sensitivity and acceptable noise levels for your specific camera and shooting situation. Newer cameras generally handle high ISOs better, so don’t be afraid to push the limits and see what works best for you.
Composition Tips for Night Scenes
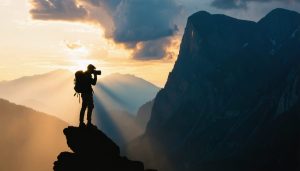
Include Foreground Interest
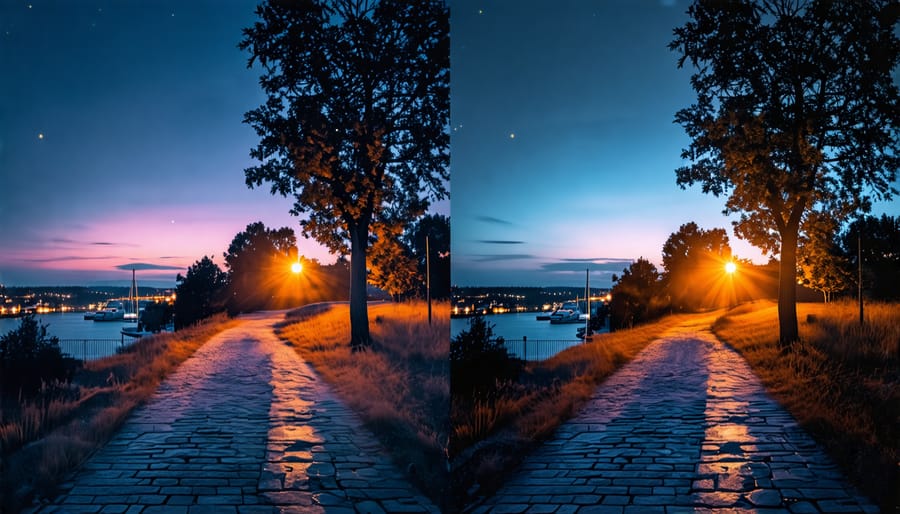
When composing your night photography shots, look for interesting foreground elements to add depth and lead the viewer’s eye into the scene. This could be anything from an intriguing rock formation, a silhouette of a tree, or a winding path. Foreground elements serve as an anchor, providing scale and context to the expansive night sky or distant cityscapes. They create a visual journey, inviting the viewer to explore the image further. Experiment with different angles and perspectives to find the most compelling way to incorporate your chosen foreground subject and create a sense of immersion in the nocturnal scene.
Embrace Negative Space
Embrace the power of simplicity in your night photography compositions by isolating subjects against the dark sky. Instead of cluttering the frame, focus on a single point of interest, such as a lone tree, a silhouetted figure, or a striking architectural element. The vast expanse of the night sky provides a natural negative space that can make your subject stand out. Experiment with different angles and positions to create a sense of scale and drama, allowing the darkness to become an integral part of your composition. By minimizing distractions and emphasizing your main subject, you can create compelling and impactful night photographs that captivate the viewer’s attention.
Experiment with Light Painting
Light painting is a fun and creative night photography technique that involves selectively illuminating parts of your scene while the shutter is open. By moving a light source like a flashlight or LED light during a long exposure, you can “paint” with light to highlight specific elements, create abstract patterns, or write words in the air. Experiment with different light sources, colors, and movements to achieve unique effects. You can also use light painting to add interest to portraits or still life scenes. Just be sure to use a sturdy tripod and a remote shutter release to avoid camera shake during the long exposure. Start with exposure times of around 30 seconds and adjust as needed based on the ambient light and the brightness of your light source. With a little practice and imagination, light painting can add a whimsical, artistic flair to your night photos.
Subjects for Night Photography
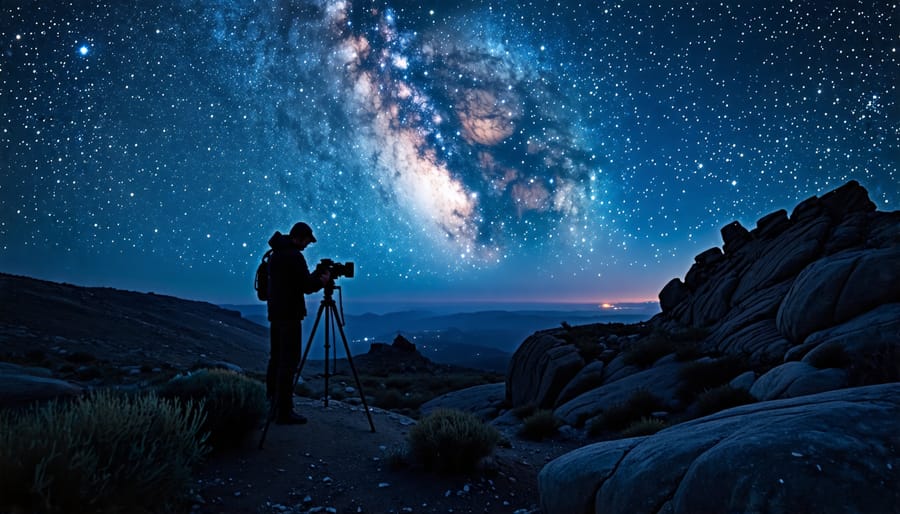
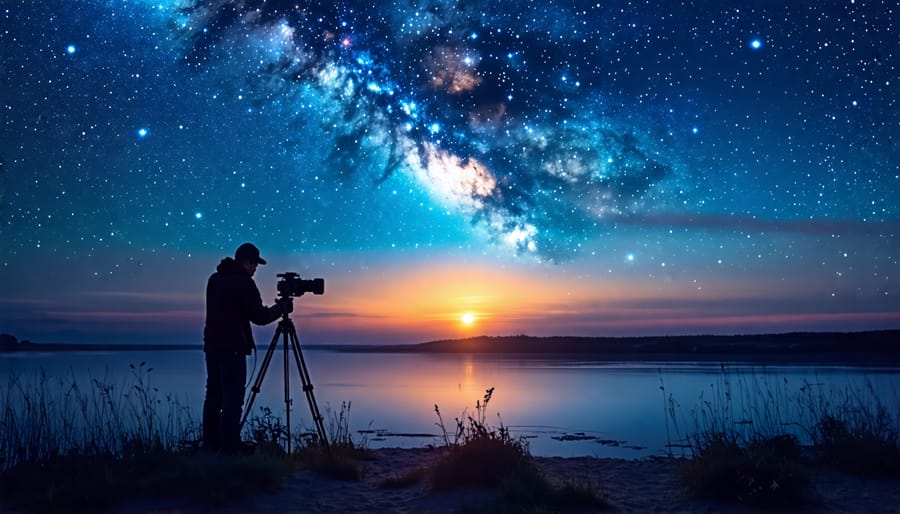
The Milky Way
Capturing the Milky Way is a breathtaking experience for any night sky enthusiast. To plan your shot, use apps like Stellarium or PhotoPills to determine when and where the Milky Way will be visible. Look for a location with minimal light pollution and a clear view of the sky. Compose your shot with an interesting foreground element, such as a tree or rock formation, to add depth and scale. Use a wide-angle lens and focus manually on a bright star or distant light to ensure sharpness. Set your camera to manual mode, use a high ISO (1600 or higher), a wide aperture (f/2.8 or wider), and a shutter speed of 15-30 seconds to start. Experiment with different settings to find the perfect balance for your conditions.
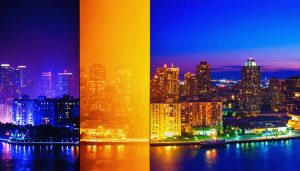
City Skylines
Cityscapes at night offer a dazzling array of photographic opportunities. To capture stunning skylines, scout out high vantage points like rooftops, bridges, or hilltops that provide unobstructed views. The interplay of city lights against the dark sky creates a captivating contrast. Look for reflections in bodies of water, glass facades, or even puddles on the street to add an extra dimension to your compositions. Experiment with long exposures to turn car headlights and taillights into streaking ribbons of color through the frame. Remember to bring a sturdy tripod to keep your camera steady during longer shutter speeds. With a bit of exploration and creative vision, you can transform the urban landscape into a breathtaking nighttime spectacle.
Post-Processing Night Photos
RAW vs JPEG
Shooting in RAW format is essential for night photography as it captures the maximum amount of data, allowing for greater flexibility in post-processing. Unlike JPEG, RAW files are uncompressed and unprocessed, preserving more detail in both the highlights and shadows. This is crucial when dealing with high-contrast night scenes where you may need to recover lost detail. Additionally, RAW files provide a wider color gamut and higher bit depth, enabling more precise adjustments to white balance, exposure, and color during editing.
Basic Adjustments
When editing your night photos, start with basic adjustments to refine the image. Adjust the white balance to neutralize any color casts and achieve a natural look. Exposure can be tweaked to brighten underexposed areas or recover highlight details. Boost contrast to add depth and dimension, making the image pop. Apply noise reduction judiciously to minimize grain without sacrificing sharpness. Experiment with these settings to find the right balance for each photo. Remember, subtle adjustments often work best to maintain a realistic feel. With practice, you’ll develop an eye for the edits that elevate your night photography.
Conclusion
In conclusion, night photography is a rewarding and exciting genre that pushes your creativity and technical skills. By understanding your camera settings, using the right gear, and applying composition techniques, you can capture stunning low-light images. Remember to experiment with different subjects, from cityscapes to starry skies, and don’t be afraid to play with light painting and long exposures. The key is to practice regularly and learn from your successes and failures. Post-processing is also a crucial aspect of night photography, so take the time to develop your editing skills. As you embark on your night photography journey, we encourage you to share your shots with the community and inspire others with your unique perspective. With dedication and persistence, you’ll soon be creating night photos that truly shine.