Master professional lighting by combining multiple strobe positions to create depth, starting with a key light at 45 degrees and building layers with rim and fill lights. Transform harsh shadows into compelling visual elements through precise light control techniques using flags, scrims, and diffusion panels. Shape your subject’s features by manipulating the inverse square law – double the light-to-subject distance to reduce intensity by 75%, creating dramatic fall-off effects.
Lighting mastery separates amateur work from professional imagery, yet many photographers overlook its transformative power. Whether crafting commercial portraits or fine art pieces, understanding advanced lighting unlocks endless creative possibilities. This guide explores sophisticated lighting patterns, modifier combinations, and color theory applications that elevate your work from technically correct to visually extraordinary.
By mastering these advanced concepts, you’ll develop an intuitive understanding of how light behaves, moves, and shapes your subjects. We’ll explore both studio and location lighting scenarios, teaching you to create consistent, repeatable results while maintaining the flexibility to adapt to challenging environments and unique creative visions.
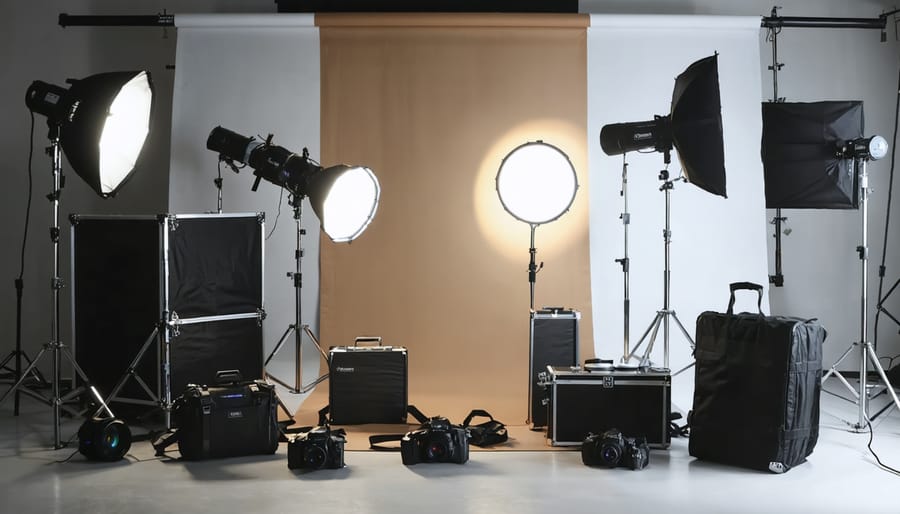
Essential Lighting Equipment for Advanced Photography
Strobe vs. Continuous Lighting
When choosing between strobe and continuous lighting, photographers face a decision that significantly impacts their shooting style and final results. While both are considered essential photography lighting equipment, each serves distinct purposes in different scenarios.
Strobe lighting delivers powerful, instantaneous bursts of light that freeze motion and provide crisp, sharp images. This makes them ideal for fast-moving subjects, sports photography, and scenarios requiring precise control over light intensity. They’re also more powerful than continuous lights, allowing you to overpower ambient light even in bright conditions. However, they require more experience to master since you can’t see the exact lighting effect until after taking the shot.
Continuous lighting, on the other hand, offers the advantage of “what you see is what you get.” Perfect for beginners and video work, these lights allow you to visualize your lighting setup in real-time. They’re particularly valuable for portrait photography, product shots, and any situation where precise light positioning is crucial. The main drawback? They’re typically less powerful than strobes and can generate heat during extended use.
For maximum versatility, many photographers maintain both types in their kit. Consider starting with continuous lighting if you’re new to lighting techniques, then gradually incorporate strobes as your skills advance. This approach allows you to build confidence while expanding your creative possibilities.
Light Modifiers That Make the Difference
Light modifiers are the secret weapons in every photographer’s arsenal of essential lighting gear, transforming harsh light into something magical. Let’s explore the game-changers that can elevate your photography to the next level.
Softboxes are perhaps the most versatile modifiers available, creating beautifully diffused light that wraps around your subject. Their soft edges and even spread make them perfect for portrait and product photography. The larger the softbox, the softer the light – think of it as the difference between light streaming through a small window versus a wall of windows.
Beauty dishes deliver that sweet spot between soft and specular light, creating distinctive catchlights and sculpted shadows that fashion photographers love. Their unique design produces a wrapped, contrasty light that’s particularly flattering for beauty and portrait work.
Reflectors are the unsung heroes of lighting modification. Whether silver, gold, or white, they bounce light back onto your subject, filling shadows and adding dimension. The 5-in-1 reflector is particularly valuable, offering multiple surfaces for different effects in one portable package.
For those looking to push creative boundaries, specialty modifiers like grids, snoots, and barn doors allow precise control over light spread and spill. These tools help create dramatic spotlight effects or carefully controlled accent lighting, perfect for mood-driven shoots or creative portraiture.
Advanced Lighting Patterns and Setups
Three-Point Lighting Mastery
Three-point lighting is the cornerstone of professional photography lighting, and mastering it can transform your images from amateur to extraordinary. This classic technique involves three distinct light sources: key light, fill light, and rim light, each serving a specific purpose in creating depth and dimension.
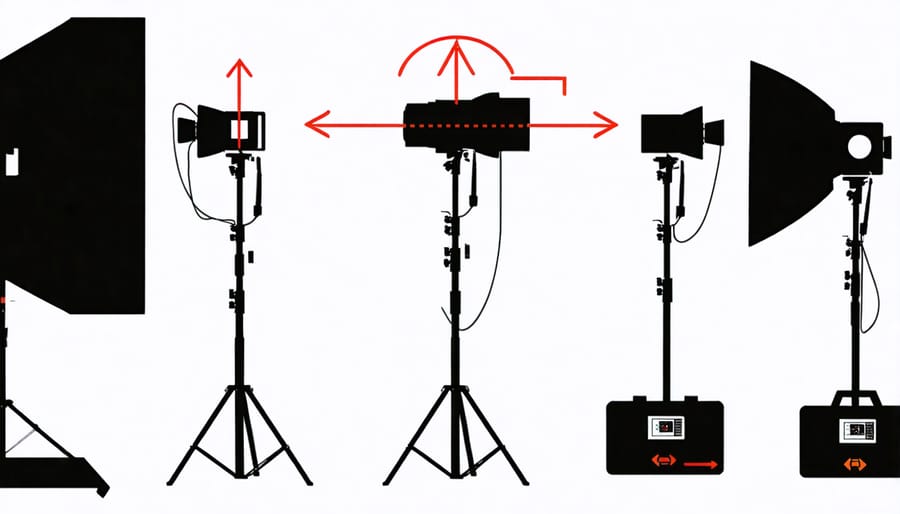
Your key light is your primary light source, typically positioned at a 45-degree angle to your subject, about 45 degrees above their eye level. This light establishes the main illumination and sets the overall mood of your image. For portraits, position it on the side of your subject’s “good side” to emphasize their best features.
The fill light, usually set at half the intensity of your key light, softens shadows and reveals details that would otherwise be lost in darkness. Position it opposite your key light, slightly lower, and further from your subject. Remember, the ratio between your key and fill lights determines the contrast in your image – a 2:1 ratio creates natural-looking results, while 4:1 or higher produces more dramatic effects.
Your rim light (also called back light or hair light) separates your subject from the background, creating that professional edge glow. Position it behind and slightly above your subject, aimed at their shoulders or hair. The trick is to control the spill – use barn doors or flags to prevent lens flare and maintain precise edge lighting.
Common mistakes to avoid include positioning lights at equal intensities (which flattens your image) and placing your rim light too close to your subject (causing unwanted hot spots). Start with a basic setup and experiment with different ratios and positions until you find your signature style.
Pro tip: When working with reflective surfaces or glasses, adjust your key light position slightly higher to prevent unwanted reflections. Use diffusion materials on your fill light to create softer transitions between light and shadow, especially for beauty and fashion photography.
Creative Multi-Light Arrangements
Mastering creative multi-light arrangements opens up a world of possibilities for achieving stunning professional lighting effects that can transform ordinary shots into extraordinary images. The key lies in understanding how different light sources interact and complement each other to create depth, dimension, and mood.
Start by establishing your key light as the foundation, then build complexity by introducing additional lights strategically. A classic three-point lighting setup can be elevated by adding a fourth light for background separation or a subtle hair light. Consider positioning two rim lights at 45-degree angles behind your subject while using a large softbox as your main light – this creates a dramatic edge definition while maintaining soft, flattering illumination on the face.
For product photography, try placing two strip boxes on either side of your subject, with a top light for separation and a front fill light at reduced power. This arrangement creates beautiful specular highlights while maintaining detail in the shadows. Remember to adjust the power ratios between lights to achieve the desired balance – typically, your key light should be the strongest, with supporting lights at lower intensities.
Don’t be afraid to experiment with unconventional placements. Position lights at extreme angles, use colored gels on secondary lights, or incorporate practical lights from the environment into your setup. A particularly effective technique involves using a beauty dish as your main light, supplemented by two gridded strobes for precise background control, and a large reflector underneath for subtle fill.
When working with multiple lights, always test each light individually before combining them. This helps you understand exactly how each source contributes to the final image and makes troubleshooting easier. Keep in mind that sometimes less is more – even with multiple lights available, you might find that using just two or three strategically placed sources creates the most impactful result.
Remember to document your successful lighting arrangements with behind-the-scenes photos or diagrams. This creates a valuable reference library for future shoots and helps you develop your own signature lighting styles.
Color Temperature and Gel Techniques
Understanding Color Temperature Control
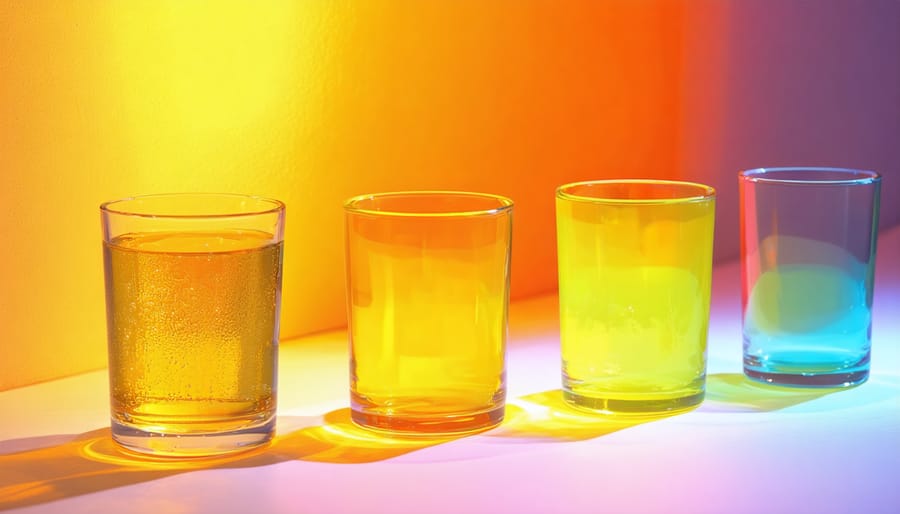
Color temperature is one of the most crucial yet often misunderstood aspects of photography lighting. Measured in Kelvin (K), it describes the warmth or coolness of light, ranging from warm orange tones (around 2000K) to cool blue hues (above 6500K).
Professional photographers need to master color temperature control because different light sources emit varying color temperatures. For instance, candlelight produces a warm glow at about 2000K, while overcast daylight sits around 6500K. Indoor tungsten bulbs typically output around 3200K, creating that familiar yellowish cast in indoor photos.
Understanding these variations becomes essential when mixing different light sources. Imagine photographing a portrait where window light combines with indoor lighting – without proper color temperature control, your subject might appear unnaturally orange on one side and blue on the other.
To maintain consistent color throughout your images, you can use tools like color temperature meters, gels, and white balance settings. Gels are particularly useful for matching multiple light sources – placing an orange CTO (Color Temperature Orange) gel over a flash can warm it up to match indoor lighting, while a blue CTB (Color Temperature Blue) can cool it down to match daylight.
Modern cameras offer preset white balance options, but learning to manually adjust color temperature gives you precise control over your image’s mood and authenticity.
Creative Gel Applications
Gels are more than just colored filters – they’re powerful creative tools that can transform the mood and atmosphere of your photographs. By placing these transparent, heat-resistant sheets over your light sources, you can create stunning effects that would be impossible to achieve in post-processing alone.
For dramatic portraits, try using a split-lighting setup with complementary colored gels. Place a blue-gelled light on one side of your subject and an orange-gelled light on the other to create a striking cyberpunk aesthetic. This technique works particularly well for athletic and fashion shoots where you want to convey energy and dynamism.
Environmental portraits can benefit from subtle gel applications. Using a slight warming gel (CTO) on your key light while keeping your fill light neutral helps create an inviting, golden-hour look any time of day. For moody editorial shots, deep blues and purples can simulate nighttime conditions even in broad daylight.
Experiment with unexpected color combinations. Green and magenta gels can create an otherworldly atmosphere perfect for conceptual photography, while red and teal combinations echo classic cinema color grading. Remember that gels reduce light output, typically by 1-2 stops, so you’ll need to adjust your power settings accordingly.
For product photography, use gels to create colored reflections and highlights that complement your subject. This technique is particularly effective with glossy or metallic products, adding depth and visual interest to your compositions.
Light Metering and Control
Advanced Light Meter Techniques
Light meters are indispensable tools for achieving precise exposure in complex lighting scenarios, but mastering their use requires understanding some advanced techniques. When working with multiple light sources, start by measuring your main light independently, then take readings for each additional light to establish your lighting ratios. This approach helps you maintain exact control over the relationship between highlights and shadows.
For complex portrait setups, spot metering different areas of your subject’s face can reveal subtle lighting variations. Take readings from the highlights on the cheekbone, the shadows under the eyes, and the hair to ensure your ratios create the depth you’re seeking without losing detail in any area.
When dealing with mixed lighting situations, such as combining studio strobes with ambient light, use your meter’s flash mode to measure the strobe output separately from the continuous light. This allows you to balance the two sources precisely, creating natural-looking results that blend seamlessly.
One often-overlooked technique is incident metering from your subject’s position facing different light sources. By rotating the meter’s dome toward each light while maintaining the same position, you can accurately gauge how each source contributes to the overall exposure. This is particularly valuable when working with rim lights or hair lights where precise control is crucial.
For high-contrast scenes, consider taking multiple readings and averaging them, or use the meter to determine the dynamic range of your scene. This helps ensure you’re working within your camera’s capabilities while maintaining detail in both highlights and shadows.
Remember to regularly calibrate your meter and cross-reference its readings with your camera’s histogram for the most accurate results.
Balancing Multiple Light Sources
Balancing multiple light sources is like conducting an orchestra – each light plays its part in creating a harmonious final image. The key lies in understanding light ratios, which determine the relationship between your main light, fill light, and accent lights.
Start by establishing your main light as your reference point, typically set at full power (1:1). From there, adjust your secondary lights in relation to this baseline. For a natural, dimensional look, many photographers follow the classic 3:1 ratio, where the main light is three times brighter than the fill light. This creates enough shadow detail while maintaining depth.
When working with three or more lights, consider the visual hierarchy. Your key light should dominate (1:1), followed by your fill light (1:3), and finally, any accent or hair lights (1:4 or 1:8). Use a light meter to measure precise ratios, or start with the “squint test” – squinting helps you see the relative brightness of different areas in your setup.
Remember that light placement affects ratio effectiveness. A fill light at 45 degrees might need different power than one positioned at 90 degrees to achieve the same effect. Start with one light, perfect its position and power, then add each additional light systematically while measuring its impact on the overall scene.
Digital cameras’ instant feedback makes experimentation easier, but don’t rely solely on your LCD screen. Use the histogram to ensure you’re maintaining detail in both highlights and shadows. With practice, you’ll develop an intuitive sense for balancing multiple lights to create exactly the mood and dimension you envision.
Common Lighting Challenges and Solutions
Every photographer encounters challenging lighting situations, but with the right approach, these obstacles can become opportunities for creative solutions. Let’s explore some common lighting challenges and their practical fixes.
Mixed lighting sources often create color temperature conflicts, especially in indoor settings with both natural and artificial light. Combat this by using color temperature orange (CTO) or color temperature blue (CTB) gels on your flash units to match the dominant light source. Alternatively, embrace the contrast for artistic effect, using the temperature difference to create depth and mood.
Harsh midday sun presents another frequent challenge. Instead of avoiding it, transform it into an advantage by using a diffuser to soften the light or incorporating a reflector to fill in harsh shadows. For outdoor portraits, seek open shade or create your own using a scrim, which provides even, flattering light even in bright conditions.
Low-light situations without the option to use flash (like in museums or ceremonies) require creative thinking. Positioning subjects near windows or existing light sources, using a reflector to maximize available light, and mastering your camera’s high ISO capabilities can help you capture stunning images without additional lighting.
When dealing with backlit subjects, many photographers struggle with exposure. Rather than fighting the backlight, use it to create rim lighting effects. Add a fill light or reflector to illuminate the subject’s face, or experiment with silhouettes for dramatic impact.
For those needing specialized equipment for specific challenges, consider professional lighting equipment rentals to test different solutions before investing.
Glossy surfaces and reflective materials can create unwanted hotspots. Control these by adjusting light positioning, using polarizing filters, or employing black flags to absorb and control reflections. Remember, sometimes the most effective solution is to embrace and incorporate these reflections creatively into your composition.
Mastering advanced lighting techniques is a journey that combines technical knowledge with creative vision. Throughout this guide, we’ve explored the essential elements of professional lighting, from understanding the fundamentals of light behavior to manipulating complex multi-light setups. Remember that these techniques aren’t just theoretical concepts – they’re practical tools that can transform your photography. Start by practicing with one light source, perfecting your understanding of direction and quality, before gradually incorporating more complex setups. Don’t be afraid to experiment and break the conventional rules once you’ve mastered them. The best photographers know that lighting is both a science and an art form, and your unique perspective will develop through hands-on experience. Take these techniques into your next shoot, but most importantly, make them your own through practice and experimentation.