Master travel photography lighting by carrying a collapsible reflector as your most versatile light-shaping tool – it weighs almost nothing yet transforms harsh midday sun into soft, flattering light. Position subjects in doorways or under overhangs during bright conditions, using the architectural features as natural diffusers to achieve stunning travel photography even in challenging conditions. Pack a compact LED light panel with adjustable color temperature to supplement dim indoor scenes or create dramatic evening portraits without lugging heavy flash equipment. Scout locations during the “golden hours” of sunrise and sunset when natural light paints landscapes in rich, warm tones that require minimal modification – then return with your subject when conditions are perfect. Travel photography demands adapting to unpredictable lighting situations, but with these fundamental techniques and lightweight tools, you’ll capture compelling images anywhere in the world.
Natural Light Mastery for Travel Photographers
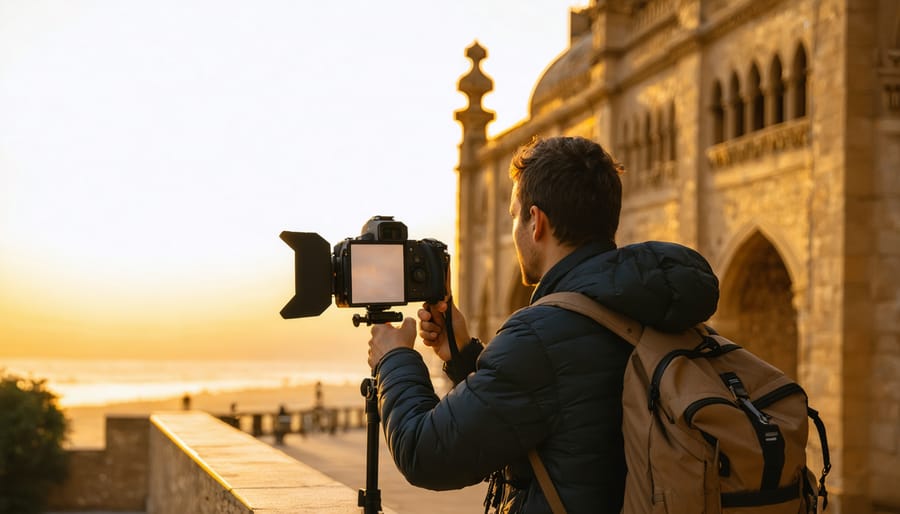
Golden and Blue Hours: Your Best Travel Photography Friends
Nature’s most magical light shows happen twice daily, and savvy travel photographers know these moments are pure gold for capturing dramatic landscape photos and stunning portraits alike. The Golden Hour occurs during the first hour after sunrise and the last hour before sunset, bathing everything in warm, amber light that creates long, soft shadows and adds a ethereal glow to your subjects.
During Golden Hour, position your subjects facing the sun for a warm, flattering light that minimizes harsh shadows. For landscapes, shoot perpendicular to the sun to capture those long shadows that add depth and dimension to your scenes. The low angle of light also brings out textures in buildings, landscapes, and portraits that might otherwise appear flat during midday.
The Blue Hour arrives just before sunrise and shortly after sunset, when the sky takes on deep blue tones that create a moody, mysterious atmosphere. This is prime time for cityscape photography, as artificial lights begin to twinkle while there’s still enough natural light to maintain detail in the shadows. During Blue Hour, experiment with longer exposures to capture light trails from vehicles or to smooth out water surfaces.
Pro tip: Scout your locations in advance and arrive at least 30 minutes before these golden windows begin. Light conditions change rapidly during these periods, and being prepared means you won’t miss that perfect moment when everything comes together beautifully.
Harsh Midday Light Solutions
Harsh midday light is often a photographer’s biggest challenge when traveling, but don’t let it stop you from capturing amazing shots. The key is to adapt your approach and use the intense light to your advantage.
One effective technique is to embrace shadows as compositional elements. Look for interesting patterns created by architectural features or natural objects. The stark contrast between light and shadow can add dramatic depth to your images, especially in urban environments or ancient ruins.
When photographing people, seek out open shade – areas that are shielded from direct sunlight but still receive ambient light. Doorways, archways, and the shadows of buildings make excellent natural light studios. If you must shoot in direct sun, position your subject with the sun behind them and use a reflector to bounce light back onto their face, eliminating harsh shadows.
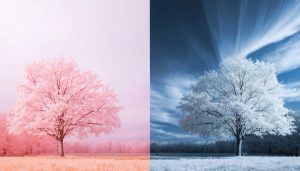
For landscape photography, consider converting challenging midday shots to black and white. The high contrast can create striking monochrome images, particularly with clouds in the sky. Alternatively, use a polarizing filter to manage reflections and enhance color saturation, especially when shooting water or architectural details.
If possible, plan indoor shots during the harshest light hours (typically 10 AM to 2 PM). Museums, churches, and local markets often provide fascinating subjects with more manageable lighting conditions. When you must shoot outdoors, look for ways to diffuse the light – even a thin white scarf can serve as an impromptu diffuser for close-up shots.
Remember, sometimes embracing the harsh light rather than fighting it can lead to uniquely compelling images that capture the essence of your destination.
Working with Weather and Atmospheric Conditions
Weather conditions can be either your best friend or biggest challenge in travel photography, but learning to work with them can lead to spectacular results. Overcast days, often considered unfavorable, actually provide perfect conditions for portraits and architectural shots, acting like a giant softbox that eliminates harsh shadows and reduces contrast.
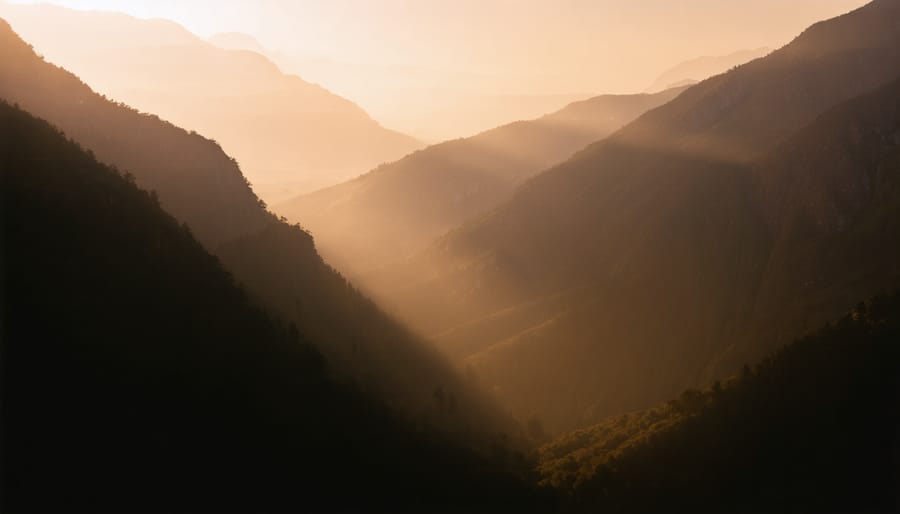
Foggy conditions create an ethereal atmosphere perfect for landscape photography. Position yourself to shoot towards any available light source to capture rays piercing through the mist. During rain, look for reflections in puddles and wet surfaces – they can add dramatic mirror effects to urban scenes. Remember to protect your gear with a good weather-sealed bag or rain cover.
Storm clouds provide particularly dramatic lighting opportunities. The contrast between dark clouds and breaks of sunlight can create stunning golden rays or spotlight effects on your subject. Position yourself safely and wait for these momentary breaks in the clouds.
Snow presents unique lighting challenges due to its highly reflective nature. Expose for the highlights and use your camera’s exposure compensation (usually -1 to -2 stops) to prevent overexposure. Early morning or late afternoon sun on snow creates beautiful blue shadows and warm highlights.
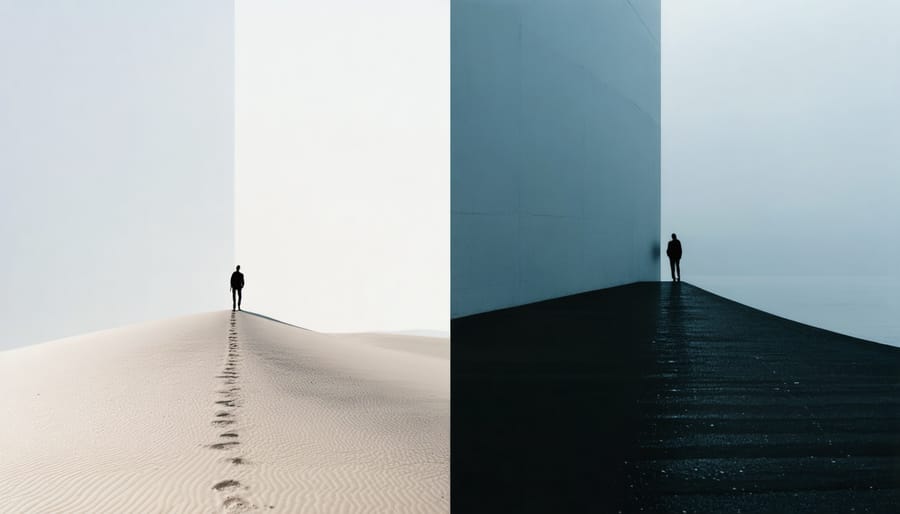
Even harsh midday sun can be used creatively. Look for interesting shadow patterns, or use the strong contrast to create striking silhouettes. In dusty conditions, backlighting can reveal beautiful light rays – common in markets or religious buildings in tropical destinations.
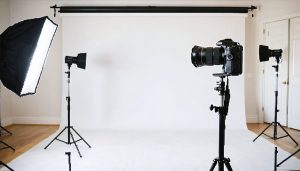
Essential Lighting Gear for Travel Photography
Lightweight Flash Solutions
When it comes to travel photography, lightweight flash solutions can make all the difference without weighing down your bag. A compact speedlight is your best friend, offering powerful illumination in a package that typically weighs less than a pound. Modern speedlights feature TTL (Through-The-Lens) metering, which automatically calculates the correct flash output, making them incredibly user-friendly even in challenging situations.
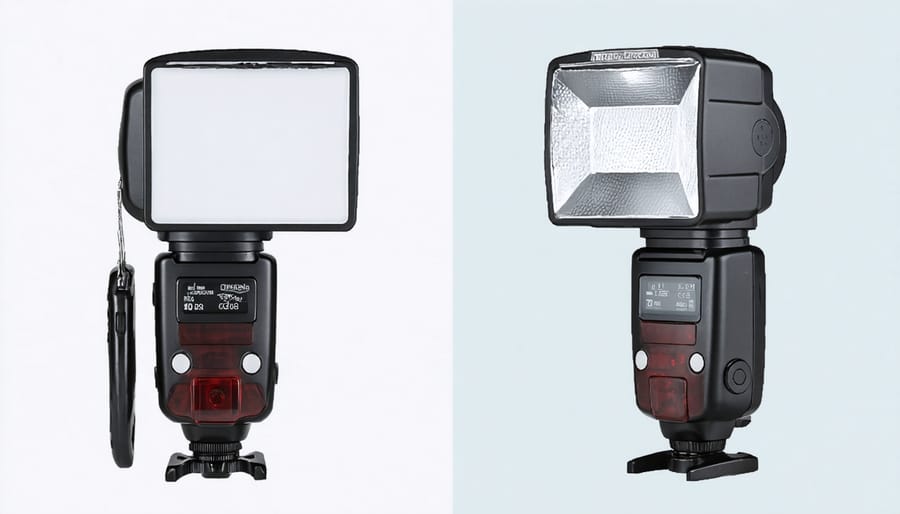
For even more portability, consider a collapsible flash diffuser. These lightweight modifiers fold flat in your bag and can transform harsh direct flash into soft, flattering light. Some photographers swear by the bounce card method – simply attaching a small white card to your flash to redirect and soften the light.
Mini LED panels have also revolutionized travel lighting. These pocket-sized units provide continuous lighting, perfect for both photo and video work. Many models offer adjustable color temperature and brightness, running on standard batteries or USB power banks you’re likely already carrying.
For macro and close-up work, ring lights that attach to your lens provide even illumination without casting shadows. Some newer models are rechargeable and weigh just a few ounces, making them ideal travel companions.
Don’t overlook the humble 5-in-1 reflector. While not technically a flash, these collapsible discs can bounce available light exactly where you need it. When folded, they take up minimal space in your bag, yet they open up to provide silver, gold, white, or black surfaces for different lighting effects.
Remember to pack spare batteries – they’re lightweight and can save the day when you’re far from power sources. Consider lithium batteries for their longer life and lighter weight compared to alkaline alternatives.
Reflectors and Diffusers Worth Packing
When it comes to travel photography, every ounce in your bag matters, but some light modifiers are worth their weight in gold. A collapsible 5-in-1 reflector is perhaps the most versatile tool you can pack, offering white, silver, gold, black, and translucent options in one compact package. These lightweight discs typically fold down to about one-third their working size and can transform harsh midday sun into beautiful, soft light for portraits or product shots.
For an ultra-lightweight option, consider packing a few pieces of white foam board, which can be easily cut to size and serve as both reflectors and bounce cards. They’re incredibly light, practically free, and can be disposed of to make room for souvenirs on your return journey.
Diffusion fabric is another game-changer that barely takes up any space. A simple piece of white ripstop nylon or a lightweight shower curtain can soften harsh sunlight or create a makeshift softbox for your flash. These materials can be clipped to window frames or held up by an assistant to create gorgeous, diffused light in almost any situation.
Don’t overlook the value of a collapsible diffuser specifically designed for flash photography. These small modifiers can attach directly to your speedlight and dramatically improve the quality of artificial light. Look for ones that fold flat and feature both bounce and diffusion capabilities.
Remember, even a white t-shirt or hotel bed sheet can serve as an impromptu diffuser in a pinch. The key is to think creatively and pack tools that serve multiple purposes while maintaining that crucial balance between functionality and portability.
Indoor and Low-Light Travel Photography
Museum and Historical Site Photography
Museums and historical sites present unique challenges for photographers, often combining dim lighting conditions with strict rules about flash photography. To tell better stories through photography in these cultural spaces, you’ll need to master both technical skills and respectful shooting practices.
Start by checking the venue’s photography policy before your visit. Many locations prohibit tripods and flash photography to protect delicate artifacts and maintain the atmosphere. In these cases, rely on your camera’s high ISO capabilities and fast lenses. A prime lens with an f/1.8 or f/1.4 aperture can be invaluable in low-light situations.
When shooting in museums, stabilize yourself against walls or columns when possible, and use controlled breathing techniques to minimize camera shake. Look for natural light sources like skylights or windows, which can create dramatic lighting effects on exhibits. Position yourself to capture artifacts where available light falls most favorably.
For historical sites with mixed lighting conditions, consider bracketing your exposures. This technique involves taking multiple shots at different exposure settings, giving you options to work with in post-processing. Remember to turn off your LCD review screen to avoid disturbing other visitors with the bright display.
A small LED light panel can be helpful when allowed, as it’s less intrusive than flash and provides continuous illumination for composing shots. Always keep it at low power and maintain a respectful distance from artwork and artifacts.
Night Markets and Street Photography
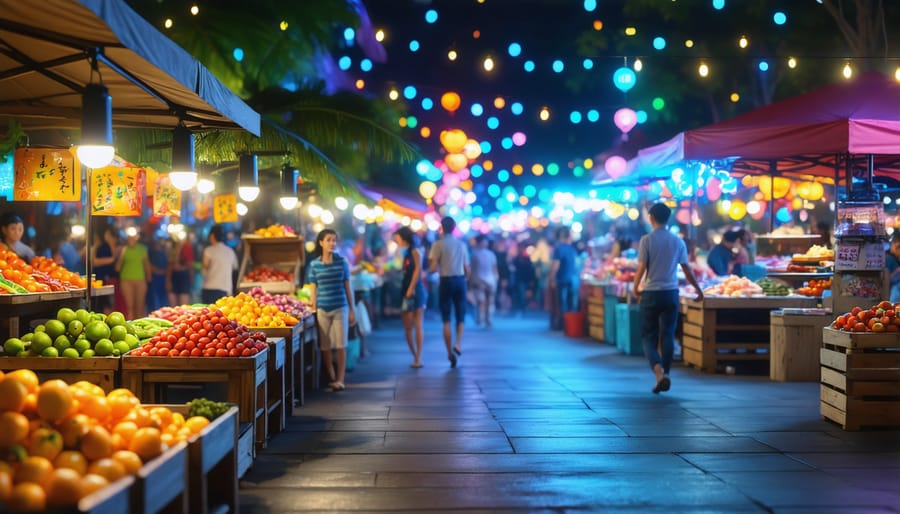
Night markets and bustling evening streets offer photographers unique opportunities to capture the vibrant energy of a destination after dark. The key to successful night market photography lies in embracing and working with available light sources, from neon signs to lanterns and street lamps.
Start by setting your camera to a higher ISO (typically 1600-3200) while maintaining image quality. Use a wide aperture (f/1.8 to f/2.8) to capture more light and create atmospheric bokeh effects with street lights. For sharper images without motion blur, stabilize your camera against solid surfaces or use a compact travel tripod.
The magical “blue hour” just after sunset provides perfect conditions for balancing artificial lighting with the remaining natural light. Position yourself to incorporate multiple light sources in your composition – vendors’ lights, street signs, and ambient illumination all add depth to your images. Modern mobile photography techniques can also yield impressive results, especially with night mode features.
Consider shooting in RAW format to preserve detail in both highlights and shadows, allowing for greater flexibility in post-processing. Look for reflective surfaces like puddles or polished streets to add visual interest through light reflections. Remember to capture both wide establishing shots of the scene and intimate details of food stalls, vendors, and customers to tell a complete visual story of the night market experience.
Mixed Lighting Challenges
One of the most challenging scenarios in travel photography is dealing with mixed lighting conditions, where different light sources create a complex web of color temperatures and intensities. Picture walking through a European city at dusk, where warm sodium street lamps clash with cool blue twilight sky, while shop windows cast their own fluorescent glow.
To master mixed lighting, start by identifying your primary light source and deciding whether to embrace or minimize the color variations. Use your camera’s white balance selectively – you might want to keep the warmth of tungsten lighting while allowing the blue hour to retain its natural cool tones. The key is understanding that not everything needs to be perfectly balanced.
Consider using graduated neutral density filters to control exposure differences between bright and dark areas. For indoor-outdoor scenes, try positioning your subject where the different light sources blend naturally, such as near a doorway or window. This creates a transition zone that can work to your advantage.
When shooting in challenging mixed lighting, bracketing your exposures can be invaluable. Take multiple shots at different settings, giving you options in post-processing. Remember that your camera’s LCD screen can be deceiving in these situations, so check your histogram frequently to ensure you’re capturing all the necessary detail in both highlights and shadows.
For extreme situations, consider using a flash with color correction gels to match one of the ambient light sources, creating a more cohesive look in your final image.
Post-Processing for Perfect Travel Lighting
RAW Processing for Better Light
RAW format is your best friend when dealing with challenging lighting conditions during travel photography. Unlike JPEG, RAW files preserve all the image data your camera captures, giving you unprecedented control over light and color during post-processing. This flexibility becomes invaluable when working with diverse lighting scenarios you encounter while traveling.
Understanding post-processing fundamentals is crucial for making the most of your RAW files. Start by adjusting the exposure to recover details in highlights and shadows – particularly useful for those challenging sunset shots or dimly lit indoor scenes. The white balance flexibility in RAW allows you to correct color temperature issues common in mixed lighting situations, like museums or street markets.
Pay special attention to the highlights and shadows sliders in your editing software. These tools can help balance harsh midday sun or bring out details in backlit situations. For instance, when photographing architecture against bright skies, you can recover cloud details while maintaining building features in a single shot.
Don’t forget about local adjustments. Use graduated filters for dramatic skies or adjustment brushes to brighten specific areas of your image. The beauty of RAW processing is that you can make these adjustments without degrading image quality, ensuring your travel memories look their absolute best while maintaining a natural appearance.
Local Adjustments for Drama
Local adjustments in post-processing can dramatically enhance the impact of your travel photos by selectively emphasizing lighting effects. Using tools like graduated filters and adjustment brushes in editing software, you can create depth and drama that mirrors what your eyes saw during your travels.
Start by identifying the areas that need attention – perhaps the foreground is too dark while the sky is perfectly exposed, or a building’s facade needs selective brightening to reveal architectural details. The radial filter tool is particularly useful for travel photography, allowing you to create subtle spotlights that draw attention to specific elements in your frame, much like theatrical lighting.
For dramatic sunset shots, try using multiple graduated filters with different exposure and temperature adjustments. Lower the exposure in the sky while slightly warming its color temperature, then boost shadows in the foreground to reveal hidden details. When editing portraits taken during the golden hour, use adjustment brushes to enhance the natural glow on your subject’s face while keeping the background properly exposed.
Remember to keep your adjustments subtle and natural-looking. The goal isn’t to create an obviously edited image but to guide the viewer’s eye through the scene just as the natural light did when you captured it. Pay special attention to transition areas between adjusted zones to ensure they blend seamlessly with the rest of the image.
Mastering travel photography lighting is an ongoing journey that combines technical knowledge with creative vision. Throughout this guide, we’ve explored the essential techniques and tools that can help you capture stunning images during your travels, from working with natural light during golden hour to managing challenging midday conditions and creating compelling night shots.
Remember that the best travel photos often come from being prepared while staying flexible. Keep your lighting kit lightweight and versatile, focusing on essential tools like a compact reflector, a small LED panel, and perhaps a collapsible diffuser. These basics will serve you well across most shooting scenarios you’ll encounter on the road.
Practice these techniques before your trip – work with window light at home, experiment with reflection and diffusion, and get comfortable with your gear. The more familiar you are with these concepts, the more naturally they’ll come to you when you’re in the moment, trying to capture that perfect street scene in Marrakech or a sunset in Santorini.
Don’t be afraid to push your creative boundaries. Sometimes the most challenging lighting conditions can lead to the most memorable images. Whether you’re shooting in harsh desert sun or capturing the moody atmosphere of a rainy day in London, remember that every lighting situation offers unique opportunities for compelling photography.
Most importantly, enjoy the process. Travel photography is about documenting your journey and sharing your unique perspective with the world. With these lighting techniques in your toolkit, you’re well-equipped to create images that tell powerful stories and capture the essence of your adventures.