Step into the world of nature photography with your camera set to aperture priority mode, a sturdy tripod, and the golden hours of dawn or dusk as your creative canvas. Master essential landscape photography techniques by starting with wider apertures (f/8 to f/11) to capture both foreground detail and distant scenery in sharp focus. Frame your compositions using nature’s leading lines—rivers, fallen trees, or mountain ridges—to draw viewers into your image while maintaining the rule of thirds for balanced, compelling shots.
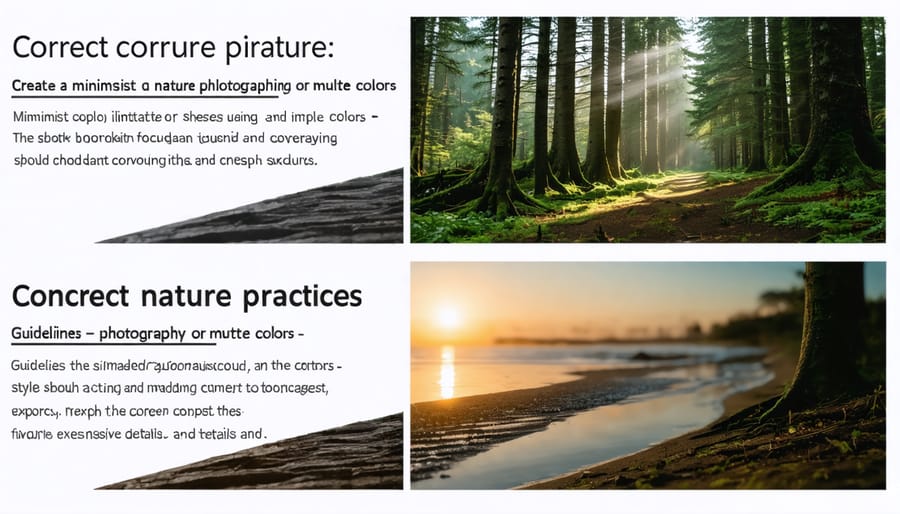
Nature photography transforms ordinary outdoor moments into extraordinary visual stories, but success demands more than just good equipment. Understanding light, weather patterns, and animal behavior becomes as crucial as mastering your camera’s settings. Whether you’re capturing delicate wildflowers in morning dew or dramatic storm clouds rolling across mountain peaks, this guide will equip you with professional-grade techniques while respecting and preserving the natural environments you photograph.
Let’s dive into the essential tools, techniques, and field practices that will elevate your nature photography from simple snapshots to stunning works of art, all while maintaining an ethical approach to wildlife and landscape photography.
Essential Camera Gear for Nature Photography

Choosing the Right Lens
Selecting the right lens for nature photography can significantly impact your results. While a standard kit lens (18-55mm) is a good starting point, different subjects require specific focal lengths. For landscapes, a wide-angle lens (10-24mm) captures sweeping vistas and dramatic perspectives. These lenses excel at including foreground elements while maintaining sharp focus throughout the scene.
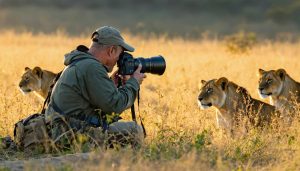
When photographing wildlife, telephoto lenses (200mm and above) are essential, allowing you to maintain a safe distance while getting close-up shots. A 70-300mm zoom lens offers versatility for both distant subjects and closer nature scenes. For detailed shots of flowers, insects, and textures, exploring macro photography with a dedicated macro lens opens up a whole new world of possibilities.
Consider starting with a versatile zoom lens that covers multiple focal lengths (like a 24-70mm or 70-300mm) before investing in specialized lenses. This approach lets you discover your preferred subjects and shooting style while building your kit thoughtfully. Remember, image stabilization can be particularly valuable for nature photography, especially when shooting in low light or using longer focal lengths.
Must-Have Accessories
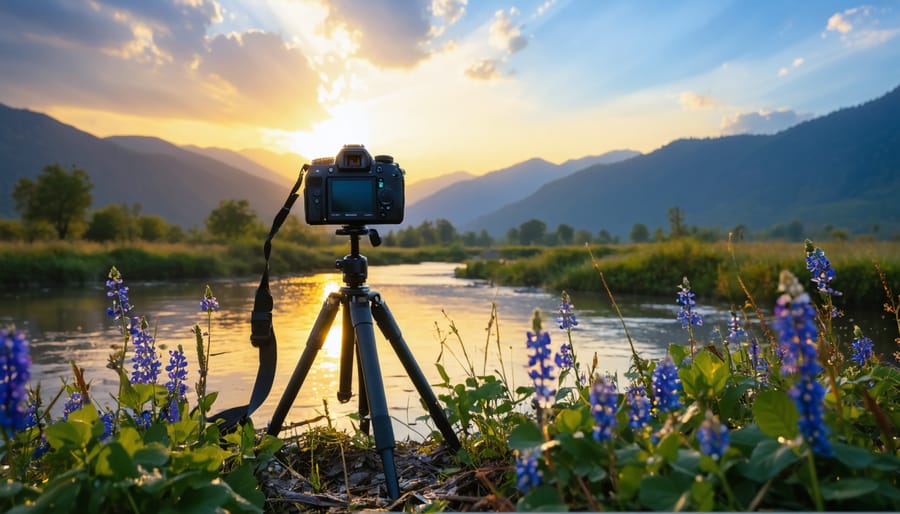
While a good camera is essential, having the right accessories can make or break your nature photography experience. A sturdy tripod is your first must-have item – it’s invaluable for sharp images in low light conditions and when using slower shutter speeds to capture flowing water or moving clouds. Look for one that’s lightweight yet stable, with adjustable legs for uneven terrain.
Filters are another crucial investment. A polarizing filter helps reduce glare from water and leaves, while enhancing colors and contrast in your scenes. Neutral density filters are perfect for creating those silky-smooth waterfall effects or managing bright daylight exposure.
Don’t forget about weather protection! A good rain cover for your camera is essential, as nature doesn’t always cooperate with perfect conditions. Lens cleaning supplies should always be in your bag – a microfiber cloth and cleaning solution will help keep your glass crystal clear.
Finally, invest in a comfortable camera bag that can handle outdoor conditions. Look for one with weather-resistant materials, plenty of padding, and enough space for your gear and some basic supplies like water and snacks.
Camera Settings for Nature Shots
Mastering Manual Mode
Taking control of your camera’s manual settings is a game-changer for nature photography. While auto mode can produce decent results, understanding and using manual settings allows you to capture nature exactly as you envision it.
Start by mastering the exposure triangle: aperture, shutter speed, and ISO. For landscape shots, try using a smaller aperture (higher f-number like f/8 or f/11) to achieve greater depth of field, ensuring both foreground and background are sharp. When photographing wildlife, opt for faster shutter speeds (1/500 or higher) to freeze motion, especially for birds in flight or moving animals.
ISO should be kept as low as possible (typically 100-400) in good lighting conditions to minimize digital noise. However, don’t be afraid to increase it in darker situations, like forest photography or during golden hour.
For flowing water or waterfalls, experiment with slower shutter speeds (1/15 or longer) to create that silky-smooth effect. Remember to use a tripod for these shots to avoid camera shake.
Manual focus can be particularly useful when shooting through foliage or in low-contrast situations where autofocus might struggle. Use your camera’s live view and zoom feature to ensure precise focusing, especially for macro shots of flowers or insects.
Practice adjusting these settings until they become second nature. Start in one location and experiment with different combinations to understand how each setting affects your images. Keep a photography journal to note which settings work best for different scenarios.
Understanding Light and Exposure
Light is the foundation of photography, and mastering exposure in nature settings can transform your images from ordinary to extraordinary. When working with natural light, you’ll encounter various challenges and opportunities throughout the day.
Golden hour, occurring during the first and last hours of sunlight, offers warm, soft illumination perfect for landscapes and wildlife. During this time, use a slightly lower exposure compensation (-0.3 to -0.7) to preserve the rich colors and prevent highlight blowout.
For harsh midday sun, consider using a polarizing filter to manage reflections and enhance color saturation. When shooting in bright conditions, the histogram is your best friend – keep an eye on it to avoid losing detail in highlights or shadows. If your camera has highlight alert (blinking highlights), enable it for quick exposure checks.
Overcast days provide nature photographers with beautiful, diffused light that’s ideal for close-up shots of flowers and foliage. In these conditions, you might need to increase exposure slightly (+0.3 to +0.7) to maintain proper brightness and detail.
For challenging lighting situations, like photographing in dense forests or during sunset, bracketing your exposures can help ensure you capture all the detail you need. Take three shots: one at the measured exposure, one slightly underexposed, and one slightly overexposed. This technique gives you flexibility when processing your images later.
Focus Techniques
Achieving sharp focus is crucial in nature photography, and there are several reliable techniques to help you capture crisp, detailed images. Start by using your camera’s autofocus points strategically – for wildlife, focus on the animal’s nearest eye, while for landscapes, focus about one-third into the scene to maximize depth of field.
When shooting in low light or with moving subjects, switch to back-button focus. This technique separates focus from the shutter button, giving you more control over when and where your camera focuses. It’s particularly useful when tracking birds in flight or photographing insects.
For macro photography, consider focus stacking. Take multiple shots at slightly different focus points and combine them in post-processing. This ensures your entire subject is tack-sharp, from the nearest point to the farthest.
Remember to use a tripod whenever possible, especially during golden hour or in dim forest conditions. Enable your camera’s image stabilization if available, but turn it off when using a tripod to prevent unnecessary compensation.
Manual focus can be your best friend for certain situations, like shooting through foliage or capturing intricate details in flowers. Use your camera’s live view and zoom function to achieve precise focus – this is especially helpful for macro shots where every millimeter counts.
Field Techniques and Composition
Finding the Right Angle
Finding the perfect angle can transform an ordinary nature photo into something extraordinary. As a beginner, your instinct might be to shoot everything at eye level, but the most captivating nature photographs often come from unexpected perspectives.
Get low to the ground when photographing small subjects like wildflowers or insects. This eye-level perspective creates a more intimate connection with your subject and can make even tiny flowers appear larger than life. For larger subjects like trees, try lying on your back and shooting upward to capture their towering majesty, particularly effective when capturing sunlight filtering through the canopy.
When photographing landscapes, elevation is your friend. Scout for higher vantage points that offer sweeping views of the scene. These elevated positions are perfect for creating stunning panoramic nature shots that capture the grandeur of the landscape.
Don’t forget about the rule of thirds – imagine your frame divided into a 3×3 grid and position key elements along these lines or at their intersections. This simple technique can dramatically improve your composition. However, don’t be afraid to break this rule when the scene calls for it.
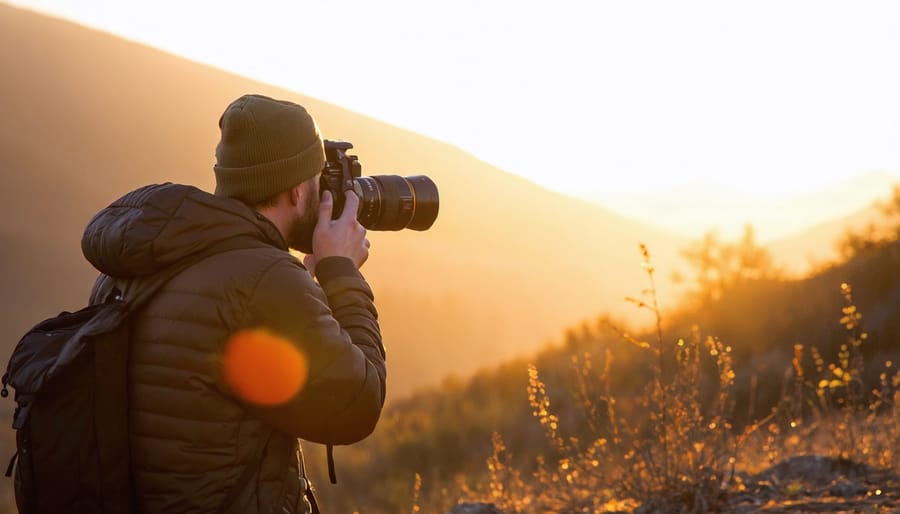
Experiment with different angles relative to the sun. Side-lighting can reveal texture and depth, while backlighting can create beautiful silhouettes or highlight translucent subjects. During golden hour (just after sunrise or before sunset), position yourself so that the warm, directional light enhances your subject’s natural beauty.
Remember to move around your subject, taking test shots from different positions. Sometimes a slight shift in angle can make the difference between an ordinary photo and a remarkable one.
Working with Natural Light
Natural light is your most powerful ally in nature photography, and understanding how to harness it can transform your images from ordinary to extraordinary. The coveted “golden hour” – occurring during the first hour after sunrise and the last hour before sunset – provides warm, directional light that creates stunning depth and dimension in your photographs.
During golden hour, position yourself so the light falls at a 45-degree angle to your subject. This creates appealing shadows and highlights that enhance texture and form. The soft, warm tones during this time are particularly flattering for wildlife portraits and landscape compositions.
However, don’t limit yourself to golden hour shoots. Overcast days offer their own advantages, acting like a giant softbox that eliminates harsh shadows and reduces contrast. This diffused light is perfect for capturing delicate details in flowers and foliage. If you’re interested in expanding your shooting schedule, many of these lighting principles also apply to night photography techniques.
For midday shooting, look for opportunities in shaded areas or use natural features like trees to filter harsh sunlight. Remember that the quality of light changes dramatically with weather conditions and seasons. Monitoring weather forecasts and planning your shoots accordingly can help you anticipate optimal lighting conditions.
A polarizing filter can be invaluable for managing natural light, particularly when photographing water or foliage. It reduces glare and enhances color saturation, making it easier to capture the true vibrancy of natural scenes. Start paying attention to how light interacts with your subjects throughout the day, and you’ll develop an intuitive sense of when and where to shoot for the best results.
Common Mistakes to Avoid
Technical Pitfalls
When starting out in nature photography, several technical pitfalls can hinder your success. One of the most common mistakes is relying too heavily on automatic settings. While “Auto” mode can be useful, it often struggles with complex lighting situations common in nature, like dappled sunlight through trees or backlit subjects during golden hour.
Another frequent error is incorrect focus placement. Many beginners focus on the closest part of their subject, which can leave important elements blurry. For wildlife shots, always ensure the eyes are sharp – they’re the window to your subject’s soul. With landscapes, forgetting to account for hyperfocal distance can result in unnecessarily blurry foregrounds or backgrounds.
Camera shake is particularly problematic in nature photography, especially in low-light conditions or when using longer lenses for wildlife shots. Many newcomers forget to adjust their shutter speed according to their focal length or neglect to use a tripod when necessary.
Exposure mistakes are also common, particularly when dealing with high-contrast scenes. Bright skies and dark foregrounds can trick your camera’s meter, leading to blown-out highlights or muddy shadows. Learning to read your histogram and use exposure compensation can help avoid these issues.
Finally, many beginners overlook the importance of proper white balance settings, especially during golden hour or in heavily shaded areas. Auto white balance can produce inconsistent results, making your lush green forest appear yellowish or your pristine snow scene look too blue.
Environmental Considerations
Nature photography comes with a responsibility to protect the very subjects we aim to capture. The golden rule is simple: leave no trace. Always stick to marked trails and viewing areas to prevent soil erosion and protect delicate vegetation. Remember that your perfect shot isn’t worth damaging the environment or disturbing wildlife.
When photographing wildlife, maintain a safe and respectful distance. Using a telephoto lens allows you to capture intimate shots without causing stress to animals. Never bait or lure wildlife for a photo opportunity, as this can alter their natural behavior and potentially endanger both the animals and other visitors.
Be mindful of delicate ecosystems, particularly in wetlands or alpine areas. Avoid trampling vegetation or moving natural elements for a better composition. If you find an interesting fallen branch or rock formation, photograph it as is rather than rearranging the scene.
During dawn and dusk shoots, use headlamps with red lights to minimize disruption to nocturnal wildlife. Pack out everything you bring in, including batteries, memory cards, or any other photography-related waste. Consider joining local conservation groups or contributing your images to environmental causes – this way, your photography can actively support nature preservation.
Finally, share your environmental knowledge with fellow photographers. Leading by example and educating others about responsible nature photography helps ensure these beautiful locations remain pristine for future generations to capture and enjoy.
Nature photography is a rewarding journey that combines technical skill, artistic vision, and a deep appreciation for the natural world. As you’ve learned throughout this guide, success in nature photography comes from mastering the basics while developing your unique creative perspective.
Remember that your camera is just a tool – it’s your eye for composition, understanding of light, and patience that will truly make your images stand out. Start with the fundamental techniques we’ve covered: proper exposure settings, thoughtful composition, and working with natural light. As you become more comfortable with these elements, gradually experiment with more advanced techniques and different subjects.
Don’t be discouraged if your first attempts don’t match your expectations. Nature photography requires practice, persistence, and often multiple attempts to capture that perfect moment. Weather conditions, animal behavior, and lighting can be unpredictable, but these challenges are part of what makes nature photography so exciting and rewarding.
Most importantly, always prioritize the well-being of your subjects and their environment. The best nature photographers are also passionate conservationists who understand their role in preserving the natural world they document.
Take your camera out regularly, even if it’s just to your local park or backyard. Every outdoor session is an opportunity to learn and improve. With time and practice, you’ll develop both your technical skills and your unique photographic style. Happy shooting!