
Store photographs across multiple physical drives and cloud services simultaneously, implementing a robust backup workflow that protects against both hardware failure and natural disasters. Digital photography has transformed how we capture moments, but it’s also created a critical need for sophisticated storage solutions that safeguard our visual legacy. Professional photographers now routinely generate terabytes of data annually, while even casual enthusiasts can quickly amass thousands of high-resolution images that demand secure, organized storage systems. The challenge isn’t just about finding space – it’s about creating an infrastructure that ensures immediate access, maintains file integrity, and preserves irreplaceable memories for decades to come. Whether you’re managing a professional portfolio or preserving family photographs, implementing the right storage strategy has become as crucial as mastering camera techniques. This guide cuts through the complexity of modern photography storage, delivering practical solutions for both working professionals and passionate enthusiasts who need to protect and organize their growing image collections.
Understanding Your Storage Needs
Calculating Your Storage Requirements
Determining how much storage you’ll need for your photography starts with understanding your shooting habits and file formats. Let’s break it down into a simple calculation process.
First, consider how many photos you typically shoot per session and how often you shoot. For example, if you shoot 500 photos at a wedding and work two weddings per month, that’s roughly 1,000 images monthly.
Next, look at your file sizes. RAW files from modern cameras can range from 25MB to 100MB per image, while high-quality JPEGs typically range from 5MB to 15MB. Let’s do the math: if you’re shooting RAW with a 30MB average file size, those 1,000 monthly images would require approximately 30GB of storage per month, or 360GB annually.
Don’t forget to factor in edited versions of your images. A good rule of thumb is to multiply your initial storage estimate by 1.5 to account for edited files and variations. In our example, this brings the annual requirement to 540GB.
Remember to include some buffer space – aim for 20% extra storage than your calculated needs. This gives you room for growth and prevents storage stress when you’re approaching capacity. For our example photographer, a 1TB drive would comfortably accommodate a year’s worth of work with room to spare.
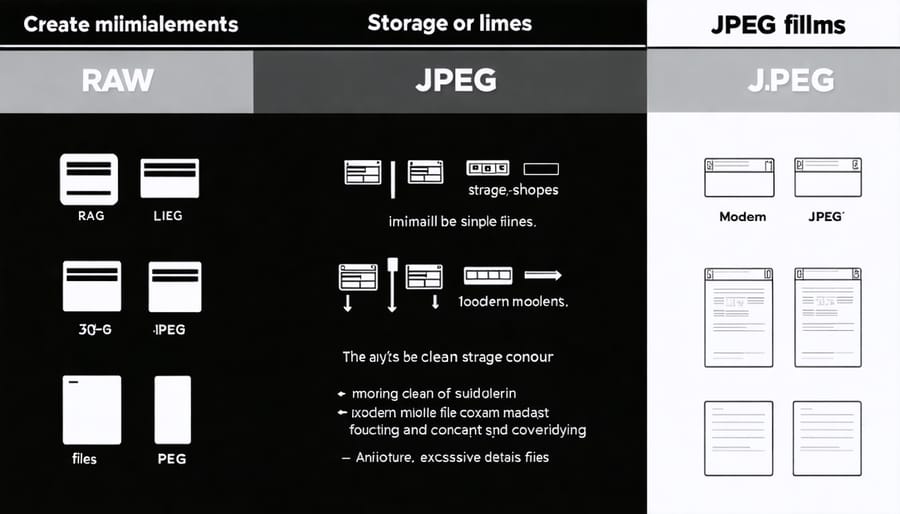
RAW vs. JPEG Storage Considerations
When deciding between RAW and JPEG formats, storage space becomes a crucial consideration. RAW files typically consume 20-40 MB per image, while their JPEG counterparts might only take up 3-10 MB, depending on quality settings and image complexity. This significant difference means you’ll need roughly 3-4 times more storage space when shooting in RAW.
Consider this practical example: a weekend wedding shoot producing 2,000 images would require approximately 60-80GB of storage in RAW format, while the same number of high-quality JPEGs might only need 15-20GB. However, don’t let these numbers automatically push you toward JPEG. RAW files offer unparalleled editing flexibility and preserve all the original image data your camera captured.
Many photographers adopt a hybrid approach to balance storage needs with creative control. For critical shoots or artistic work where post-processing is essential, they shoot in RAW. For casual snapshots or events where immediate sharing is important, JPEG becomes the practical choice. Some cameras even offer RAW+JPEG options, though this naturally requires the most storage space.
Remember that storage costs have decreased significantly over the years, making RAW storage more accessible than ever. When in doubt, shooting in RAW provides a safety net for future editing needs, even if it means investing in additional storage solutions.
Primary Storage Solutions
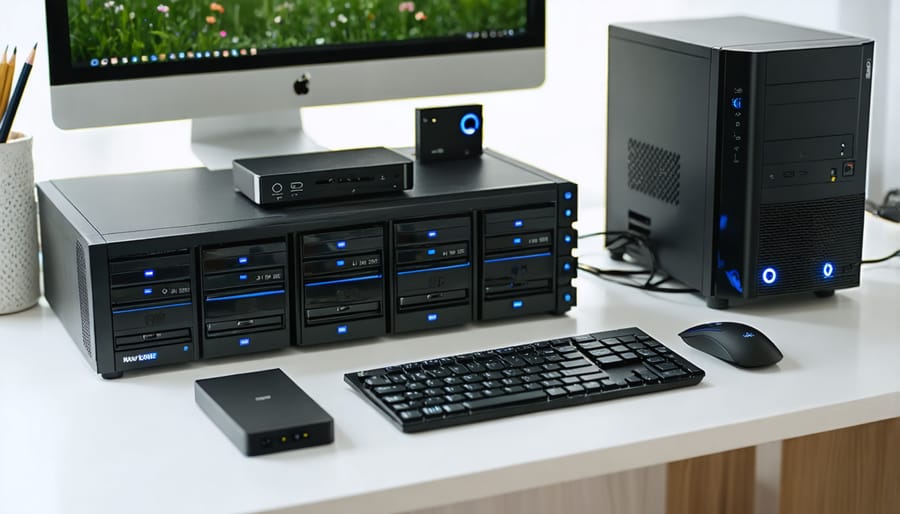
External Hard Drives
External hard drives remain a cornerstone of photography storage, offering a perfect balance of portability, capacity, and reliability. They come in two main types: traditional Hard Disk Drives (HDDs) and Solid State Drives (SSDs). HDDs offer more storage for your money, making them ideal for photographers with extensive archives and those planning an efficient photo printing workflow.
HDDs excel in capacity and affordability but are more vulnerable to physical damage due to their moving parts. The Western Digital My Passport series and Seagate Backup Plus drives are reliable choices, offering up to 5TB of storage at reasonable prices. For professionals who need faster transfer speeds and enhanced durability, SSDs like the Samsung T7 or SanDisk Extreme Portable SSD are worth the premium price.
When choosing an external drive, consider these key factors: transfer speed (USB 3.0 or higher is essential), durability (especially if you shoot on location), and reliability (look for drives with good warranties and backup features). For optimal protection, use drives with built-in encryption and password protection.
Remember to always handle your drives with care and maintain at least one backup copy of your important photos. Many photographers follow the 3-2-1 backup rule: three copies of your data, on two different types of media, with one copy stored off-site.
Network Attached Storage (NAS)
Network Attached Storage (NAS) systems offer photographers a robust solution for storing and accessing their photo collections across multiple devices. Think of a NAS as your personal cloud server that lives in your home or studio, providing the perfect balance between accessibility and security.
A NAS system typically consists of multiple hard drives working together, offering both storage capacity and data protection through RAID configurations. This means your precious photos remain safe even if one drive fails. Most modern NAS devices also provide remote access capabilities, allowing you to browse and download your photos from anywhere with an internet connection.
Setting up a NAS requires some initial investment and technical know-how, but the benefits are worth it. When choosing a NAS for photography, consider units with at least two drive bays for redundancy. Popular brands like Synology and QNAP offer user-friendly interfaces and photography-specific features such as automatic photo organization and RAW file preview support.
For optimal performance, connect your NAS directly to your router via ethernet cable and opt for drives specifically designed for NAS use. Many photographers find that a 4-bay NAS with 4-8TB drives provides ample room for growth while maintaining good speed and reliability. Remember to implement a backup strategy beyond your NAS, as it shouldn’t be your only copy of important images.
Cloud Storage Services
Cloud storage has become an essential component of modern photography workflows, offering photographers secure and accessible solutions for their precious images. The three major players in this space – Google Photos, iCloud, and Adobe Creative Cloud – each bring unique advantages to the table.
Google Photos shines with its powerful AI-driven search capabilities and generous free storage for high-quality compressed images. While professional photographers might prefer the original quality option, the compression is barely noticeable for most uses. The platform’s sharing features and automatic organization make it particularly appealing for casual photographers.
iCloud seamlessly integrates with Apple devices, making it a natural choice for photographers deeply invested in the Apple ecosystem. The platform’s automatic syncing across devices ensures your photos are always accessible, though the 5GB free storage tier fills up quickly. Just remember to include cloud storage checks in your regular equipment maintenance checklist.
Adobe Creative Cloud, while pricier, offers specialized features for professional photographers. The Photography Plan includes both cloud storage and professional editing tools like Lightroom and Photoshop. Its advanced organization features and raw file support make it ideal for serious photographers.
For maximum security, consider implementing a multi-cloud strategy, using one service for primary storage and another for backup. Remember to factor in monthly costs, storage limits, and file format support when choosing your cloud storage solution.
Backup Strategies That Work
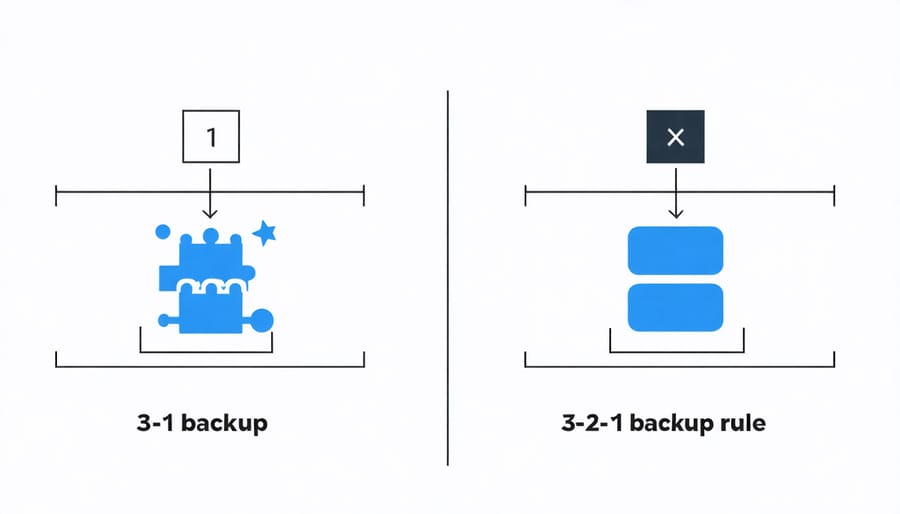
The 3-2-1 Backup Rule
When it comes to protecting your precious photos, the 3-2-1 backup rule stands as the gold standard for creating a fail-safe backup system. This time-tested strategy is remarkably simple yet incredibly effective: keep 3 copies of your data, store them on 2 different types of media, and keep 1 copy off-site.
Let’s break this down into practical terms. Your first copy is typically your primary working files, stored on your computer’s internal drive. The second copy might live on an external hard drive or NAS (Network Attached Storage) device, providing quick access when needed. For your third copy, consider cloud storage services like Google Drive, Amazon Photos, or dedicated photography platforms like SmugMug or Backblaze.
The “2 different types of media” rule helps protect against technology-specific failures. For instance, combine solid-state drives (SSD) with traditional hard disk drives (HDD), or local storage with cloud solutions. This diversification ensures that if one technology fails, your photos remain safe on another.
The off-site component is crucial for protecting against local disasters like fires, floods, or theft. Cloud storage naturally fulfills this requirement, but you could also keep an external drive at a different location, such as your office or a safety deposit box.
Remember to regularly test your backup system by attempting to restore files. There’s nothing worse than discovering your backup strategy has failed when you need it most. Set a monthly reminder to verify your backups and ensure all three copies remain synchronized with your latest work.
Automated Backup Solutions
Protecting your precious photos shouldn’t be a manual chore, which is why automated backup solutions are essential for any photographer’s workflow. These systems work silently in the background, ensuring your images are safely duplicated without you having to remember to do it.
One of the most popular automated solutions is cloud-based backup services like Google Photos, iCloud, or Backblaze. These services automatically sync your photos whenever your device connects to the internet, providing peace of mind and off-site storage protection. Many photographers set up their cameras or memory cards to automatically upload images when connected to their computer or Wi-Fi network.
For local backups, software solutions like Time Machine (for Mac users) or Windows File History offer seamless automated backups to external drives. Professional photographers often employ dedicated backup software like Chronosync or GoodSync, which can be configured to automatically duplicate files across multiple drives or network-attached storage (NAS) devices.
NAS systems themselves often come with built-in backup software that can be scheduled to run at specific times. For instance, Synology’s Hyper Backup or QNAP’s Hybrid Backup Sync can automatically create multiple copies of your photo library across different drives or cloud services.
The key to successful automated backup is the 3-2-1 strategy: three copies of your data, on two different types of media, with one copy stored off-site. Modern automated solutions make this easier than ever by combining local and cloud backups in a single system. Remember to regularly verify your backups are working correctly, as automation is only reliable if properly maintained and monitored.
Organization and Retrieval Systems
File Naming Conventions
A consistent file naming system is your secret weapon for keeping your photo library organized and easily searchable. Start by creating a standard format that includes key information like the date, location, and event or subject. For example: “YYYYMMDD_Location_Event_001” (20231215_Paris_EiffelTower_001).
Including the date at the beginning ensures your files are automatically sorted chronologically in your folders. Use underscores or hyphens instead of spaces to prevent compatibility issues across different systems and platforms. Avoid special characters (#, @, %, etc.) that might cause problems during file transfers or backups.
For professional photographers handling multiple shoots, consider incorporating the client’s name or project code: “YYYYMMDD_ClientName_ProjectType_001”. Wedding photographers might use: “YYYYMMDD_SmithWedding_Ceremony_001”.
Sequential numbering (001, 002, etc.) at the end helps maintain the original capture order and prevents duplicate filenames. If you’re organizing personal photos, you might prefer a simpler system like “YYYYMMDD_FamilyVacation_001”.
Consider using prefixes for different types of images: “RAW_” for original files, “EDT_” for edited versions, and “FINAL_” for client-ready images. This makes it easier to identify different versions of the same photo.
Remember to be consistent with your chosen naming convention. Taking time to rename files properly during import saves countless hours of searching later. Many photo management software tools offer batch renaming features, making it easier to implement your naming system across large collections of images.
Digital Asset Management (DAM) Software
Digital Asset Management (DAM) software has revolutionized how photographers organize, store, and access their growing image collections. Popular solutions like Adobe Lightroom, Capture One, and PhotoMechanic offer robust features that go beyond basic file management, integrating seamlessly with your camera control software for a streamlined workflow.
Adobe Lightroom remains the industry standard, offering a comprehensive solution that combines photo organization with powerful editing capabilities. Its catalog system allows photographers to manage thousands of images without moving original files, while smart collections and AI-powered tagging make finding specific photos a breeze.
Capture One provides a more specialized approach, particularly beloved by studio photographers for its tethering capabilities and superior color editing tools. Its catalog system offers flexible organization options, including customizable metadata fields and advanced search functionality.
For those prioritizing speed and efficiency, PhotoMechanic excels at rapid culling and metadata management. Sports and event photographers often choose this solution for its lightning-fast image preview and robust keywording features.
ACDSee Photo Studio offers a compelling alternative with its hybrid approach, combining traditional folder browsing with database-driven organization. Its facial recognition and advanced search capabilities make it particularly useful for portrait photographers managing large client libraries.
When choosing a DAM solution, consider factors like your workflow needs, existing software ecosystem, and budget. Many photographers find success using a combination of tools – perhaps PhotoMechanic for initial culling, then Lightroom for long-term organization and editing. The key is finding a system that grows with your photography journey while keeping your assets secure and accessible.

Protecting your precious photographic memories doesn’t have to be complicated, but it does require thoughtful planning and consistent execution. Throughout this guide, we’ve explored various storage solutions that cater to different needs and budgets, from external hard drives to cloud storage services and professional-grade NAS systems.
Remember the fundamental 3-2-1 backup rule: maintain three copies of your photos, store them on two different types of media, and keep one copy off-site. This strategy provides robust protection against hardware failure, accidents, and natural disasters.
To put your storage plan into action, start by assessing your current photo collection size and growth rate. Choose a primary storage solution that offers room for expansion, then implement your backup strategy in phases if needed. Begin with the most critical photos first, then gradually expand your system to include your entire collection.
Consider these next steps:
– Audit your existing storage setup and identify potential vulnerabilities
– Calculate your storage needs for the next 2-3 years
– Select and purchase your primary storage solution
– Set up an automated backup system
– Create a file organization system that works for your workflow
– Schedule regular maintenance checks of your storage systems
Don’t wait for a crisis to start protecting your photos. Every day you delay implementing a proper storage solution puts your valuable images at risk. Start small if you need to, but start today. Your future self will thank you for preserving these irreplaceable moments with such care and attention.
Remember that storage technology continues to evolve, so review and update your strategy annually to ensure it still meets your needs and takes advantage of new developments in the field.