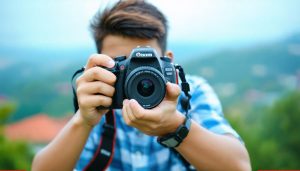
Grip your camera firmly with your right hand, wrapping your fingers around the body and using your index finger to control the shutter button. Place your left hand under the lens to support the camera’s weight and stabilize the lens. For added stability, tuck your elbows into your body and use proper camera grip techniques like the “push-pull” method, bracing the camera against your face. When shooting vertically, rotate the camera 90 degrees clockwise, keeping your right elbow tucked in for support.
The Anatomy of Camera Grip
Right Hand Grip
Your right hand plays a crucial role in holding the camera steady and accessing key controls. Grip the right side of the camera body firmly with your right hand, ensuring your index finger rests comfortably on the shutter button. Keep your middle, ring, and pinky fingers wrapped securely around the camera grip, providing stability and balance. Use your right thumb to support the camera from underneath, resting it on the back of the camera or the space next to the LCD screen.
The index finger is responsible for pressing the shutter button to capture photos, while the thumb controls the rear dial, which is often used to adjust aperture, shutter speed, or other settings. Your middle finger may also have access to additional customizable function buttons on some camera models. By maintaining a firm grip with your right hand and keeping your fingers positioned on these essential controls, you’ll be able to make quick adjustments and take shots without losing stability or focus.
Left Hand Support
The left hand plays a vital role in stabilizing your camera and supporting the weight of the lens. Grip the lens barrel or the lens shade with your left hand, keeping your elbow tucked in close to your body for added stability. If your lens has a built-in tripod mount, you can use that as a grip point. Avoid holding the camera body with your left hand, as this can introduce shake and won’t provide adequate support for heavier lenses. Spread your fingers to create a stable base, and apply gentle pressure to keep the lens steady. When using longer lenses, move your left hand further out on the lens barrel to maintain balance. For vertical shots, keep your left hand underneath the lens to support its weight. Adapting your left-hand grip based on the lens and shooting situation will help you capture sharp, blur-free images.
Stance and Arm Position
A stable stance is essential for sharp photos, especially when shooting handheld. Start by standing with your feet shoulder-width apart, one slightly in front of the other. This provides a solid base and helps minimize body sway. Keep your elbows tucked close to your body for added stability. If possible, lean against a wall or use a knee for support when kneeling. When holding the camera, grip it firmly but not too tightly. Use both hands – one around the camera body and the other supporting the lens. This two-handed grip helps counteract camera shake. Avoid extending your arms fully, as this can introduce unwanted movement. Instead, keep your arms bent and close to your body for optimal stability.
Adapting Your Grip for Different Shooting Scenarios
Portrait Orientation
When rotating the camera to shoot in portrait orientation, you’ll need to adjust your grip. For most people, it feels natural to support the lens from below with your left hand. Cradle the lens barrel in your palm, with your fingers wrapped around it. Your right hand should maintain its position on the grip, with your index finger on the shutter button. This allows you to comfortably control the camera while keeping it steady. If the lens is too heavy to support from below, try bracing the camera body against your face for added stability. As with landscape orientation, keep your elbows tucked in close to your body. With practice, you’ll develop muscle memory for quickly switching between orientations while maintaining a secure, stable grip.
Tripod Technique
When using a tripod, ensure that the camera is securely attached to the tripod head and that all locks are tightened to prevent any movement. If your tripod has a center column, consider lowering it for added stability, especially in windy conditions. Engage the camera’s mirror lockup feature, if available, to minimize vibrations caused by the mirror slapping up and down during exposure. Use a remote shutter release or your camera’s self-timer to trigger the shutter without physically touching the camera, as even the slightest pressure can cause blur. If your lens has an image stabilization feature, turn it off when using a tripod, as the stabilization mechanism may actually introduce vibrations when the camera is already stable. Lastly, if shooting on soft or uneven ground, consider hanging a weight from the center hook of your tripod to further stabilize it and prevent any unwanted movement during long exposures.
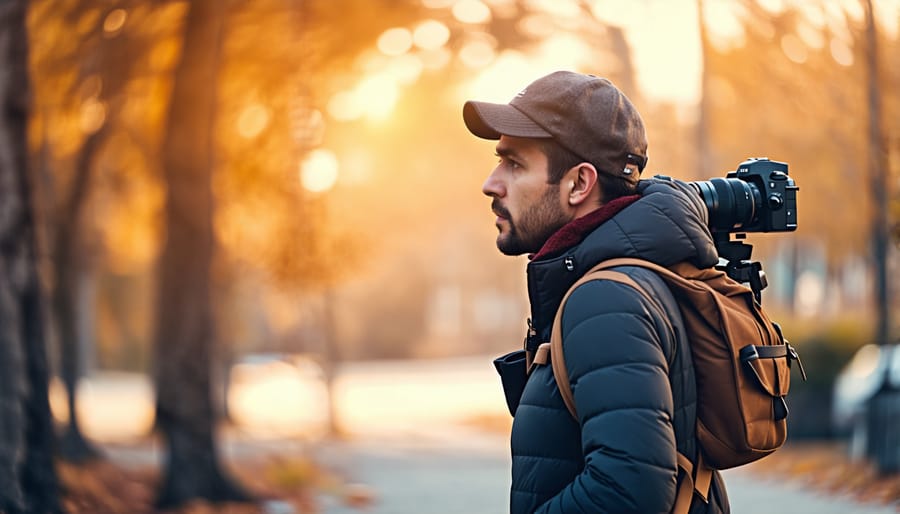
Shooting with Long Lenses
When using long telephoto lenses, it’s crucial to provide adequate support to minimize camera shake and ensure sharp images. Firstly, use a sturdy tripod or monopod whenever possible, as the added weight and length of telephoto lenses can make handholding challenging. If handholding is necessary, adopt a wide, stable stance with your elbows tucked in close to your body for added support. Consider using a camera or lens with built-in image stabilization to counteract any remaining camera shake. Additionally, utilize your camera’s burst mode to capture multiple shots in quick succession, increasing the likelihood of obtaining a tack-sharp image.
Mastering Breathing and Posture
Controlled breathing and good posture play a crucial role in minimizing camera shake when holding your camera. When you breathe, your body naturally moves, which can translate into unwanted camera movement and blurry photos. To combat this, practice taking slow, deep breaths and exhaling gently while pressing the shutter button. This technique helps you maintain a steadier grip on the camera.
In addition to breathing, your posture significantly impacts camera stability. Stand with your feet shoulder-width apart, keeping your elbows close to your body for added support. If you’re sitting, ensure your back is straight and your arms are tucked in. Good posture not only minimizes camera shake but also reduces fatigue during long shooting sessions.
When handholding your camera, avoid tensing up your muscles, as this can lead to tremors and unsteady shots. Instead, maintain a relaxed grip and use your body as a stable base. If you find yourself in a low-light situation or using a slower shutter speed, consider bracing yourself against a wall, tree, or other sturdy object to further minimize camera movement.
Incorporating these breathing and posture techniques into your photography workflow will help you capture sharper, clearer images. With practice, controlled breathing and good posture will become second nature, allowing you to focus on composing stunning shots without worrying about camera shake.
Accessories for Added Stability
While mastering the proper handgrip techniques is essential for capturing sharp photos, there are also several useful gear accessories that can provide added stability and support. Handgrips, for example, attach to the bottom of your camera and offer a more comfortable, secure hold. They’re especially handy for heavier camera setups or during lengthy shoots.
Camera straps are another simple yet effective tool. Wearing your camera strap around your neck or cross-body helps distribute the weight and prevents accidental drops. Look for straps with padding for extra comfort during all-day use.
For the ultimate in shake-free shooting, consider investing in a stabilizer. Gimbals and monopods are popular choices that allow fluid movement while keeping your camera level and steady. They’re fantastic for capturing smooth video footage or crisp low-light photos.
Tripods, of course, are the tried-and-true solution for rock-solid stability. While less mobile than handheld options, a sturdy tripod is indispensable for long exposures, night photography, self-portraits, and tricky compositions that require precise framing.
Whichever accessories you choose, the goal is to maximize stability, minimize shake, and expand your creative options. Experiment to find the tools that best fit your needs and shooting style.
Conclusion
In conclusion, mastering the proper way to hold your camera is a fundamental skill that can greatly improve the sharpness and clarity of your photos. By following the techniques outlined in this article, such as using a firm grip, bracing your elbows, and maintaining good posture, you’ll be well on your way to capturing stunning, blur-free images. Remember, the key is to find a comfortable and stable position that allows you to control your camera effectively. As with any skill, practice makes perfect, so don’t be afraid to experiment with different grips and techniques until you find what works best for you. With time and dedication, you’ll develop the muscle memory and instincts needed to hold your camera properly in any situation, enabling you to focus on the creative aspects of photography and take your work to the next level.