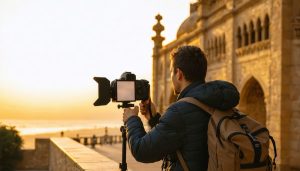
Soar above majestic landscapes with today’s most powerful storytelling tool: the drone. Mastering aerial landscape photography transforms ordinary vistas into extraordinary perspectives that tell compelling visual stories. From sweeping mountain ranges to meandering rivers, drone photography unlocks compositions previously reserved for helicopter pilots and satellite imagery.
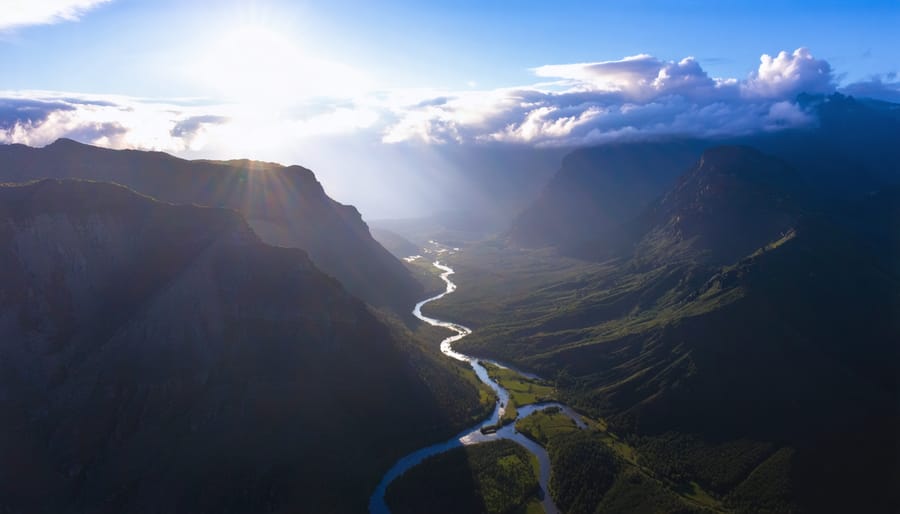
Flying at dawn or dusk maximizes dramatic lighting conditions, revealing textures and shadows impossible to capture from ground level. Position your drone between 100 and 400 feet altitude—the sweet spot where patterns emerge and landscapes reveal their hidden geometry. Master the interplay of foreground elements with distant horizons by using leading lines: rivers, roads, and ridgelines that draw viewers through your frame.
Consider weather conditions as your creative ally. Low-hanging clouds add depth, morning mist creates mystique, and storm fronts deliver drama. But success demands more than just getting airborne—it requires understanding your drone’s capabilities, mastering manual camera controls, and developing an eye for compositions that leverage the unique advantages of aerial perspectives.
Handle the technical challenges of aerial shooting by maintaining steady movements, using ND filters for slower shutter speeds, and bracketing exposures to capture the full dynamic range of dramatic landscapes. The result? Images that not only document locations but transport viewers to perspectives they’ve never experienced.
Essential Drone Equipment for Remote Landscape Photography
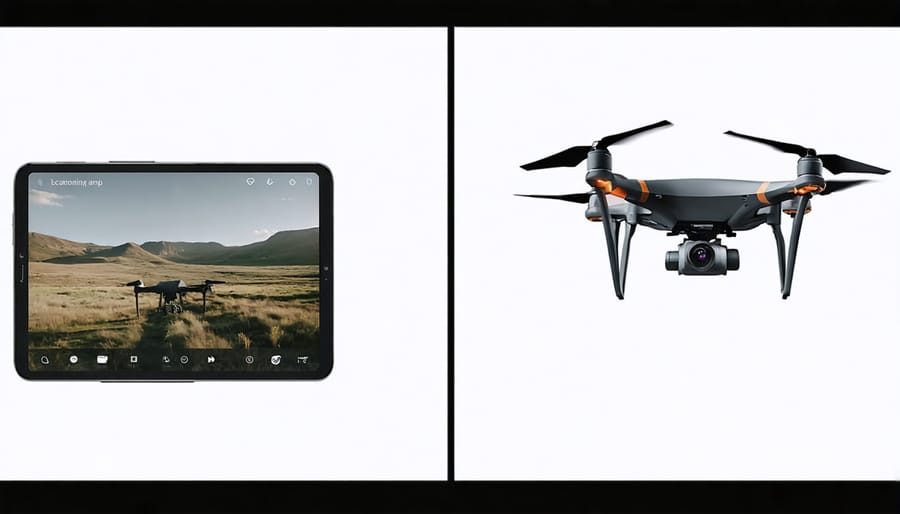
Choosing the Right Drone
When selecting a drone for landscape photography, several key features can make or break your aerial imaging experience. Flight time should be a top priority – aim for drones offering at least 25-30 minutes of flight time per battery, allowing you to capture the perfect shot without rushing. Consider carrying spare batteries for extended shooting sessions in remote locations.
Camera quality is crucial, with sensor size being particularly important. Look for drones equipped with at least a 1-inch sensor, which provides better low-light performance and dynamic range – essential for capturing dramatic landscapes during golden hour. A camera capable of shooting in RAW format will give you more flexibility in post-processing.
Weather resistance is another critical factor, especially when shooting in challenging environments. While most consumer drones aren’t completely weatherproof, models with higher IP ratings will better handle light rain and dusty conditions. Pay attention to wind resistance ratings too – stronger drones can maintain stability in winds up to 20-25 mph.
Additional features to consider include obstacle avoidance systems for safer flying in challenging terrain, automated flight modes for complex shots, and GPS positioning for precise control. The DJI Mavic 3 and Air 2S are excellent options that balance these features with portability, though budget-conscious photographers might consider the Mini 3 Pro as a capable alternative.
Remember to factor in portability – the best drone is one you’ll actually carry to remote locations. Consider the drone’s weight and folded dimensions, especially if you’ll be hiking to shooting locations.
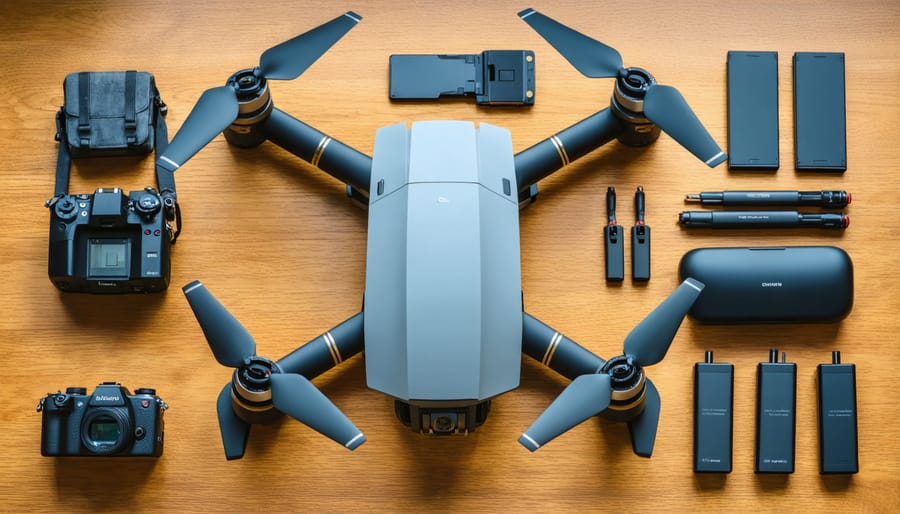
Critical Accessories
When venturing into drone landscape photography, having the right accessories can make the difference between capturing stunning shots and missing opportunities. Extra batteries are absolutely essential – pack at least three to four fully charged batteries for a typical shooting session. Remote locations often mean limited charging options, so a portable charging hub and power bank are invaluable companions.
ND (Neutral Density) filters are crucial for managing bright daylight conditions and achieving those silky-smooth water effects or dramatic motion blur in clouds. A set of ND4, ND8, and ND16 filters will cover most shooting scenarios. Polarizing filters are equally important, helping to reduce glare and enhance colors, particularly when shooting water bodies or dealing with reflective surfaces.
Protect your investment with a hard-shell carrying case. Look for one with custom-cut foam inserts that securely hold your drone and accessories. Landing pads are often overlooked but prove invaluable in dusty or wet conditions, preventing debris from damaging your drone’s motors and cameras.
Memory cards deserve special attention – invest in multiple high-speed cards with ample storage. Class 10 or UHS-3 rated cards are recommended for handling 4K footage. Don’t forget to pack a tablet sunshade for better screen visibility in bright conditions, and propeller guards for added safety when flying in challenging environments.
Planning Remote Landscape Shoots
Location Scouting and Access
Effective location scouting is crucial for successful drone landscape photography, and it begins long before you reach your destination. Start by utilizing tools like Google Earth, photography apps, and social media to identify promising locations. These location scouting tips can help you find unique perspectives and anticipate potential challenges.
Always research local drone regulations and airspace restrictions through official aviation websites or apps like B4UFLY or AirMap. Many locations require specific permits or have no-fly zones, especially near national parks, airports, or populated areas. Contact local authorities or land managers well in advance to secure necessary permissions.
Consider accessibility when planning your shoot. Look for safe takeoff and landing zones with clear sight lines and minimal obstacles. Remember that you’ll need to transport your equipment to the location, so factor in hiking distances and terrain difficulty. Weather patterns are also crucial – check historical weather data and forecasts for optimal flying conditions.
Scout your chosen location during different times of day to understand how light interacts with the landscape. Golden hour and blue hour often provide the most dramatic lighting for aerial photography, but midday can work well for certain subjects like water features or abstract patterns. Take note of potential hazards such as power lines, trees, or areas with poor GPS reception.
Creating a detailed location database with coordinates, access points, and permit requirements will help streamline future shoots and ensure you’re always prepared for the perfect shot while staying compliant with local regulations.
Weather and Timing Considerations
Weather and timing play crucial roles in capturing stunning drone landscape photographs. The golden hours – just after sunrise and before sunset – offer warm, directional light that creates dramatic shadows and highlights across the landscape. These periods typically provide the most favorable conditions for aerial photography, with the low sun angle revealing texture and depth in ways that midday light simply cannot match.
Cloud conditions can make or break your shot. While clear skies might seem ideal, partial cloud cover often adds drama and interest to your compositions. Stratocumulus clouds can create fascinating patterns of light and shadow on the ground, while dramatic storm clouds can add mood and atmosphere to your images.
Wind is a particular concern for drone photography. As a general rule, try to fly when wind speeds are below 15 mph for stable footage. Early mornings typically offer the calmest conditions, making them ideal for drone operations. However, be prepared to adapt – weather conditions can change quickly, especially in mountainous or coastal areas.
Seasonal considerations also impact your shots. Autumn provides rich colors and interesting patterns in forested areas, while winter snow can transform familiar landscapes into abstract compositions. Spring brings vibrant greens and flowering landscapes, while summer offers extended golden hours in many locations.
Always check weather forecasts specifically for your flying altitude, as conditions can differ significantly from ground level. Apps that provide detailed weather information for aviators can be particularly helpful. Remember to monitor humidity levels too – high humidity can cause condensation on your drone’s camera lens, potentially ruining your shots.
Advanced Drone Photography Techniques
Composition from Above
Composing landscape shots from above requires a fresh perspective on traditional composition techniques for stunning photos. When shooting from a drone, the world below becomes a canvas of patterns, textures, and leading lines that might go unnoticed from ground level.
Start by identifying natural patterns in the landscape. Rivers snake through valleys creating organic leading lines, while agricultural fields offer geometric shapes that can add structure to your composition. Look for contrasting elements – the interplay between light and shadow, texture variations, or color differences that create visual interest.
The rule of thirds remains valuable in aerial photography, but consider the unique opportunities that a bird’s-eye view provides. Position key landscape elements along these intersecting points, but don’t be afraid to experiment with symmetry, especially when capturing reflective surfaces like lakes or when shooting directly down on geometric patterns.
Height plays a crucial role in composition. Lower altitudes (50-100 feet) emphasize texture and detail, while higher elevations (200-400 feet) reveal broader patterns and relationships between landscape elements. Try different heights to find the sweet spot that best captures your subject’s essence.
Time your shots around golden hour when long shadows add depth and dimension to your aerial landscapes. The low-angle light creates dramatic contrasts and helps emphasize the natural contours of the land.
Camera Settings
When it comes to optimizing camera settings for drone landscape photography, finding the right balance is crucial. Start with shooting in RAW format to maximize post-processing flexibility and capture the full dynamic range of your scenes.
For most landscape shots, aim for an aperture between f/4 and f/8 to maintain sharpness while avoiding diffraction issues common in smaller drone sensors. Keep your ISO as low as possible, ideally at 100 or 200, to minimize noise in your images. This is particularly important in drone photography, where smaller sensors are more susceptible to noise at higher ISOs.
Shutter speed depends on your shooting conditions. In good light, use 1/200s or faster to ensure sharp images and compensate for drone movement. For dramatic motion effects with waves or clouds, you might go slower, but be aware that this requires extremely stable hovering conditions.
Consider using Auto Exposure Bracketing (AEB) for challenging lighting situations, particularly during golden hour or when shooting high-contrast scenes. This technique captures multiple exposures that can be merged later for better dynamic range.
For focusing, set your drone camera to infinity focus for most landscape shots. Enable any built-in sharpening features your drone offers, but keep them moderate to avoid artificial-looking results. Remember to check your white balance settings, though shooting in RAW gives you flexibility to adjust this later.
Movement and Dynamic Shots
Dynamic movement is what sets drone landscape photography apart from traditional ground-based shots, and mastering these movements can transform your images from static snapshots into cinematic masterpieces. The key to creating compelling motion lies in mastering three essential drone movements: the reveal, the orbit, and the pull-back.
The reveal movement involves starting with your drone behind an obstacle, then slowly rising or moving sideways to unveil the landscape. This technique works particularly well when photographing mountains, where you can start below a ridge and gradually reveal the vista beyond, creating a sense of discovery and anticipation.
Orbital movements add depth and dimension to your landscape compositions. By flying your drone in a circular pattern around a focal point, you can capture the changing relationship between foreground and background elements. This technique is especially effective when photographing isolated features like lone trees, rock formations, or small lakes.
The pull-back, or reverse reveal, starts with a tight composition of your subject before slowly moving backward to show its context within the broader landscape. This movement creates a powerful sense of scale and can make even modest landscapes appear epic and expansive.
When executing these movements, maintain a slow, steady pace – rushing the motion can result in jerky footage and missed opportunities. Use your drone’s intelligent flight modes when available, as they often provide smoother, more consistent movement than manual control.
Post-Processing Remote Landscape Drone Photos
Raw Processing Workflow
Processing raw drone footage requires a methodical approach to bring out the best in your aerial landscapes. Start by establishing a consistent post-processing workflow that begins with importing your RAW files into your preferred editing software, such as Adobe Lightroom or Capture One.
First, adjust the white balance to ensure natural-looking colors, particularly important for golden hour shots where warm tones need to be accurately represented. Next, tackle the exposure triangle adjustments: fine-tune your highlights to preserve cloud detail, recover shadows in darker areas, and adjust contrast to add depth to your landscape.
Color grading is crucial for drone landscapes. Work with HSL (Hue, Saturation, Luminance) adjustments to enhance specific colors without making them appear artificial. Pay special attention to blues in the sky and greens in vegetation, as these often need subtle refinement to look natural from an aerial perspective.
Address lens distortion and perspective issues common in drone photography. Most editing software includes automatic lens corrections, but you may need to manually adjust vertical and horizontal perspective to ensure straight horizons and proper building angles.
For sharpening, use a two-step approach: apply initial capture sharpening to counter any softness from the drone’s camera, followed by selective sharpening for key landscape elements. Finally, remove any visible sensor dust spots or artifacts, which are particularly noticeable in drone shots of clear skies.
Export your images in appropriate formats and sizes for your intended use, keeping both web-optimized versions and high-resolution files for printing.

Advanced Editing Techniques
Post-processing drone landscape photos requires specialized techniques to address unique challenges like perspective distortion and atmospheric haze. Start by applying lens corrections specifically designed for your drone’s camera to minimize barrel distortion, which is often more pronounced in aerial shots.
Color grading takes on extra importance in aerial landscapes. The atmosphere can create a blue cast, especially when shooting from higher altitudes. Use selective white balance adjustments and split-toning to restore natural colors while maintaining the atmospheric mood. Pay special attention to gradients in the sky, which often need careful balancing to avoid banding.
Perspective correction is crucial for architectural elements within landscapes. Use transform tools to adjust converging lines and ensure buildings appear properly aligned, even when shot at an angle. For pure landscape shots, subtle perspective adjustments can help emphasize natural leading lines and enhance composition.
One powerful technique specific to drone photography is selective clarity adjustment. Apply higher clarity to ground details while keeping atmospheric elements softer to create depth. Use luminosity masks to target specific brightness ranges, allowing you to enhance texture in mountains or forests while preserving the delicate qualities of clouds and mist.
Consider focus stacking for ultra-sharp images from foreground to background, particularly useful when shooting at lower altitudes. Blend multiple exposures taken at different focus points to achieve maximum detail throughout the frame. Finally, use careful noise reduction techniques, as drone sensors can struggle in low-light conditions. Apply noise reduction selectively to maintain sharpness in key areas while smoothing out problematic zones.
Remember to save your editing steps as presets to maintain consistency across a series of drone landscape images, especially when working on a cohesive portfolio or project.
Drone landscape photography opens up a world of creative possibilities that simply weren’t available to photographers just a few years ago. By taking to the skies, you can capture breathtaking perspectives of remote landscapes that tell compelling visual stories from entirely new angles. Whether you’re photographing sweeping mountain ranges, pristine coastlines, or vast deserts, the key to success lies in careful planning, technical proficiency, and a deep respect for both the environment and local regulations.
Remember that mastering drone landscape photography is a journey that requires patience and practice. Start with familiar locations before venturing into more remote areas, and always prioritize safety over getting the perfect shot. Take time to understand your equipment thoroughly, study weather patterns, and develop a workflow that works for you. The extra effort you put into preparation will invariably show in your final images.
As you continue to explore this exciting field, don’t be afraid to experiment with different heights, angles, and compositions. Each location presents unique opportunities to capture something truly special. Consider joining local drone photography communities to share experiences, learn from others, and discover new shooting locations.
The future of drone landscape photography is incredibly promising, with technology continuing to advance and new creative possibilities emerging. Whether you’re a hobbyist looking to capture memories of your adventures or a professional seeking to expand your portfolio, the sky is quite literally the limit. So charge those batteries, pack your gear, and head out to capture the world from above – there’s never been a better time to explore the captivating realm of drone landscape photography.