Download our comprehensive photography equipment checklist PDF to track maintenance schedules, calibration dates, and essential gear inventory in one organized document. Professional photographers know that methodically maintaining and protect your valuable equipment extends its lifespan and ensures consistent image quality. This master checklist, developed through decades of field experience, covers everything from sensor cleaning schedules to lens alignment verification and battery maintenance protocols. Whether you’re managing a professional studio or organizing personal gear, proper documentation prevents costly oversights and helps maintain your investment. The downloadable PDF includes customizable sections for cameras, lenses, lighting equipment, and accessories, complete with recommended maintenance intervals and verification procedures. Track serial numbers, purchase dates, warranty information, and insurance details in one centralized resource that travels with you to every shoot.
Essential Camera Body Maintenance
Sensor Cleaning Protocol
Maintaining a clean sensor is crucial for optimal sensor performance and spotless images. Here’s a systematic approach to sensor cleaning that every photographer should follow:
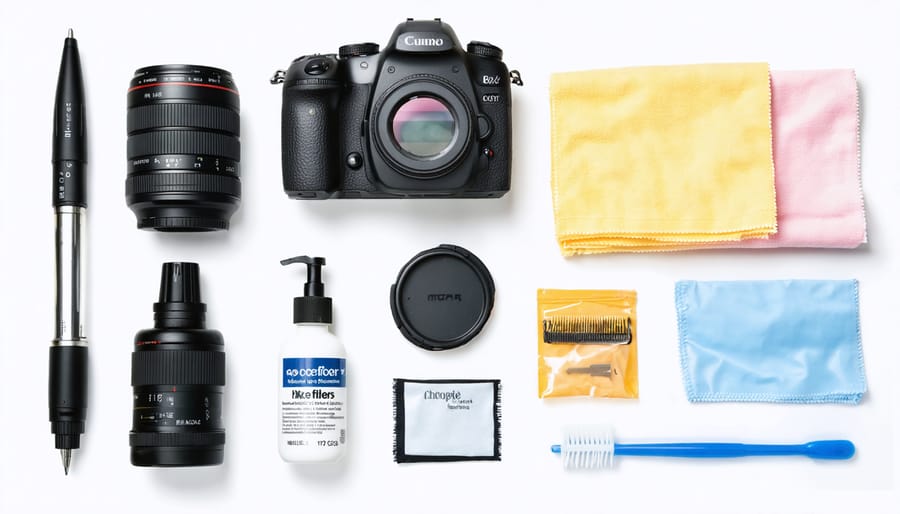
Essential Tools:
– Sensor cleaning swabs (appropriate size for your sensor)
– Sensor cleaning solution
– Rocket blower
– LED loupe or inspection light
– Microfiber cloths
– Clean workspace with good lighting
Step-by-Step Cleaning Process:
1. Preparation
– Ensure your camera battery is fully charged
– Find a clean, dust-free environment
– Wash and dry your hands thoroughly
– Have all tools within easy reach
2. Initial Inspection
– Set camera to sensor cleaning mode
– Use LED loupe to examine sensor surface
– Note locations of dust or spots
3. Dry Cleaning
– Use rocket blower first
– Hold camera face-down while cleaning
– Blow air across sensor surface gently
– Re-inspect with loupe
4. Wet Cleaning (if necessary)
– Apply 2-3 drops of solution to swab
– Swipe across sensor in one smooth motion
– Use new swab for each pass
– Clean from left to right, then top to bottom
5. Final Check
– Take test shot of plain white surface at f/16
– Review image at 100% magnification
– Repeat cleaning if spots remain
Remember to clean your sensor only when necessary, typically every few months or when spots become visible in images. Always refer to your camera’s manual for manufacturer-specific guidelines and warranty considerations.
Battery Contacts and Memory Card Slots
Proper maintenance of battery contacts and memory card slots is crucial for ensuring reliable camera operation. Clean battery contacts prevent power issues and extend battery life, while well-maintained card slots protect your precious images and prevent data corruption.
For battery contacts, inspect them monthly for signs of corrosion, dirt, or oxidation. Use a pencil eraser to gently clean metal contacts in both the battery compartment and on the battery itself. For stubborn residue, apply a small amount of isopropyl alcohol (91% or higher) to a cotton swab and carefully clean the contacts. Always ensure the contacts are completely dry before reinserting batteries.
Memory card slots require similar attention but demand even more care during cleaning. Use compressed air to remove dust and debris, holding the can upright and spraying in short bursts to prevent moisture buildup. If you notice card reading issues, inspect the pins inside the slot using a flashlight. Never insert metal tools or abrasive materials into card slots – if you spot bent pins, have them repaired by a professional.
Preventive measures are equally important. Store your camera in a dry environment and always insert/remove memory cards with the camera powered off. Consider using contact cleaner specifically designed for electronics when performing thorough maintenance. Keep spare batteries in a protective case with plastic covers over their contacts, and store memory cards in dedicated cases to prevent dust accumulation and static damage.
Remember to document these maintenance procedures in your equipment care log, noting any issues or unusual observations for future reference.
Lens Care and Calibration
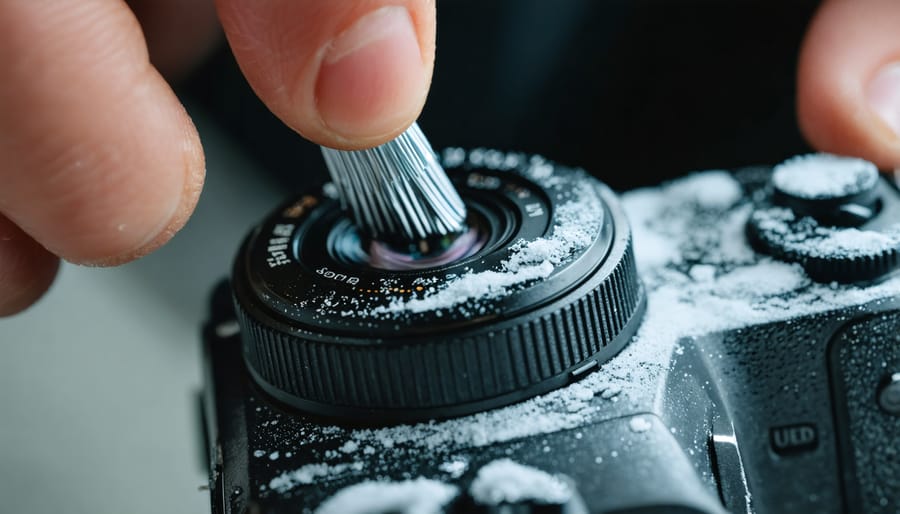
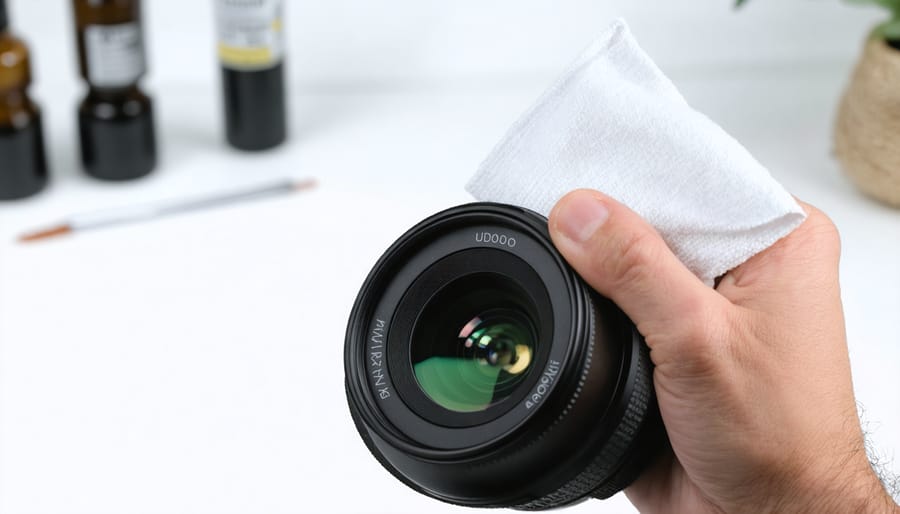
External Lens Cleaning
Keeping your lenses clean is crucial for maintaining image quality and protecting your investment. Start by using a rubber air blower to remove loose dust and particles – never use compressed air, as it can damage lens coatings. For stubborn debris, use a soft-bristled lens brush, gently sweeping from the center outward in a circular motion.
When deeper cleaning is needed, use a microfiber cloth specifically designed for optical elements. Apply a small amount of lens cleaning solution to the cloth – never directly to the lens. Gently clean in a circular motion from the center outward, being particularly careful around the edges where the glass meets the housing.
For particularly stubborn marks, use pre-moistened lens cleaning wipes, but ensure they’re specifically formulated for photographic equipment. Always use a fresh portion of the cleaning cloth or a new wipe for each cleaning session to avoid redistributing dirt or oils.
When cleaning filters, follow the same procedure but exercise extra caution, as some filters have delicate coatings that can be easily damaged. Store your cleaned lenses and filters in appropriate cases with lens caps attached, and keep silica gel packets in your storage area to prevent moisture buildup.
Remember to clean your equipment in a dust-free environment, and never attempt to clean the internal elements of your lenses – this should be left to professional service technicians.
Focus Calibration Steps
Achieving precise focus is crucial for sharp, professional-quality images. Here’s a systematic approach to calibrating your camera’s autofocus system. Start by setting up a focus target at a 45-degree angle, ensuring it’s well-lit and contains high-contrast elements. Position your camera on a sturdy tripod at a distance that’s typical for your shooting style.
Using camera calibration software can greatly simplify this process, but you can also perform manual tests. Take multiple test shots at your lens’s widest aperture, as focus discrepancies are most visible at large apertures. Make sure your subject distance remains consistent throughout the testing process.
If you notice consistent front or back focusing issues, access your camera’s AF fine-tune menu (available on most professional and enthusiast-level cameras). Make small adjustments in increments of 5 units, then retest. Keep detailed notes of your adjustments and results.
Remember to test each lens separately, as AF calibration values can vary between different lenses. Store these values in your camera’s memory for quick access when switching lenses. It’s recommended to perform this calibration annually or whenever you notice focus inconsistencies in your images.
Pro tip: Create test shots in both bright and low-light conditions to ensure your calibration holds up across different shooting scenarios.
Mount and Contact Care
Proper maintenance of your lens mount and electrical contacts is crucial for ensuring reliable camera-to-lens communication and preventing costly repairs. Start by inspecting the lens mount and contacts before each shooting session. Using a clean microfiber cloth, gently wipe around the metal mount to remove any dust or debris. For stubborn dirt, use a cotton swab slightly dampened with isopropyl alcohol, being careful not to let any liquid drip into the camera or lens.
Pay special attention to the gold-colored electrical contacts. These delicate components transfer vital information between your camera and lens, controlling functions like autofocus and aperture settings. If you notice any oxidation (appearing as a dark discoloration), clean the contacts with a pencil eraser, using gentle circular motions. Always blow away any eraser residue with a rocket blower afterward.
Never use metal tools or abrasive materials on the mount or contacts, as these can cause permanent damage. If you encounter persistent communication issues between your camera and lens, or notice physical damage to the mount, it’s best to consult a professional repair service rather than attempting complex repairs yourself.
For weather-sealed equipment, regularly check the rubber gasket around the mount for signs of wear or damage. A compromised seal can allow moisture and dust to enter your camera, potentially causing serious damage to internal components.
Accessories Maintenance Schedule
Flash Unit Care
Proper maintenance of your flash units is crucial for consistent performance and longevity. Start by regularly checking the battery compartment for any signs of corrosion or damage. Clean the contacts with a pencil eraser or specialized electronic contact cleaner if you notice any buildup. When storing flash units for extended periods, always remove the batteries to prevent potential leakage.
Test your flash unit’s recycling time monthly – if it’s taking longer than usual to recharge, this could indicate failing capacitors or battery issues. For photographers exploring advanced camera techniques, ensuring your flash unit’s TTL metering is accurate is essential. Perform a quick test by taking a series of shots at different distances and reviewing the exposure consistency.
Keep the flash head clean by gently wiping it with a microfiber cloth. If you’re shooting in dusty or humid conditions, consider using a protective cover. Check the tilt and swivel mechanisms regularly for smooth operation, and avoid forcing them if you encounter resistance.
For shoe-mounted flashes, inspect the hot shoe connection points and tighten any loose components. The locking mechanism should click firmly into place without wobbling. If you notice any unusual sounds or see error messages during operation, have your unit professionally serviced rather than attempting DIY repairs.
Tripod and Support Gear
Proper maintenance of your tripod and support gear is crucial for ensuring stable shots and long-lasting equipment. Start by regularly inspecting all locking mechanisms, joints, and legs for signs of wear or damage. If your tripod has been exposed to sand, salt water, or dirt, disassemble the legs according to the manufacturer’s instructions and clean each section thoroughly with a damp cloth.
For carbon fiber tripods, avoid using harsh chemicals that might damage the material. Instead, use a soft brush to remove debris and wipe down with a slightly damp microfiber cloth. Pay special attention to the leg locks – accumulated dirt here can affect stability and smooth operation.
Ball heads and pan-tilt heads require special attention. Every few months, clean the ball mechanism with a lint-free cloth and apply a small amount of specialized lubricant if recommended by the manufacturer. Check that all knobs and controls move smoothly and tighten properly.
For quick-release plates and mounting systems, ensure the locking mechanisms are free from debris and functioning correctly. A small brush can help remove dust from hard-to-reach areas. If you’re using a gimbal or stabilizer, regularly check and tighten all screws and calibrate the balance system.
Store your support gear in a dry place and consider using silica gel packets in your gear bag to prevent moisture damage. When traveling, use the provided carry bags to protect against impacts and environmental elements.
Storage and Transportation Best Practices
Climate Control Guidelines
Proper storage conditions are crucial for protecting your valuable photography equipment. The ideal storage environment should maintain a temperature between 68-75°F (20-24°C) and relative humidity between 35-45%. Extreme temperatures and humidity can lead to fungal growth on lenses, corroded electronics, and damaged sensor components.
To maintain optimal conditions, consider using a dry cabinet or dehumidifier in your storage area. These specialized storage solutions actively control humidity levels and protect your gear from moisture damage. For photographers in tropical or humid climates, silica gel packets can provide additional moisture protection when stored with equipment.
Never store your equipment in basements, attics, or garages where temperature and humidity fluctuate dramatically. When traveling between environments with significant temperature differences, allow your equipment to acclimate gradually to prevent condensation. Place your gear in a sealed plastic bag before moving from cold to warm environments, and let it reach room temperature before opening.
Remember to remove batteries from equipment during long-term storage to prevent corrosion. Store memory cards in protective cases away from magnetic fields and static electricity. For delicate items like sensors and lenses, consider using anti-static bags and dust-proof containers.
Regular monitoring of storage conditions using a hygrometer can help you maintain the optimal environment for your equipment’s longevity. Small investments in proper storage solutions can prevent costly damage and repairs in the long run.
Travel Protection Methods
When it comes to transporting your valuable photography equipment, knowing how to protect your gear during travel is absolutely crucial. Start by investing in a high-quality camera bag or hard case that offers proper padding and compartmentalization. Look for weather-resistant materials and ensure your bag has adequate shock absorption capabilities.
Always remove batteries from your equipment before packing, and store them separately in a dedicated battery case. Place silica gel packets in your camera bag to prevent moisture damage, especially when traveling to humid environments. Use lens caps, body caps, and rear lens caps religiously, and wrap each lens in a microfiber cloth before placing it in its designated compartment.
For air travel, always carry your photography equipment as hand luggage – never check it in. Keep your gear organized using padded dividers, and avoid overpacking to prevent internal stress on equipment. When using rolling cases, position heavier items at the bottom for better stability.
Consider using protective wraps or neoprene covers for additional cushioning, particularly for telephoto lenses and delicate accessories. Keep a copy of your equipment list and serial numbers in both digital and physical formats, and ensure your insurance coverage is up to date before any major trip.
Downloadable Maintenance Checklist
To make your maintenance routine as easy as possible, we’ve created a comprehensive PDF checklist that you can download and use to track the care of your photography equipment. Simply click the button below to download your free maintenance checklist.
[Download Photography Equipment Maintenance Checklist]
This user-friendly checklist is organized by equipment type and maintenance frequency, making it simple to keep track of when each piece of gear needs attention. The PDF includes dedicated sections for:
• Camera bodies
• Lenses
• Tripods and supports
• Lighting equipment
• Storage devices
• Filters and accessories
Each section features checkboxes for daily, weekly, monthly, and annual maintenance tasks. We’ve also included blank spaces where you can add custom items specific to your gear collection.
To use the checklist effectively:
1. Print a fresh copy at the start of each month
2. Date each maintenance session
3. Check off tasks as you complete them
4. Make notes about any issues discovered
5. Keep completed checklists for equipment service history
Pro tip: Store the PDF on your phone or tablet for easy access when traveling, and consider laminating a printed copy for your camera bag to protect it from moisture and wear.
Feel free to modify the checklist to better suit your specific needs and equipment collection. Regular maintenance tracking will help extend the life of your gear and ensure it’s always ready for your next shoot.

Regular maintenance of your photography equipment isn’t just about preserving your investment – it’s about ensuring you’re always ready to capture those perfect moments without technical hiccups. By following a structured maintenance checklist, you can significantly extend the life of your gear while maintaining optimal performance. Remember that even small issues, when left unchecked, can lead to costly repairs or missed photo opportunities.
We encourage you to download and utilize the maintenance checklist we’ve provided. Make it a habit to review it monthly, and don’t hesitate to customize it based on your specific equipment and needs. Consider setting calendar reminders for different maintenance tasks – whether it’s cleaning your lenses weekly or checking your camera’s firmware every few months.
Think of your photography gear as a professional athlete’s equipment – it needs consistent care to perform at its best. By implementing these maintenance practices, you’re not just protecting your investment; you’re ensuring that your creative vision won’t be limited by preventable technical issues. Start your maintenance routine today, and you’ll thank yourself later when your gear continues to deliver outstanding results year after year.