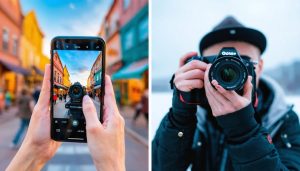
Transform ordinary moments into extraordinary photographs with today’s most accessible tool – the smartphone in your pocket. Modern phones pack professional-grade camera systems capable of rivaling dedicated cameras, making it easier than ever to capture stunning images without carrying bulky equipment. By mastering a few key smartphone photography secrets, anyone can elevate their mobile photography from casual snapshots to compelling visual stories.
The evolution of smartphone cameras has democratized photography, putting powerful creative tools in billions of hands worldwide. With computational photography, advanced sensors, and sophisticated image processing, smartphones now offer features once exclusive to high-end cameras – from portrait mode’s artificial bokeh to night mode’s ability to capture stunning low-light scenes. Whether you’re documenting daily life, creating content for social media, or pursuing creative expression, understanding your smartphone’s photographic capabilities opens up endless possibilities for visual storytelling.
This comprehensive guide will walk you through essential techniques, creative approaches, and technical insights to help you maximize your smartphone’s camera potential and capture images that stand out in today’s visual-first world.
Master Your Phone’s Camera Settings
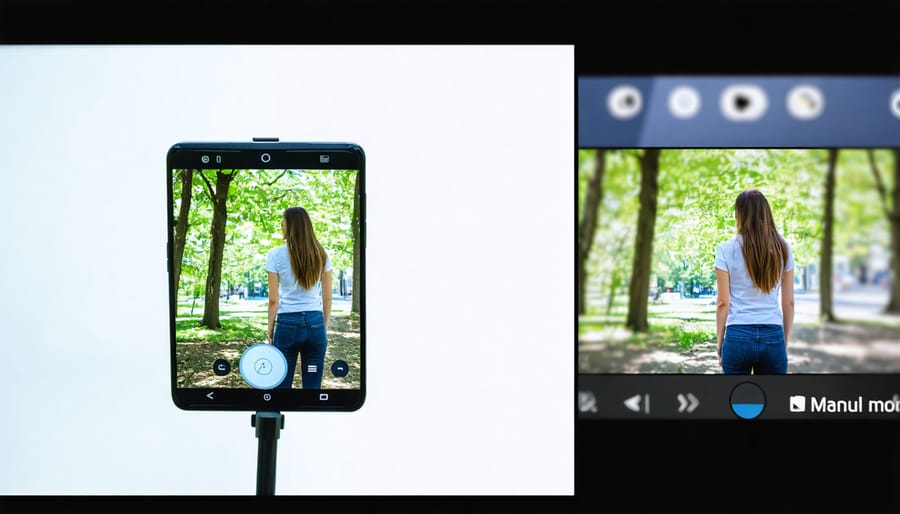
Manual Mode Mastery
Taking control of your smartphone’s manual camera controls can transform your mobile photography from simple snapshots to professional-quality images. Let’s dive into the three key elements you can adjust: ISO, shutter speed, and focus.
ISO controls your camera’s light sensitivity. In bright conditions, stick to lower ISO values (100-400) to maintain crisp, noise-free images. When shooting in darker environments, you can increase the ISO (800-3200), but be mindful that higher values may introduce digital noise. Finding the sweet spot for your specific lighting situation is crucial.
Shutter speed manipulation allows you to either freeze action or create intentional motion blur. For sharp sports photos or catching splashing water, use faster speeds (1/500th or quicker). To capture light trails from moving cars or create silky waterfall effects, experiment with slower speeds (1/15th or longer). Remember to stabilize your phone when using slower shutter speeds.
Manual focus is particularly useful when your phone’s autofocus struggles or when you want precise control over your focal point. Most manual modes offer a focus slider or ring. For macro shots, adjust the focus to get incredibly close to your subject while maintaining sharpness. When shooting portraits, ensure the focus falls precisely on your subject’s eyes.
Pro tip: Practice these controls individually before combining them. Start in well-lit conditions where you can see the immediate effects of your adjustments. As you become more comfortable, challenge yourself with more complex lighting scenarios and creative techniques.
HDR and RAW Photography
HDR (High Dynamic Range) and RAW photography are powerful tools that can elevate your smartphone photography from good to exceptional. HDR combines multiple exposures into a single image, capturing detail in both bright highlights and dark shadows that might otherwise be lost. Use HDR when photographing landscapes with bright skies and darker foregrounds, or in high-contrast scenes where important details might be lost in shadows or highlights.
Most modern smartphones offer automatic HDR, which intelligently activates when needed. However, you can often manually enable or disable it based on your scene. HDR works best with static subjects, as movement between exposures can create ghosting effects. Avoid using HDR for moving subjects or when you want to capture dramatic shadows intentionally.
RAW format, on the other hand, captures all the data from your camera sensor without processing or compression. Think of it as your photo’s digital negative, offering maximum flexibility during editing. When shooting in RAW, you’ll have greater control over white balance, exposure, and color correction in post-processing.
To shoot in RAW on your smartphone, check if your native camera app supports it or download a third-party camera app. Keep in mind that RAW files take up significantly more storage space than JPEGs and require post-processing to look their best. They’re particularly valuable when shooting in challenging lighting conditions or when you plan to edit your photos extensively.
Consider using RAW when photographing sunrise or sunset, in low-light situations, or for any scene where you want to preserve maximum detail for later editing. For casual snapshots or when you need to share photos immediately, JPEG format might be more practical.
Composition Techniques for Phone Photography
Grid Lines and Rule of Thirds
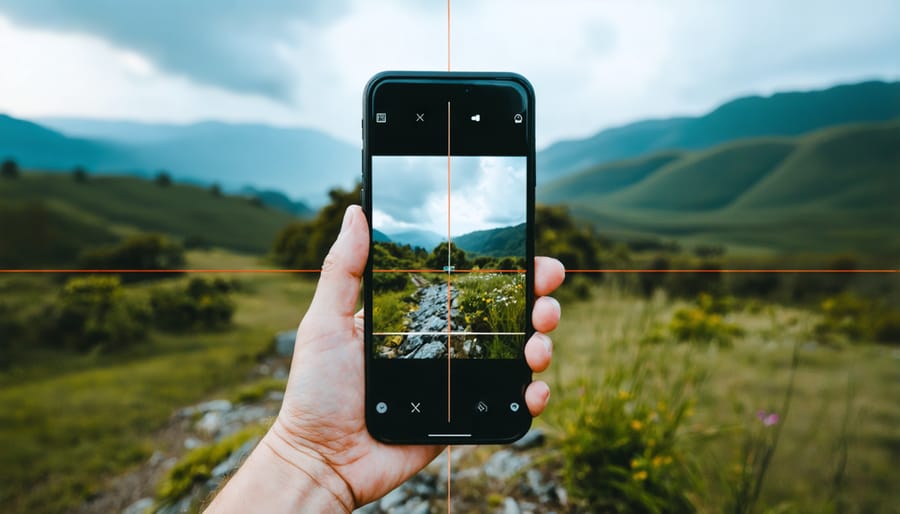
Most modern smartphones come equipped with powerful composition tools that can transform your photography. The grid lines feature, typically found in your camera settings, overlays a 3×3 grid on your screen, making it easier to apply the rule of thirds – a fundamental principle in photography composition.
To activate grid lines, simply open your camera app settings and toggle on the grid option. This visual aid helps you position key elements along the lines or at their intersections, known as power points. These points naturally draw the viewer’s eye and create more dynamic, engaging images.
When photographing landscapes, try aligning the horizon with either the top or bottom horizontal line rather than cutting your frame in half. For portraits, position your subject’s eyes along the upper horizontal line, or place them at one of the intersection points for a more compelling composition.
The beauty of smartphone grid lines is that they’re non-intrusive – they won’t appear in your final image but serve as valuable guides while shooting. Experiment with positioning different elements along these lines and intersections. You might place a tree at one vertical line while positioning a mountain peak at an intersection point.
Remember, while the rule of thirds is a powerful guideline, it’s not a strict rule. Once you’ve mastered it, feel free to break it intentionally for creative effect.
Leading Lines and Framing
Leading lines and framing are two powerful compositional techniques that can transform your smartphone photos from ordinary snapshots into compelling visual stories. Leading lines naturally guide the viewer’s eye through your image, creating depth and drawing attention to your main subject. You can find these lines everywhere in urban environments – stairways, roads, buildings, and even handrails make excellent leading elements.
When using leading lines, position yourself to capture lines that flow from the foreground to your subject. For instance, try shooting from the center of a path looking forward, or angle your phone to capture diagonal lines from street corners. The key is to ensure these lines lead somewhere interesting rather than directing attention to empty space.
Framing adds another dimension to your smartphone photography by using natural or architectural elements to create a “window” around your subject. Look for archways, doorways, tree branches, or even people to frame your shot. This technique not only adds depth but also helps isolate your subject and create a more intimate viewing experience.
To maximize these techniques with your smartphone, try getting low to the ground to emphasize leading lines, or move slightly to adjust how natural frames surround your subject. Remember that the best frames don’t always need to be complete – even partial frames can create striking compositions. Experiment with different angles and positions until you find the perfect balance between your leading lines, frames, and subject matter.
Perspective and Angles
One of the greatest advantages of smartphone photography is the unparalleled mobility and flexibility it offers when composing shots. Unlike traditional cameras, smartphones can be easily maneuvered into tight spaces or held at unusual angles, opening up a world of creative possibilities.
Try shooting from ground level to create dramatic perspectives of urban landscapes or capture unique views of flowers and small subjects. The small size of your phone allows you to position it mere inches from the ground without struggling with awkward positions that larger cameras would require.
Overhead shots become effortless with a smartphone – simply hold your device above the scene and use your screen as a viewfinder. This perspective works particularly well for flat lays, food photography, and documenting events from above. Remember to use your volume buttons as shutter release to maintain stability when shooting from high angles.
Don’t be afraid to experiment with unconventional angles. Try shooting through objects, capturing reflections in puddles, or positioning your phone inside everyday items for a fresh perspective. The ability to preview your composition in real-time on your screen makes it easy to perfect these creative angles before taking the shot.
For added stability when shooting from unusual positions, tuck your elbows into your body and breathe steadily. This simple technique helps maintain sharpness even in challenging shooting positions.
Lighting Mastery for Smartphone Photos
Natural Light Techniques
Natural light is your smartphone camera’s best friend, and mastering its use can transform your photos from ordinary to extraordinary. The key to exceptional smartphone photography lies in understanding how to work with available light and knowing when to shoot.
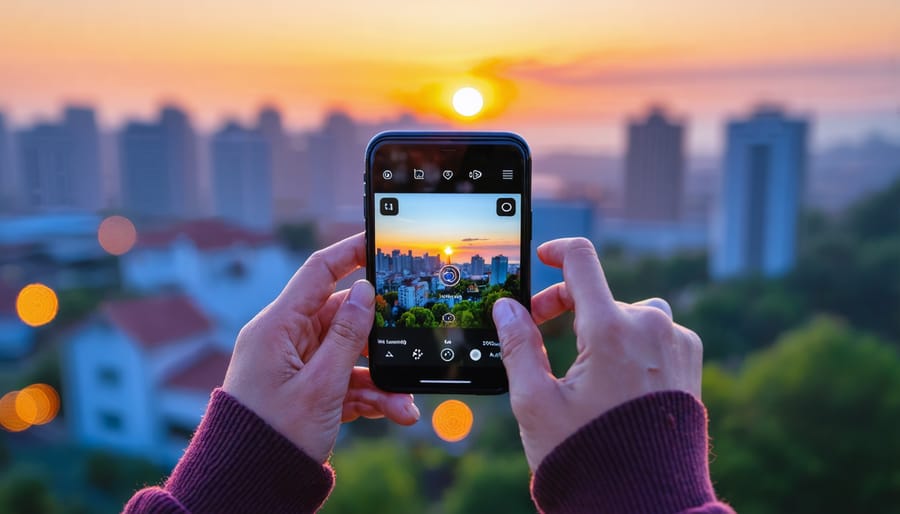
The celebrated “golden hour” – occurring during the first hour after sunrise and the last hour before sunset – provides warm, soft lighting that’s perfect for both landscapes and portraits. During these times, the sun’s position creates long shadows and a golden glow that adds depth and dimension to your images. Try positioning your subject so the light falls at a 45-degree angle for flattering portraits with natural highlights and gentle shadows.
For midday shooting, seek out open shade under trees or buildings to avoid harsh shadows and blown-out highlights. When photographing in bright conditions, tap on the brightest part of your scene to expose properly, or use your phone’s HDR mode to capture detail in both highlights and shadows.
Overcast days offer their own advantages, acting like a giant softbox that creates even, diffused light perfect for close-ups and portraits. These conditions are ideal for capturing rich colors without dealing with harsh shadows or excessive contrast.
Window light is particularly valuable for indoor photography. Position your subject near a window, with the light falling at an angle, and watch how it creates natural-looking illumination that’s perfect for food photography, still life, and portraits. For more dramatic effects, try shooting during blue hour – the brief period just before sunrise or after sunset – when the sky takes on ethereal blue tones that can add mood to your urban and landscape shots.

Low-Light Photography
Low-light photography has long been a challenge for mobile devices, but modern smartphone camera capabilities have evolved significantly to tackle this limitation. Success in low-light conditions relies on understanding both your device’s features and essential techniques.
First, stabilization is crucial. Brace your phone against a stable surface or use both hands with your elbows tucked close to your body. Many phones now offer Night Mode, which automatically captures multiple exposures and combines them for clearer, brighter images – but this requires keeping your device extremely still for several seconds.
To maximize available light, tap to focus on your main subject and adjust the exposure by sliding your finger up or down on most phones. Look for light sources that can add dimension to your shot – street lamps, window light, or even passing car headlights can create interesting effects.
Pro tip: Instead of using your phone’s flash, which often produces harsh results, try using another phone’s flashlight or a friend’s phone screen as a soft light source. This creates more natural-looking illumination and helps preserve the ambient atmosphere.
Consider shooting in RAW format if your phone supports it. This gives you more flexibility in post-processing to adjust exposure, shadows, and noise reduction. Many third-party camera apps offer manual controls for ISO and shutter speed, allowing you to fine-tune your exposure for challenging lighting situations.
Remember that some noise or grain in low-light photos can add character to your images. Don’t be afraid to embrace this aesthetic when it serves your creative vision. The key is finding the right balance between noise reduction and maintaining detail in your shots.
Post-Processing on Your Phone
Essential Adjustments
Making basic adjustments to your smartphone photos can dramatically improve their smartphone photo quality and visual impact. Let’s explore the three fundamental aspects of photo editing that every mobile photographer should master.
Start with exposure adjustments, which control the overall brightness of your image. Most smartphone editing apps feature a brightness or exposure slider. When adjusting, pay attention to both the highlights and shadows – you want to maintain detail in both bright and dark areas. If your photo appears too dark, gradually increase the exposure until the main subject is properly lit. For overexposed images, reduce the brightness until you recover lost details in bright areas.
Contrast adds depth and dimension to your photos by enhancing the difference between light and dark areas. When adjusting contrast, start with subtle changes. Too much contrast can make your image look artificial, while too little can make it appear flat. Look for a balance where the darker areas remain rich without becoming too black, and the lighter areas maintain their natural appearance without becoming washed out.
Color adjustments can transform the mood of your photo. Begin with white balance to ensure your colors look natural – most editing apps offer presets like “cloudy” or “daylight,” or you can fine-tune the temperature manually. The saturation slider affects color intensity – use it sparingly to enhance colors without making them look unrealistic. Some apps also offer vibrance adjustment, which intelligently enhances muted colors while preventing already-vibrant ones from becoming oversaturated.
Remember, these adjustments work together to create the final look. Make subtle changes and frequently compare your edited version to the original to ensure you’re enhancing, not overdoing, your image.
Advanced Editing Techniques
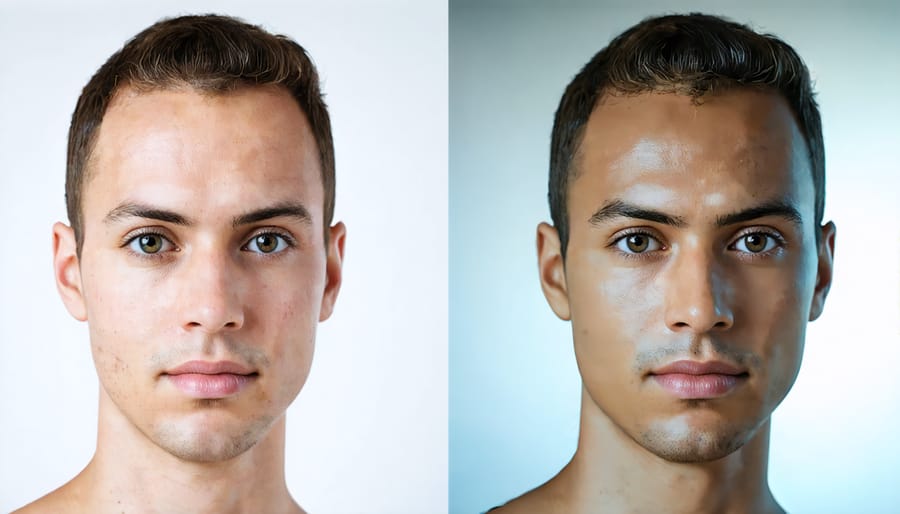
Today’s smartphone editing apps rival desktop software in their capability to transform your photos into professional-looking images. The key is knowing which tools to use and how to apply them effectively without over-processing your shots.
Start with basic adjustments like exposure, contrast, and white balance to establish a solid foundation. Apps like Snapseed and Lightroom Mobile excel at these fundamentals, offering precise control through intuitive slider interfaces. When adjusting exposure, pay special attention to preserving highlights and shadows – smartphones often struggle with high-contrast scenes.
For more sophisticated editing, explore selective adjustments. Use masking tools to enhance specific areas of your image without affecting others. For instance, you might brighten a subject’s face while keeping the background properly exposed, or sharpen only the main focal point while maintaining natural softness elsewhere.
Color grading is another powerful technique. Instead of applying generic filters, learn to work with color curves and HSL (Hue, Saturation, Luminance) controls. These tools allow you to create your unique style while maintaining natural-looking results. Try split-toning to add subtle color to highlights and shadows for a cinematic look.
Advanced healing tools can remove unwanted elements from your photos with remarkable precision. Whether it’s removing power lines from a landscape or cleaning up skin blemishes in portraits, today’s AI-powered removal tools make these edits surprisingly straightforward.
Remember to use layers or step-by-step editing to maintain control over your process. This approach allows you to adjust or undo specific edits without starting over. Always save your original image and export edited versions separately to preserve your creative options.
Smartphone photography has evolved from a convenient alternative to becoming a legitimate artistic medium in its own right. Throughout this guide, we’ve explored how modern smartphones pack impressive photographic capabilities that, when properly utilized, can produce stunning results rivaling traditional cameras.
Remember that mastering smartphone photography is a journey that combines technical knowledge with creative vision. From understanding your device’s basic camera settings to experimenting with composition techniques, each skill builds upon the last. The key is consistent practice – take your phone with you everywhere and make a habit of photographing different subjects in various lighting conditions.
Don’t be afraid to push your boundaries and try new techniques. Whether it’s playing with manual controls, exploring different perspectives, or experimenting with editing apps, each attempt helps develop your unique photographic style. The beauty of smartphone photography lies in its accessibility and immediacy – you can instantly review your results and adjust your approach accordingly.
As technology continues to advance, smartphone cameras will only get better. However, it’s not the technology that makes a great photograph – it’s the photographer’s eye and understanding of fundamental principles. Keep practicing, stay curious, and most importantly, enjoy the creative process of capturing moments through your smartphone lens. With dedication and regular practice, you’ll be amazed at how your mobile photography skills evolve and improve over time.