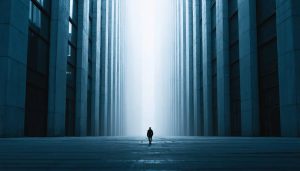
Transform your film photography with in-camera effects that capture the raw, authentic beauty digital filters can’t replicate. From ethereal double exposures to striking light leaks, these analog techniques create unique images that tell compelling stories without touching a computer.
The magic of film camera effects lies in their unpredictability and organic nature. Whether you’re deliberately fogging your lens for a dreamy vintage look, experimenting with slow shutter speeds to create motion blur, or manipulating exposure settings to achieve dramatic contrasts, each technique requires intention and craftsmanship. Unlike digital post-processing, these effects become permanently embedded in your images, creating one-of-a-kind photographs that stand out in our increasingly digital world.
Masters of film photography have long used these techniques to develop their signature styles. By understanding and practicing these traditional methods, you’re not just creating photos – you’re participating in a rich photographic tradition that stretches back to the medium’s earliest days. From subtle color shifts achieved through careful film selection to bold experimental techniques like film soups and multiple exposures, these effects offer endless creative possibilities for photographers willing to embrace the beautiful uncertainty of analog processes.
Let’s explore how you can master these timeless techniques and add them to your creative arsenal, whether you’re shooting with a professional SLR or a simple point-and-shoot camera.
The Power of Practical Effects in Modern Photography
In an era dominated by digital filters and post-processing tools, the allure of practical film camera effects remains surprisingly powerful. These in-camera techniques create authentic, unrepeatable moments that carry a distinct organic quality that even the most sophisticated digital editing software struggles to replicate.
The beauty of practical effects lies in their tangibility and unpredictability. When you use pro lighting techniques combined with physical filters, multiple exposures, or intentional light leaks, you’re creating something unique in real-time. Each shot becomes a one-of-a-kind piece, impossible to duplicate exactly, adding value and authenticity to your work.
Modern photographers are increasingly drawn to these traditional methods for several compelling reasons. First, practical effects force you to slow down and think carefully about your composition before pressing the shutter. This mindful approach often leads to more thoughtful, deliberate photography. Second, the physical limitations of film and practical effects can actually spark creativity, pushing you to find innovative solutions within these constraints.
The aesthetic appeal of practical effects is also undeniable. Film grain has a natural, organic quality that digital noise can’t quite match. Light leaks create warm, dreamy atmospheres that feel genuine rather than artificial. Multiple exposures produced in-camera have a seamless quality that’s different from digital composites, while practical blur effects create a sense of movement that feels more authentic than post-processing motion blur.
Additionally, mastering practical effects gives photographers a deeper understanding of light, exposure, and the fundamental principles of photography. This knowledge translates valuable skills across all forms of photography, whether digital or analog. It’s this combination of technical expertise and artistic expression that continues to make practical effects relevant and sought-after in contemporary photography.
Essential In-Camera Techniques for Creative Photography
Multiple Exposure Magic
Multiple exposure photography on film creates enchanting, dreamlike images by exposing the same frame multiple times. This technique allows you to layer different scenes or subjects onto a single negative, producing ethereal results that digital filters simply can’t replicate.
To create a double exposure, start by underexposing your first shot by one stop. This prevents overexposure when combining images. After taking your first shot, don’t advance the film. Instead, cock the shutter again (if your camera requires manual cocking) and take your second exposure. Consider visual composition principles when planning your shots – contrast between light and dark areas creates the most striking results.
For more complex multiple exposures, some cameras offer dedicated multiple exposure settings. The Nikon FM2 and Canon AE-1 are excellent choices for this technique. When shooting, look for complementary subjects: silhouettes work beautifully with textural elements like trees or architecture. Try combining a portrait against a dark background with cityscape lights, or overlay natural elements with geometric patterns.
Remember to keep notes of your exposures – film doesn’t offer instant feedback. Start with simple two-exposure combinations before attempting more complex layering. With practice, you’ll develop an intuition for how different elements will interact, creating unique artistic expressions that showcase film photography’s magical possibilities.
Light Painting and Long Exposures
Light painting and long exposures represent some of the most creative techniques available to film photographers, offering a unique way to capture the poetry of motion and light. With nothing more than a film camera, tripod, and light source, you can create stunning trails of light that dance through your frame.
To begin light painting, you’ll need a camera capable of bulb mode or extended shutter speeds, typically 1 second or longer. Set up your camera on a sturdy tripod in a dark environment, and use a cable release to prevent camera shake. Film speeds between ISO 100 and 400 work best, offering a good balance between light sensitivity and grain.
Popular light sources include flashlights, LED strips, steel wool (used with appropriate safety precautions), and even sparklers. Each creates distinct effects: flashlights produce clean, controlled lines, while steel wool creates explosive shower-like effects. Try moving these light sources through your frame while the shutter remains open, effectively “painting” with light.
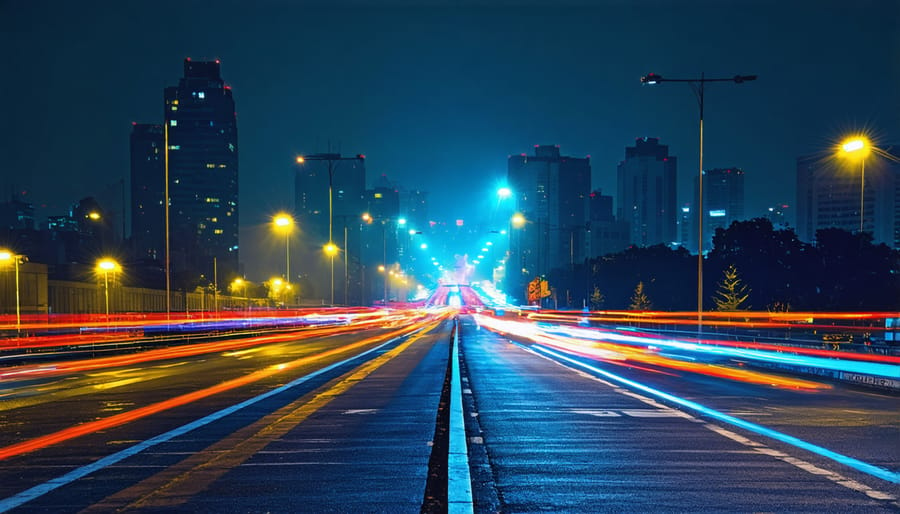
For capturing car light trails, position your camera to overlook busy roads at dusk or night. Exposure times between 15-30 seconds usually work well, allowing multiple vehicles to pass through your frame. Remember that reciprocity failure affects long exposures on film, so you may need to add extra exposure time to compensate.
Experimentation is key – each attempt might yield surprisingly different results, making this technique particularly rewarding for creative photographers. Keep detailed notes of your exposure times and light movements to recreate successful shots.
Motion Blur and Panning
Motion blur and panning are powerful techniques that allow film photographers to capture the essence of movement in their images. By deliberately introducing controlled blur through dynamic camera movement, you can create images that convey speed, energy, and motion in a way that frozen shots simply cannot achieve.
To execute a successful panning shot, position yourself parallel to your moving subject and select a slower shutter speed, typically between 1/15 and 1/60 of a second. As your subject moves past, smoothly track their movement while pressing the shutter. The goal is to match your camera’s movement with the subject’s speed, keeping them sharp while blurring the background into dramatic streaks.
The technique requires practice and patience. Start with subjects moving at predictable speeds, like cyclists or cars on a straight road. Keep your feet planted, swivel from the hips, and maintain a steady, fluid motion throughout the exposure. The slower your shutter speed, the more pronounced the blur effect will be.
Common challenges include ensuring your subject remains in focus and maintaining consistent movement. Try different shutter speeds to find the sweet spot for your specific subject. Remember that the lighting conditions will affect your ability to use slower shutter speeds, so consider shooting during golden hour when the light is softer and more manageable.
Advanced Film Camera Effects
Cross-Processing and Film Soups
Cross-processing and film soups represent some of the most experimental and unpredictable techniques in analog photography, offering photographers unique ways to create striking color shifts and textural effects. Cross-processing involves deliberately developing film in chemicals meant for a different type of film – typically processing color negative film in slide film chemicals (C-41 in E-6) or vice versa. This technique produces dramatic color shifts, increased contrast, and sometimes surreal color combinations that have become iconic in fashion and artistic photography.
Film soups take experimentation even further by pre-treating undeveloped film with various liquids before processing. Common ingredients include lemon juice, wine, tea, or even cleaning products. Each combination creates distinct effects, from color bleeds and light leaks to unique patterns and textures. For example, soaking film in green tea might produce subtle green tints and organic patterns, while citrus juices can create vibrant color shifts and ethereal streaks.
When attempting these techniques, start with less expensive film stocks and document your process carefully. Temperature, soaking duration, and chemical combinations all affect the final result. While unpredictable, these methods can produce one-of-a-kind images impossible to replicate digitally. Remember that both techniques can potentially damage your film or produce unexpected results, but that’s often part of their artistic appeal.

Intentional Camera Movement (ICM)
Intentional Camera Movement (ICM) transforms ordinary scenes into dreamlike abstractions through deliberate camera manipulation during exposure. This technique, essential in storytelling through photography, creates ethereal effects that can’t be replicated through digital editing.
To achieve ICM, start with slower shutter speeds, typically between 1/15 and 1 second. The magic happens when you deliberately move your camera during exposure. Try panning horizontally across a cityscape, vertically through a forest, or even rotating the camera while photographing circular subjects. Each movement type produces distinctly different results.
The beauty of ICM lies in its unpredictability. While you can control the basic parameters, each shot becomes a unique expression of motion and light. Experiment with different subjects: trees become graceful brushstrokes, city lights transform into ribbons of color, and water takes on a mystical quality.
For best results, consider these tips:
– Use a neutral density filter in bright conditions to achieve longer exposures
– Start with simple subjects and consistent movements
– Practice your movement before clicking the shutter
– Embrace imperfection – sometimes the “mistakes” create the most compelling images
– Try combining ICM with multiple exposures for even more abstract results
Remember, ICM is as much about feeling as it is about technique. Let your creative instincts guide your camera’s motion to capture truly unique perspectives.
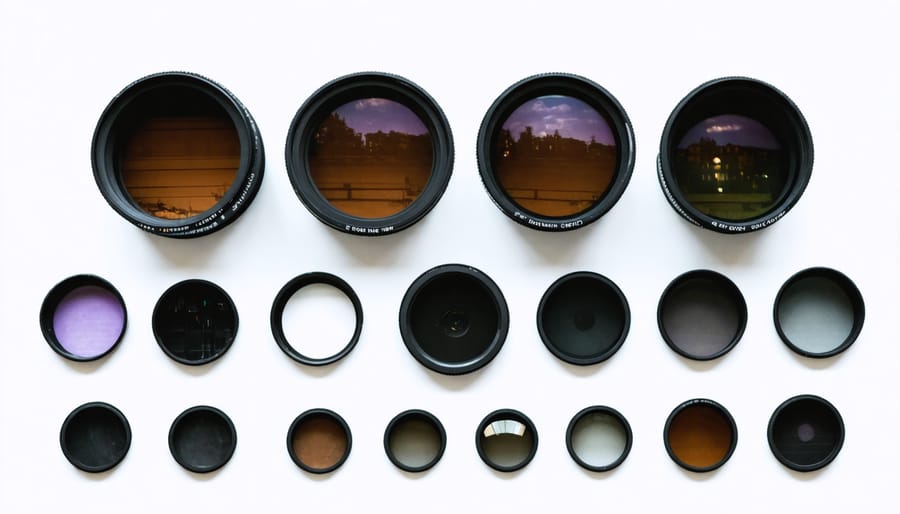
Filter and Lens Effects
Physical filters and specialized lenses offer film photographers powerful tools for creating distinctive effects right at the moment of capture. Color filters, when used with black and white film, can dramatically alter how different colors translate to grayscale tones. For instance, a red filter darkens blue skies while lightening red and orange subjects, creating striking contrast in landscape photography.
Diffusion filters remain particularly popular for portraiture, softening harsh details while maintaining overall sharpness. The classic Softnet filter, a favorite among portrait photographers in the 1970s, creates a dreamy glow while retaining critical focus on the subject’s eyes.
Split dene filters help balance exposure between bright skies and darker foregrounds, crucial in landscape photography where the dynamic range exceeds film’s capabilities. Graduated neutral density filters come in various strengths and gradients, allowing photographers to fine-tune their effect.
Special-effect lenses like fisheye and macro open up new creative possibilities. The lomography movement embraced imperfect optics, using plastic lenses and “toy” cameras to create unique vignetting and color aberrations. Star filters add sparkle to light sources, while prism filters split the image into kaleidoscopic patterns.
When using filters, it’s essential to consider their impact on exposure. Most filters reduce light transmission, requiring exposure compensation. Clear or UV filters serve a dual purpose: protecting expensive lenses while maintaining image quality.
Technical Considerations and Equipment
To achieve authentic film camera effects, you’ll need a solid foundation of essential equipment and technical understanding. Let’s explore the key tools and knowledge necessary for mastering film-like effects in your photography.
Start with a reliable film camera body – mechanical models like the Canon AE-1, Pentax K1000, or Nikon FM2 are excellent choices for beginners and professionals alike. These cameras offer manual controls essential for experimenting with different effects. Your lens selection is equally important; a standard 50mm prime lens is versatile for most techniques, while specialized lenses like macro or telephoto can expand your creative possibilities.
Light meters are indispensable tools, whether built-in or handheld. External light meters provide more accurate readings, especially in challenging lighting conditions. For multiple exposure effects, ensure your camera has this capability built-in, or consider models specifically designed for experimental photography.
Filter systems play a crucial role in achieving various effects. Essential filters include:
– Neutral Density (ND) filters for long exposures
– Color filters for black and white photography
– Polarizing filters for controlling reflections
– Diffusion filters for dreamy effects
Film choice significantly impacts your results. Different films offer unique characteristics:
– Slow films (ISO 100 or lower) for fine grain and rich colors
– Medium-speed films (ISO 400) for versatility
– High-speed films (ISO 800+) for creative grain effects
Technical knowledge requirements include:
– Understanding exposure triangle relationships
– Manual focusing techniques
– Film development processes
– Push/pull processing methods
Additional helpful equipment includes:
– Sturdy tripod for long exposures
– Cable release for shake-free shots
– Film changing bag for emergency situations
– Light-proof storage containers
Remember that maintaining your equipment is crucial. Regular cleaning of lenses and camera bodies, proper storage, and careful handling of film will ensure consistent results and protect your investment in these essential tools.
Common Mistakes and Troubleshooting
When working with film camera effects, several common pitfalls can affect your results. Light leaks are often mistaken for intentional effects but can ruin your shots if not controlled. Make sure your camera’s light seals are in good condition and avoid opening the back in bright conditions. Double exposures sometimes appear too dark because photographers forget to compensate exposure for both shots – try overexposing each frame by one stop for better results.
Blurry long exposures are another frequent issue, usually caused by camera shake. Always use a sturdy tripod and cable release for exposures longer than 1/60th of a second. When attempting zoom bursts, many photographers zoom too quickly or unevenly. Practice the motion before shooting and use a slower shutter speed (around 1/15th) for smoother results.
Color shifts in cross-processed film often appear too extreme. To maintain more control, start with fresh film and avoid extreme temperature variations during development. If your multiple exposures aren’t aligning properly, make notes of frame compositions or use viewfinder markers as reference points. Remember that film responds differently to light than digital sensors, so always bracket important shots to ensure at least one optimal exposure.
Film camera effects offer a unique and rewarding way to explore the artistic possibilities of analog photography. From simple techniques like double exposures and light leaks to more advanced methods like cross-processing and push-pull processing, each effect adds its own character to your images. Remember that experimentation is key – don’t be afraid to try different combinations of techniques, films, and exposure settings. While some attempts may not turn out as expected, these “happy accidents” often lead to the most interesting and memorable photographs. The beauty of film photography lies in its unpredictability and the tactile nature of the process. By mastering these effects, you’ll develop a deeper understanding of light, exposure, and the fundamental principles of photography. So load up your camera, embrace the experimental spirit, and start creating your unique visual narrative through the timeless medium of film.