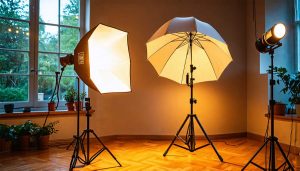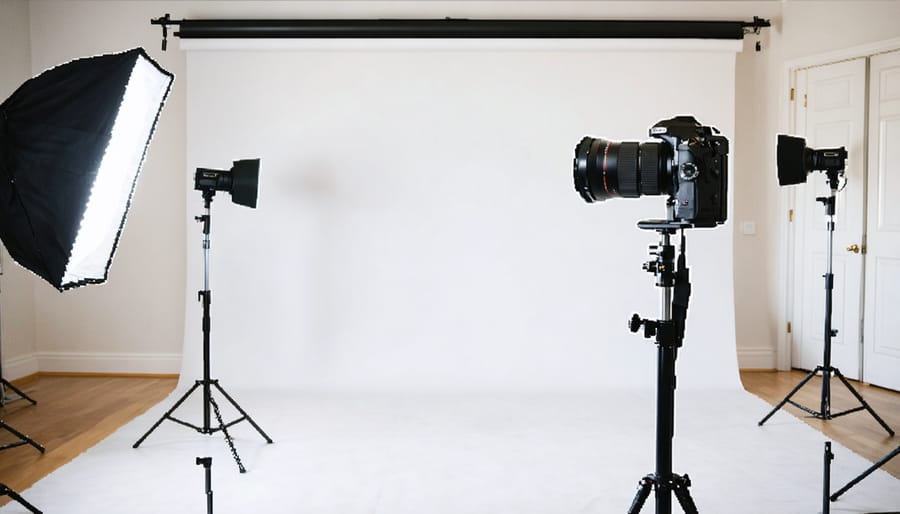
Transform any spare room into a professional-grade home photography studio ideas with minimal investment and maximum impact. Start by selecting a space with minimal natural light interference – even a garage or basement can become your creative sanctuary. Mount a sturdy backdrop support system to your walls, ensuring it can handle both paper and fabric backgrounds while maximizing your shooting area. Position your key light, fill light, and hair light in a classic triangle formation, creating studio-quality lighting without breaking the bank.
Creating a professional photography studio at home isn’t just about expensive gear – it’s about making smart choices with your space and equipment. Whether you’re shooting portraits, products, or passion projects, the right setup transforms ordinary rooms into extraordinary creative spaces. With careful planning and strategic equipment choices, you’ll build a versatile workspace that rivals commercial studios, all while maintaining complete creative control over your environment.
Choosing the Perfect Space
Space Requirements
When setting up a home photography studio, space requirements are crucial for achieving professional results. At minimum, aim for a room that’s at least 12 feet wide by 16 feet long, which allows comfortable positioning of lights, backdrops, and subjects while maintaining adequate shooting distance. A ceiling height of at least 8 feet is essential, though 9-10 feet is ideal, particularly for overhead lighting setups and full-length portraits.
Consider the room’s layout carefully. You’ll need about 6-8 feet of space between your subject and the backdrop to minimize shadows, plus an additional 6-10 feet between your camera and subject for various shooting styles. Remember to factor in space for equipment storage, changing areas (if needed), and room to move around freely with your gear.
Natural light can be both a blessing and a challenge, so evaluate any windows in your space. While windows provide beautiful natural lighting, you’ll want the ability to control them with blackout curtains or blinds when needed. If possible, choose a room with minimal architectural obstacles like pillars or built-in fixtures that could limit your shooting angles and setup options.
Room Preparation
The foundation of a great home studio starts with your room’s preparation. Paint your walls a neutral color, with mid-gray being the most versatile choice as it minimizes color cast in your images. White walls can create unwanted reflections, while dark colors might absorb too much light. If painting isn’t an option, consider hanging neutral-colored fabric or setting up portable backdrop systems.
For flooring, opt for solid, non-reflective surfaces. Wood flooring provides a classic look and stable foundation for your equipment, while vinyl offers affordability and easy maintenance. Avoid glossy tiles that can create unwanted reflections. If you’re working with carpet, ensure it’s well-maintained and consider laying portable flooring panels for equipment stability.
Maximize your space by planning a flexible layout. Use corner spaces efficiently by installing wall-mounted storage solutions for accessories and equipment. Consider collapsible furniture and rolling storage units that can be easily moved when shooting. Create designated zones for shooting, storage, and client seating if applicable. Remember to leave enough room for light stands and other equipment to be positioned at various angles.
Essential Lighting Equipment
Main Light Sources
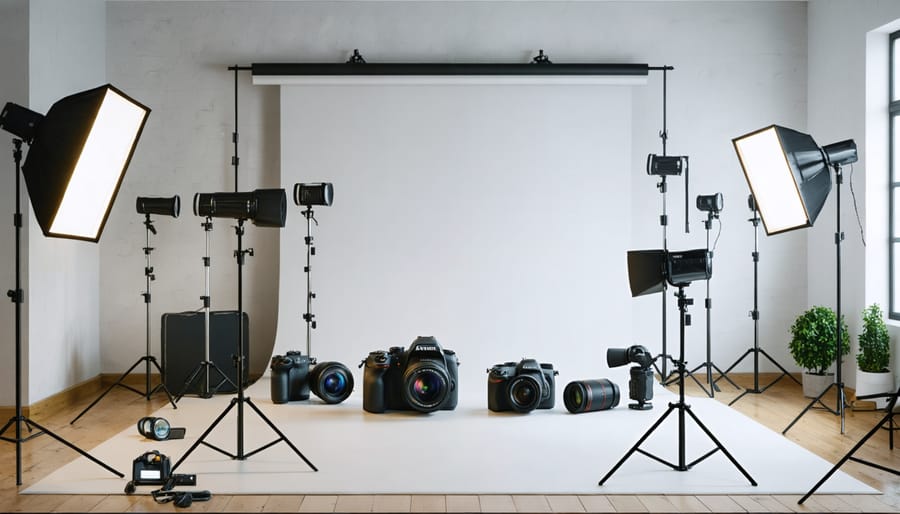
When setting up your home studio, choosing the right photography lighting equipment is crucial for achieving professional results. Let’s explore your main lighting options.
Strobe lights, also known as flash units, are popular among professionals for their powerful output and ability to freeze motion. They provide consistent color temperature and are excellent for portrait and product photography. While they can be more expensive, even a basic two-light strobe kit can dramatically improve your photos.
Continuous lights offer the advantage of “what you see is what you get” lighting. LED panels have become increasingly popular due to their low heat output, energy efficiency, and adjustable color temperature. They’re particularly useful for beginners as you can see exactly how the light falls on your subject before taking the shot.
Don’t overlook the power of natural light photography either. A large window can serve as a beautiful main light source, especially when combined with reflectors or diffusers. Position your shooting area near a north-facing window for the most consistent, soft lighting throughout the day.
For those just starting, consider beginning with a combination of natural light and a basic continuous light setup. As your skills and needs grow, you can gradually invest in more sophisticated lighting equipment.
Light Modifiers
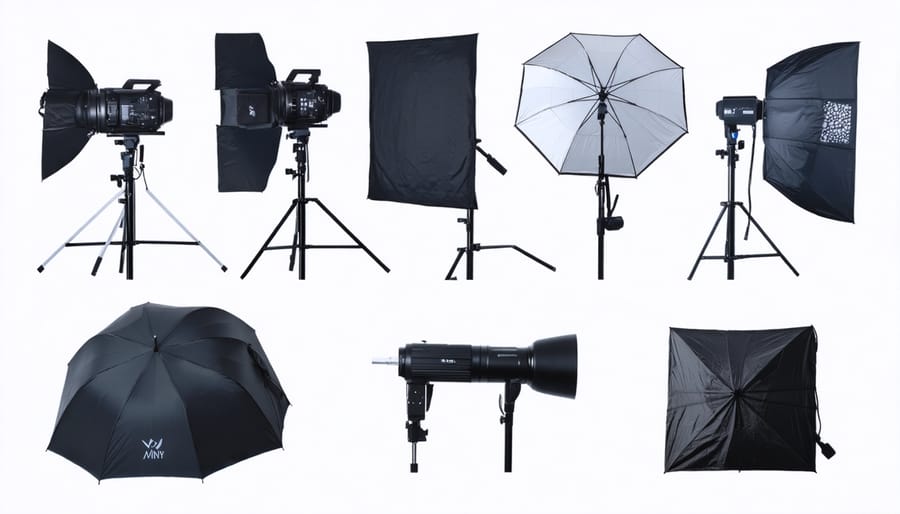
Lighting modifiers are essential tools that help you shape and control light in your home studio, transforming harsh direct light into something more flattering and professional-looking. Let’s explore the most useful options for your setup.
Softboxes are perhaps the most versatile modifiers, creating soft, even lighting that’s perfect for portraits and product photography. They come in various sizes, but a medium-sized softbox (around 24×36 inches) is an excellent starting point for most home studios. Think of them as windows that you can position anywhere to create natural-looking light.
Umbrellas are budget-friendly alternatives that come in two main varieties: reflective and shoot-through. Reflective umbrellas bounce light back toward your subject, while shoot-through umbrellas diffuse light as it passes through them. They’re incredibly portable and easy to set up, making them perfect for photographers just starting out.
Reflectors are your secret weapon for filling shadows and adding dimension to your images. A 5-in-1 reflector kit offers excellent value, providing white, silver, gold, black, and translucent options in one package. You can use them hand-held or mounted on stands to bounce light exactly where you need it.
Diffusers are simple yet effective tools for softening harsh light sources. Whether it’s a pop-up diffusion panel or a simple piece of translucent fabric, they can transform the quality of light in your images dramatically.
Lighting Accessories
Proper lighting support equipment is crucial for achieving professional results in your home studio. Light stands are your foundation, and I recommend investing in at least two sturdy aluminum stands with a minimum height of 7 feet. Look for stands with air cushioning to protect your lights if the locking mechanisms accidentally release.
Boom arms are game-changers for overhead lighting and creative positioning. A counterweighted boom arm allows you to safely suspend lights above your subject without taking up floor space. When choosing a boom arm, ensure it’s rated for the weight of your heaviest light and its modifiers.
Remote triggers are essential for controlling your lights without moving around the studio. Modern wireless triggers offer incredible reliability and features like TTL metering and high-speed sync. While premium options from brands like PocketWizard offer rock-solid performance, there are many budget-friendly alternatives that work perfectly for home studio use.
Don’t forget the small but crucial accessories: sandbags for stabilizing stands (especially with boom arms), grip heads for mounting modifiers, and plenty of extension cords and cable ties for clean cable management. A wheeled stand case can be invaluable if you occasionally need to pack up your studio or shoot on location.
For maximum versatility, consider getting at least one C-stand. While heavier and more expensive than regular light stands, their versatility and stability make them worthwhile investments for serious studio work.
Backgrounds and Support Systems
Background Types
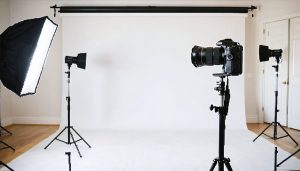
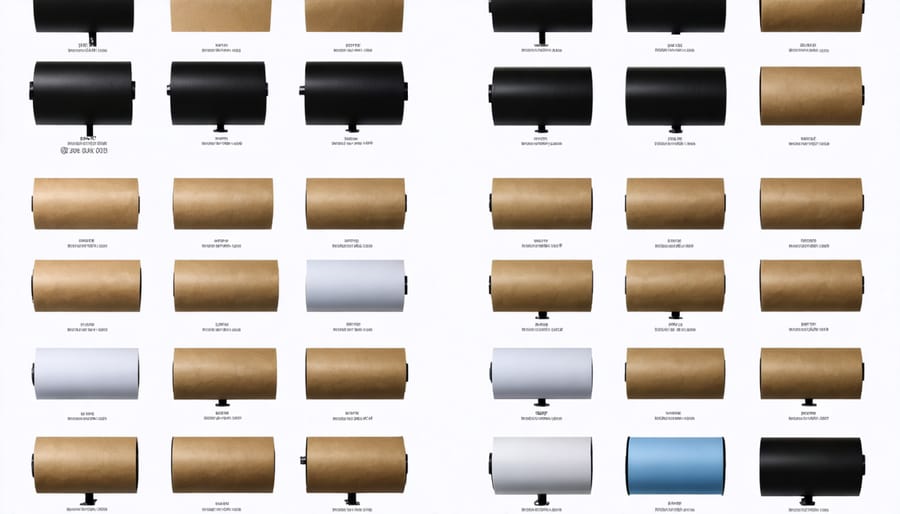
Choosing the right background is crucial for creating professional-looking photos in your home studio. Paper rolls are a popular choice among photographers, offering a smooth, seamless surface that’s perfect for portraits and product photography. Available in various colors and widths, these rolls can be mounted on a wall-mounted or stand-mounted support system. While they’re prone to damage and need regular replacement, their clean look makes them worth the investment.
Muslin backgrounds are versatile and budget-friendly options that create a softer, more textured look. These fabric backgrounds can be draped or pulled taut, and their wrinkles often add character to your shots. They’re also washable and easily portable, making them ideal for photographers who need to work in different locations.
Vinyl backgrounds offer durability and easy maintenance. They’re water-resistant, wrinkle-resistant, and can be wiped clean – perfect for high-traffic studios or when working with children and pets. While they tend to be more expensive initially, their longevity makes them cost-effective in the long run.
For photographers with limited space, portable background solutions are invaluable. Pop-up backgrounds collapse into compact carriers and set up in minutes. Backdrop stands with collapsible frames allow you to switch between different materials and colors quickly. Some portable systems even come with multiple background options in one package, offering excellent versatility for small home studios.
Support Equipment
A well-organized studio setup requires reliable support equipment to keep your gear secure and accessible. Start with a sturdy background support system – a wall-mounted rack or portable stand that can hold multiple backdrops. Look for stands with crossbars that extend at least 10 feet wide to accommodate full-body shots and group portraits.
Install heavy-duty hooks and clamps along your walls or support system for hanging lights, reflectors, and other accessories. Consider using spring-loaded clips or magnetic hooks for quick setup changes. A combination of S-hooks and bungee cords can help maintain proper backdrop tension and prevent wrinkles.
Storage solutions are crucial for maintaining an organized workspace. Invest in rolling carts with drawers for smaller items like batteries, memory cards, and light modifiers. Wall-mounted pegboards offer versatile storage for light stands, cables, and frequently used tools. Clear, labeled bins help keep your backdrops dust-free and easily identifiable.
Don’t forget about cable management – use velcro straps or cable ties to keep power cords and sync cables tidy and prevent tripping hazards. A dedicated props shelf or cabinet can house commonly used items while keeping them protected from dust and damage. Remember to leave some open floor space for moving equipment around during shoots.
For maximum efficiency, organize your support equipment based on frequency of use, keeping the most-used items within arm’s reach of your primary shooting area.
Essential Props and Accessories
Furniture and Posing Tools
Having the right furniture and posing tools in your home studio isn’t just about comfort – it’s essential for achieving professional-looking portraits. Start with a sturdy, adjustable posing stool that can accommodate subjects of different heights. Look for one with a smooth height adjustment mechanism and a stable base to ensure your subjects feel secure.
A variety of chairs can add versatility to your shoots. Consider including both an upright chair for formal portraits and a comfortable armchair for more relaxed poses. Remember that any furniture you choose should be neutral in style to avoid dating your photos or competing with your subjects.
Posing tables are invaluable for product photography and can double as props in portrait sessions. A simple white table with adjustable height is most versatile. For added flexibility, invest in a set of posing blocks or cubes in different sizes. These can be used to adjust height differences between subjects, create levels in group shots, or serve as stylish props for product photography.
Don’t forget about portable options – collapsible stools and folding chairs can be easily stored when not in use, making them perfect for home studios with limited space. Consider getting a few floor cushions too; they’re great for child photography sessions and can create casual, relaxed poses for adult subjects as well.
Organization and Storage
A well-organized studio is crucial for efficient workflow and equipment protection. Start by investing in sturdy shelving units and storage cabinets that can accommodate your gear while keeping it dust-free. Consider clear storage containers for smaller items like filters, batteries, and memory cards – label everything clearly to avoid frustrating searches during shoots.
Create dedicated zones for different activities: a prep area for equipment assembly, a storage area for unused gear, and a cleaning station for maintenance. Install hooks or pegboards on walls to hang backdrops, light stands, and cables when not in use. A rolling cart can be invaluable for moving equipment around your studio space efficiently.
Cable management is often overlooked but essential for both safety and aesthetics. Use velcro ties or cable sleeves to bundle cords together, and consider installing cable raceways along walls to keep power cables tidy and out of sight. Keep extension cords and power strips organized and easily accessible, but tucked away when not needed.
For your workspace, maintain a clean desk area for computer work and image editing. Use drawer organizers for small accessories and consider a dedicated charging station for batteries and electronic devices. Remember to keep frequently used items within arm’s reach while storing rarely used equipment in less accessible spaces.
Don’t forget to implement a system for backing up your work – keep external hard drives organized and properly labeled. A small toolbox for basic equipment maintenance should also have its designated spot in your studio.
Budget Considerations
Essential vs. Nice-to-Have Items
When setting up your home photography studio, it’s crucial to distinguish between must-have items and those that can wait. Start with the absolute essentials: a reliable camera body and a versatile lens that suits your photography style. Quality lighting equipment comes next – invest in at least one main light source, such as a speedlight or strobe, and a reflector to manage shadows.
Background materials are another essential – begin with a neutral white or black backdrop and expand your collection as needed. A sturdy tripod is non-negotiable for maintaining sharp images and consistency across shoots. Basic light modifiers, like umbrellas or softboxes, round out your essential kit.
Nice-to-have items, while valuable, shouldn’t be your initial focus. These include additional lighting setups, premium backdrop systems, specialized lenses, and advanced modifiers like beauty dishes or strip boxes. Props, posing stools, and specialized backdrops fall into this category too.
Consider this investment strategy: allocate 70% of your initial budget to essential items and save the remaining 30% for nice-to-have equipment as your skills and client base grow. Start with versatile pieces that serve multiple purposes rather than specialized equipment with limited applications. Remember, it’s better to have high-quality essential items than a studio full of mediocre equipment.
As your photography business grows, reinvest a portion of your earnings into those nice-to-have items that align with your developing style and client needs. This approach ensures you’re building a sustainable and professional setup without overwhelming your initial budget.
Money-Saving Tips
Setting up a home photography studio doesn’t have to drain your bank account. With some creative thinking and smart shopping strategies, you can build a professional setup for less. Start by exploring budget-friendly lighting solutions like using clamp lights from hardware stores paired with daylight-balanced bulbs.
Consider DIY alternatives for common studio equipment. Create a seamless backdrop by mounting a large roll of paper or fabric to your wall using simple brackets. Fashion your own reflectors using foam core boards covered with aluminum foil or purchase collapsible reflectors from affordable photography suppliers.
Hunt for deals during major shopping events or consider buying gently used equipment from reputable sellers. Many photographers upgrade their gear regularly, making the second-hand market an excellent source for quality equipment at reduced prices.
Make the most of natural light by positioning your setup near large windows. Use white sheets or translucent curtains as diffusers, and supplement with artificial lighting only when necessary. For props and surfaces, explore thrift stores, yard sales, and craft shops rather than specialized photography suppliers.
Start with essential pieces and gradually build your collection as your needs grow. Remember, creativity often produces better results than expensive equipment. Focus on mastering techniques with basic gear before investing in premium alternatives.
Setting up a home photography studio might seem daunting at first, but breaking it down into manageable steps makes the process much more approachable. Remember, you don’t need to acquire everything at once – start with the essentials and gradually build your studio as your needs and budget allow.
Begin by carefully evaluating your available space and making the most of natural light sources. Focus first on creating a clean, clutter-free environment with neutral walls and adequate room for your primary shooting area. Your initial investment should prioritize fundamental equipment: a reliable camera, basic lighting setup, and essential backgrounds or backdrops.
As you become more comfortable with your setup, you can expand your studio with additional lighting modifiers, props, and specialized equipment. Keep experimenting with different arrangements and lighting techniques to find what works best for your photography style and the types of shoots you most commonly do.
Don’t forget about the practical aspects of studio management – organize your equipment storage, establish a workflow system, and maintain your gear regularly. Consider creating a shot list or checklist to ensure consistency in your setup process.
Remember that some of the most inspiring professional photos have come from modest home studios. The key is to work creatively within your constraints while gradually building towards your ideal setup. With proper planning, careful equipment selection, and consistent practice, your home studio will become a professional space where you can create stunning images and grow as a photographer.
Start small, dream big, and most importantly, start shooting!