Dynamic camera movement transforms ordinary scenes into powerful visual narratives, merging technical precision with emotional storytelling. When combined with cinematic lighting techniques, deliberate camera motion creates psychological impact that static shots simply cannot achieve.
Master cinematographers understand that every dolly, pan, or tracking shot serves a distinct psychological purpose. A slow push-in heightens intimacy and draws viewers deeper into a character’s emotional state. Sweeping crane movements establish scale and context while creating visual poetry. Quick, handheld movements inject urgency and raw energy into scenes that demand immediacy.
But dynamic camera movement isn’t just about the technical execution – it’s about intention. Each movement should advance your story, reveal character, or amplify emotion. Whether you’re working with a sophisticated gimbal system or a simple handheld rig, the fundamental principle remains: camera movement must serve the story first.
This marriage of technical skill and narrative purpose separates amateur camera work from professional cinematography. Understanding how to harness motion – when to move, how fast to move, and most importantly, why to move – gives filmmakers a powerful tool to shape audience experience and create unforgettable visual moments.
The Psychology Behind Camera Movement
Creating Emotional Connection
Dynamic camera movement is more than just technical execution – it’s a powerful tool for creating emotional resonance with your audience. When combined with professional lighting setups, thoughtful camera movements can transform an ordinary scene into a deeply moving experience.
Consider how a slow dolly-in movement naturally draws viewers closer to a subject, creating intimacy and focusing attention on subtle emotional shifts. This technique is particularly effective during pivotal character moments or revelations. Similarly, a gentle circular motion around two characters can emphasize their connection or conflict, while adding depth to their relationship.
Upward crane shots often evoke feelings of triumph, freedom, or revelation, while downward movements can suggest defeat or isolation. Even simple handheld movements, when executed deliberately, can heighten tension or create a sense of unease by mimicking natural human perspective.
The key is matching your movement choice to the emotional beat of your story. Quick, energetic movements amplify excitement and urgency, while slow, controlled movements can build suspense or convey contemplation. Remember that sometimes, the most powerful emotional impact comes from knowing when to keep the camera still, letting the moment breathe naturally.
Subconscious Visual Language
Camera movements speak a powerful visual language that viewers interpret subconsciously, creating emotional responses and narrative understanding without the need for dialogue. When a camera slowly pushes in on a character’s face, audiences instinctively know to pay attention to subtle emotional changes. Similarly, an upward tilt often signifies power or dominance, while looking down can make subjects appear vulnerable or diminished.
Swift, energetic movements tend to create excitement and urgency, while slow, deliberate camera work typically suggests tension or contemplation. A Dutch angle (tilted frame) immediately creates unease or psychological disturbance, tapping into our natural sense of balance and orientation.
Circular movements around subjects often imply revelation or discovery, as viewers literally see things from new angles. Pull-back shots that reveal wider contexts can create dramatic irony or sudden understanding, while quick whip pans suggest urgency or chaos.
Understanding these inherent viewer interpretations helps creators make intentional choices that enhance their storytelling. Just as a writer chooses specific words, cinematographers select camera movements that resonate with audiences’ built-in visual vocabulary, making stories more impactful and engaging.
Essential Dynamic Camera Movements
The Power of the Dolly
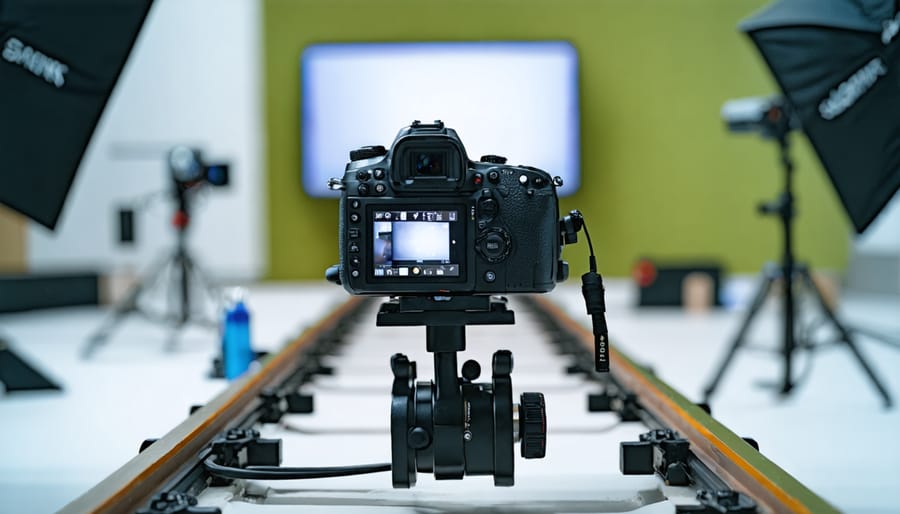
The dolly move, where the camera physically travels along a track or rail system, is one of the most powerful tools in visual storytelling. Unlike simple pans or tilts, dolly movements create a uniquely immersive experience by physically moving through space, allowing viewers to feel as if they’re being drawn into or pushed away from the scene.
When a camera dollies in towards a subject, it creates an intensifying effect that builds emotional connection and dramatic tension. Think of those classic moments where we slowly push in on an actor’s face as they make a crucial realization – the dolly movement literally pulls us into their emotional state. Conversely, dollying out can evoke feelings of isolation, loss, or reveal a broader context that changes our understanding of the scene.
The speed of dolly movements also plays a crucial role in storytelling. Slow, smooth dolly shots create elegance and contemplation, while faster movements can generate excitement or urgency. One of the most effective techniques is the dolly zoom (also known as the Vertigo effect), where the camera moves while the zoom lens compensates, creating that distinctive warping of perspective that can represent psychological distress or dramatic revelation.
Modern innovations like motorized sliders and gimbal systems have made dolly movements more accessible than ever, but the fundamental principle remains unchanged: it’s not about the movement itself, but how it serves the story you’re telling.
Mastering the Tracking Shot
The tracking shot is a cornerstone of dynamic cinematography, offering filmmakers a powerful tool to immerse viewers in the action while maintaining a continuous, fluid perspective. By moving the camera alongside or around the subject, tracking shots create a sense of intimacy and involvement that static shots simply can’t match.
To execute a perfect tracking shot, start by planning your movement path. Whether you’re using a dolly, slider, or stabilized handheld setup, ensure your route is clear of obstacles and your surface is smooth. Professional productions often lay track for dolly shots, but beginners can achieve impressive results using a wheelchair or skateboard for smooth motion.
The speed of your tracking shot dramatically affects its emotional impact. Slow, deliberate movements can build tension or create a dreamlike atmosphere, while rapid tracking heightens energy and urgency. Consider the story you’re telling – a gentle track-in might reveal a character’s vulnerable moment, while a fast parallel track could emphasize the intensity of a chase sequence.
Focus pulling becomes crucial in tracking shots, especially when moving between subjects at different distances. Practice coordinating your camera movement with focus adjustments to maintain sharp imagery throughout the shot. Many cinematographers work with a dedicated focus puller for complex movements.
Remember that tracking shots aren’t just about technical execution – they should always serve the story. Whether you’re revealing crucial details or following character movement, ensure your camera motion enhances rather than distracts from the narrative.
Creative Crane Movements
Crane shots represent one of the most powerful tools in dynamic cinematography, offering sweeping vertical and horizontal movements that can transform ordinary scenes into extraordinary visual experiences. These dramatic camera movements, when combined with proper lighting for dramatic effect, create unforgettable moments that deeply resonate with viewers.
Consider starting high above a crowd before slowly descending to reveal a single character, or rising from an intimate conversation to showcase a breathtaking landscape. These movements aren’t just about showing off technical prowess – they’re about enhancing the emotional impact of your story. A well-executed crane shot can transition between scenes seamlessly, establish spatial relationships, or reveal crucial story elements with grace and impact.
When planning crane movements, timing is everything. The speed of your movement should match the emotional beat of your scene. Slow, deliberate crane shots can create suspense or contemplation, while faster movements might convey excitement or urgency. For example, gradually rising above a quiet cityscape at dawn creates a sense of awakening, while a swift descent into a bustling street market immediately immerses viewers in the action.
Remember that crane shots work best when they serve the story rather than simply showing off technical capability. Use them strategically to punctuate important moments or transition between significant story beats, always keeping your audience’s emotional journey in mind.
Equipment and Technical Considerations

Essential Stabilization Gear
Achieving smooth, dynamic camera movement requires the right stabilization tools, and today’s market offers various options to suit different needs and budgets. At the forefront are 3-axis gimbals, which use motorized stabilization to counteract unwanted movement across all axes. These devices have revolutionized handheld cinematography, allowing operators to achieve fluid motion while maintaining precise control over framing.
Steadicams remain a classic choice for professional productions, offering unparalleled organic movement through their mechanical stabilization system. While they require significant practice to master, the results can be breathtaking, especially for long, complex shots that follow subjects through multiple environments.
For more budget-conscious creators, camera cages with handles provide basic stabilization while offering mounting points for accessories. When combined with a shoulder rig, they can deliver remarkably steady footage while maintaining a natural, documentary-style feel.
Electronic image stabilization (EIS) and in-body image stabilization (IBIS) complement physical tools, working together to smooth out minor vibrations and jerky movements. Many modern cameras feature both, providing an extra layer of stability even when using basic stabilization gear.
For specialized movements, slider systems offer precise linear motion, while drone gimbals ensure stable aerial footage. The key is selecting gear that matches your shooting style and project requirements. Remember that even the most sophisticated stabilization equipment requires practice and understanding of movement principles to achieve professional results.
Don’t overlook simple tools like monopods and counterweights, which can significantly improve stability without breaking the bank. The best stabilization setup often combines multiple tools to address different shooting scenarios.
Camera Settings for Smooth Motion
Achieving smooth, professional-looking dynamic camera movement isn’t just about your physical technique – it’s equally dependent on choosing the right camera exposure settings and configurations. Let’s break down the essential technical parameters that can make or break your dynamic shots.
First, maintain a fast shutter speed – typically at least double your frame rate. For example, if you’re shooting at 24fps, use a minimum shutter speed of 1/50 second. This helps reduce motion blur while preserving natural-looking movement. However, when intentionally creating a dreamlike effect, you might want to experiment with slower shutter speeds.
ISO selection plays a crucial role in maintaining image quality during movement. Keep it as low as possible to minimize noise, especially in low-light conditions. Modern cameras can handle higher ISOs better, but try to stay within your camera’s native ISO range for optimal results.
Aperture choice affects both exposure and depth of field. While shooting movement, a slightly narrower aperture (f/4 to f/8) often works best as it provides some forgiveness in focus while maintaining good light transmission. This becomes especially important when tracking moving subjects or executing complex camera movements.
Enable image stabilization if your camera or lens offers it, but be aware that some stabilization systems can actually interfere with intentional camera movements. Test different stabilization modes to find what works best for your specific shooting style and equipment.
Finally, consider your focus settings carefully. For tracking shots, continuous autofocus (AF-C or AI Servo) can be invaluable, but manual focus might be more reliable for complex predetermined movements. Whatever you choose, practice your focusing technique alongside your movement to achieve consistent results.
Common Mistakes and Solutions
Movement Planning Pitfalls
Even the most experienced photographers can fall into common traps when planning dynamic camera movements. One frequent mistake is focusing solely on the movement itself while neglecting the story it should tell. Remember, every camera motion should serve a purpose beyond just looking impressive.
Another pitfall is attempting overly complex movements without proper preparation. While ambitious shots can be stunning, they require extensive practice and often multiple takes. Start with simpler movements and gradually build up to more challenging sequences as your confidence grows.
Many photographers also overlook their physical environment during planning. Always scout your location thoroughly and consider potential obstacles, lighting changes, and space constraints. There’s nothing worse than discovering mid-shoot that your carefully planned tracking shot is impossible due to an immovable obstacle.
Speed control is another common challenge. Rushed movements can appear jarring and unprofessional, while overly slow ones might bore your audience. Practice varying your pace and find the sweet spot that matches your narrative rhythm.
Finally, don’t forget about your subject’s movement in relation to the camera. Many beginners focus exclusively on their own motion, leading to awkward compositions when the subject and camera movements aren’t properly coordinated. Always rehearse with your subjects and ensure all movements are synchronized for the best results.
Technical Execution Errors
Even the most experienced photographers can stumble when executing dynamic camera movements. One common mistake is rushing the movement, resulting in jerky or unstable footage. To avoid this, practice smooth, controlled movements and consider using a slower pace than you initially think necessary – you can always speed up footage in post-production, but fixing shaky footage is much more challenging.
Another frequent error is inconsistent speed throughout the movement. This often happens when photographers start too fast and slow down as they run out of strength or space. Using proper equipment like a stabilizer or slider can help maintain consistent speed, but regular practice without aids is equally important for developing muscle memory.
Poor focus management plagues many dynamic shots. When moving the camera, maintaining focus on your subject becomes exponentially more difficult. Consider using a higher f-stop for greater depth of field, or invest in a follow focus system for more precise control. If working handheld, keeping your elbows close to your body can significantly improve stability.
Battery and memory card management might seem basic, but they’re crucial for dynamic shots. These movements often require multiple takes, and running out of storage or power mid-shoot can break your creative flow. Always carry backup batteries and cards, and regularly format your cards to prevent fragmentation that could affect recording speed.
Finally, watch out for environmental obstacles. Many photographers focus so intently on their movement that they forget to check their surroundings, leading to accidents or interrupted shots. Scout your location thoroughly and plan your movement path before shooting.
Practical Exercise Guide
Let’s dive into some hands-on exercises that will help you master dynamic camera movements. Start by practicing these techniques in a controlled environment before applying them to actual shoots.
Exercise 1: The Basic Pan
Set up three distinct objects about 6 feet apart. Starting from the leftmost object, practice panning smoothly across all three items. Count to five as you move from start to finish, maintaining consistent speed. Repeat this exercise 10 times, alternating between left-to-right and right-to-left movements.
Exercise 2: Follow Focus
Have a friend walk at a steady pace in a straight line. Practice following them with your camera while maintaining proper focus. Start at walking speed, then gradually increase the difficulty by having them move faster or change directions.
Exercise 3: Dolly Simulation
Using a wheeled office chair or skateboard, practice smooth forward and backward movements. Place markers at your starting and ending points. Try to maintain steady speed and keep your subject centered in the frame. This simulates expensive dolly equipment while helping you understand motion principles.
Exercise 4: The Arc Movement
Position yourself about 6 feet from a stationary subject. Practice moving in a semicircle around them while keeping them centered in your frame. Start slowly, focusing on maintaining consistent distance and smooth movement. This builds muscle memory for complex tracking shots.
Exercise 5: Combined Movements
Create a simple obstacle course with markers indicating where to perform specific movements. For example: start with a pan, transition to a forward dolly, then end with an arc movement. This exercise helps you develop fluid transitions between different camera movements.
Remember to record these practice sessions and review your footage. Look for any shakiness, inconsistent speeds, or framing issues. Practice each exercise for at least 15 minutes daily, and you’ll notice significant improvement in your dynamic camera work within weeks.
Dynamic camera movement is more than just technical skill – it’s an art form that brings your visual stories to life. Throughout this guide, we’ve explored how deliberate camera movements can enhance emotion, direct attention, and create memorable cinematic experiences. By mastering techniques like tracking shots, dolly movements, and crane operations, you’re adding powerful tools to your creative arsenal.
Remember that effective camera movement always serves the story. Whether you’re creating a suspenseful reveal with a slow push-in or capturing the energy of a scene with a dynamic follow shot, each movement should align with your visual storytelling principles and narrative goals.
Start small with handheld movements and simple slider shots, then gradually expand your repertoire as you gain confidence. Practice is essential – try recreating movements from your favorite films, experiment with different speeds and transitions, and always consider how your camera choices affect your audience’s emotional connection to the scene.
The most impactful dynamic camera work often comes from understanding not just how to move the camera, but when to move it. Trust your instincts, keep practicing, and let your creative vision guide your technical decisions.