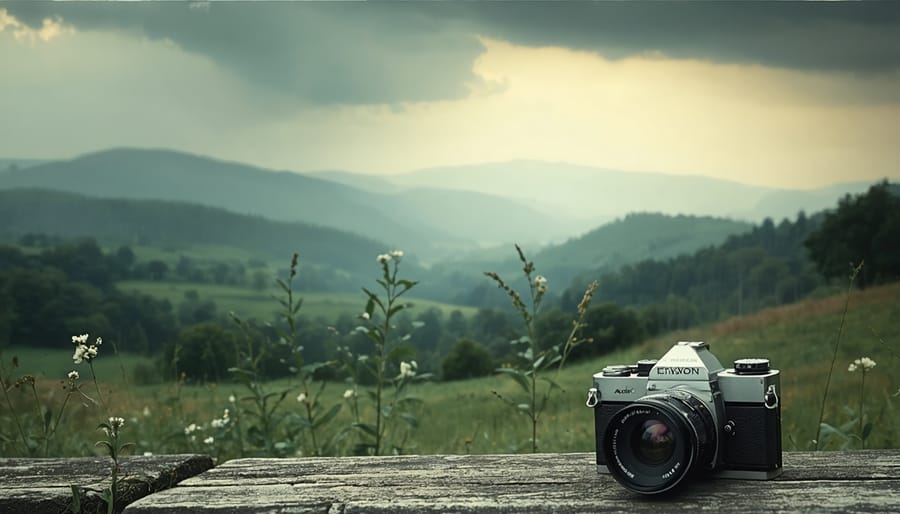
Step into the sun-bleached world of vintage landscape photography, where timeless techniques meet modern digital mastery. Understanding classic landscape photography fundamentals unlocks a realm of artistic possibilities that transcend technological boundaries.
The distinctive charm of vintage landscape imagery lies not in equipment limitations, but in deliberate artistic choices that contemporary photographers can master. By embracing longer exposures, utilizing split-neutral density filters, and prioritizing careful composition over rapid-fire shooting, photographers create images that echo the contemplative nature of large-format film work. This methodical approach, combined with modern post-processing techniques that simulate the characteristic tonal ranges of classic film stocks, delivers photographs with lasting impact.
Traditional landscape masters like Ansel Adams and Edward Weston didn’t just capture scenes—they interpreted them through meticulous exposure calculations and darkroom work. Today’s digital photographers can honor these techniques while leveraging current technology to achieve similar results: rich shadow detail, carefully preserved highlights, and that ineffable quality that makes viewers pause and reflect.
Whether shooting with a modern DSLR or mirrorless camera, these time-tested principles transform ordinary landscapes into extraordinary art pieces that feel both classic and contemporary. The key lies not in mimicking old limitations, but in understanding why these techniques produced such compelling results.
The Enduring Magic of Classic Landscape Photography
Defining the Vintage Aesthetic
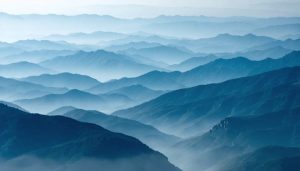
The vintage aesthetic in landscape photography is characterized by several distinct elements that transport viewers to a bygone era. Soft, muted colors and slightly decreased contrast create a nostalgic atmosphere, while subtle color shifts toward warmer tones – particularly in highlights – evoke the feeling of aged photographs. Film-like grain adds texture and character, distinguishing vintage-style images from their ultra-sharp modern counterparts.
Another hallmark is the presence of gentle vignetting around the edges, which naturally draws the viewer’s eye toward the center of the composition. Light leaks and subtle color bleeding, reminiscent of imperfect film processing, can add authenticity to the vintage look. The dynamic range in vintage-style landscapes typically appears more limited than in contemporary digital photography, with shadows that tend to be deeper and highlights that retain a delicate, often slightly blown-out quality.
Composition in vintage landscape photography often favors simplicity and classical arrangements, with strong leading lines and clearly defined focal points. These images frequently embrace imperfections like slight blur or dust spots, which contribute to their authentic period feel rather than detract from it.
The Masters and Their Methods
The pioneers of vintage landscape photography left an indelible mark on the craft through their distinctive methods. Ansel Adams revolutionized the field with his Zone System, meticulously controlling exposure and development to capture the full tonal range of dramatic landscapes. His precise approach to pre-visualization meant seeing the final print before even pressing the shutter.
Edward Weston took a different path, embracing straight photography with razor-sharp focus and long exposures. His use of large-format cameras and contact printing resulted in images with extraordinary detail and clarity. Meanwhile, Carleton Watkins hauled massive glass plates through the American West, producing sweeping vistas of Yosemite that influenced conservation efforts.
Philip Hyde combined technical excellence with environmental advocacy, using warm-toned prints and careful composition to showcase wilderness areas. His work demonstrated how careful timing and weather conditions could transform ordinary scenes into extraordinary photographs. These masters shared a common thread: patience in waiting for perfect light and dedication to careful camera placement, principles that remain relevant in today’s digital age.

Essential Vintage Techniques for Modern Cameras
Zone System in the Digital Age
While Ansel Adams developed the Zone System for film photography, this powerful visualization and exposure technique remains invaluable in the digital age. Modern photographers can leverage their camera’s histogram and dynamic range to apply these classic principles with remarkable precision.
The Zone System divides the tonal range from pure black (Zone 0) to pure white (Zone 10) into eleven distinct zones. In digital photography, this translates beautifully to your camera’s histogram, where Zone 5 represents middle gray – a crucial reference point for proper exposure. Your camera’s highlight and shadow warnings serve as valuable tools for identifying Zones 0 and 10, helping you avoid lost detail in extreme highlights and shadows.
Digital cameras offer instant feedback through their LCD screens and histograms, making it easier than ever to visualize and adjust your exposure across the zone range. When photographing a dramatic sunset, for instance, you might place the darkest shadows in Zone 2 to maintain detail while keeping the brightest clouds in Zone 8 to preserve texture and color.
Modern post-processing software also enhances our ability to work with zones. Tools like selective adjustment brushes and luminosity masks allow photographers to fine-tune specific zones without affecting others. This precise control helps create the rich, detailed landscapes that made Adams famous, while maintaining a natural, authentic look.
Remember that the Zone System isn’t just about technical precision – it’s about pre-visualization and creative interpretation. Use it as Adams intended: as a tool to translate your artistic vision into compelling images that capture the full range of tones nature presents.
Filters and Their Modern Equivalents
In the golden age of landscape photography, photographers relied heavily on physical filters to control light and enhance their images. The graduated neutral density (ND) filter was perhaps the most iconic, allowing photographers to balance bright skies with darker foregrounds – a challenge that remains relevant today. While these glass or resin filters are still used by some traditionalists, modern digital techniques have revolutionized how we achieve similar effects.
The classic polarizing filter, which reduces glare and deepens blue skies, remains one of the few physical filters that can’t be perfectly replicated in post-processing. However, contemporary editing software offers remarkable control over polarization-like effects, allowing photographers to selectively enhance colors and manage reflections with precision that wasn’t possible in the film era.
Color filters, once essential for black and white photography to control how different colors translated to grayscale, have been replaced by highly sophisticated digital color channel mixing. Today’s photographers can achieve the same dramatic effects that Ansel Adams created with red filters, but with the flexibility to adjust and fine-tune after the shot.
The tobacco and sepia warming filters of yesteryear find their modern equivalent in color grading tools. Digital photographers can now apply these vintage looks with greater control, often combining multiple effects that would have required stacking several physical filters in the past.
Split-toning, a technique traditionally achieved through complex darkroom processes and specialty filters, is now accessible through simple slider adjustments in editing software. This allows photographers to create subtle color relationships between highlights and shadows that honor the vintage aesthetic while offering greater creative freedom.
While digital tools have largely superseded traditional filters, understanding the principles behind these classic techniques remains valuable. It helps photographers make informed decisions about when to use physical filters versus digital alternatives, ensuring their landscape images maintain the timeless quality that made vintage photography so compelling.
Long Exposure Mastery
Long exposure photography has been a cornerstone of landscape imagery since the early days of photography, and these classic long exposure techniques can be beautifully adapted for modern digital sensors. The key lies in understanding how to merge traditional methods with contemporary technology.
Start by investing in a solid neutral density (ND) filter set – these are the digital photographer’s equivalent of the thick glass plates used by early landscape masters. While vintage photographers relied on naturally low-sensitivity plates, we can simulate this effect with ND filters ranging from 3 to 10 stops.
To achieve that classic ethereal look in moving water or clouds, begin with exposures between 30 seconds and several minutes. Modern cameras excel at handling long exposures without the reciprocity failure that plagued film, but they do generate more digital noise. Combat this by shooting at your sensor’s native ISO (usually 100) and enabling your camera’s long exposure noise reduction.
The magic happens during “blue hour” – just before sunrise or after sunset – when the light is soft and even, much like what early photographers preferred. Position your camera on a sturdy tripod, just as the masters did, and use a cable release or remote timer to prevent camera shake.
For that timeless feel, look for compositions that emphasize the interplay between static and moving elements. Stationary rocks against flowing water, or solid mountain peaks beneath streaming clouds, create the kind of contrast that defined classic landscape work. Remember to check your histogram regularly – digital sensors have different exposure characteristics than film, but the principles of capturing a full tonal range remain unchanged.
Composition Principles That Never Age
Finding Your Foreground
In vintage landscape photography, the foreground often serves as the gateway to your composition, drawing viewers into the scene with compelling elements that anchor the image. The masters of the craft, like Ansel Adams and Edward Weston, understood that selecting the right foreground could make or break a landscape photograph. When implementing composition techniques for landscapes, start by looking for natural leading lines like winding streams, fallen logs, or rock formations.
Traditional approaches favor elements with character and texture – weathered fence posts, ancient boulders, or patterns in the sand. These objects should occupy roughly the lower third of your frame, creating a natural progression from near to far. The key is finding elements that complement rather than compete with your primary subject.
Remember to consider how your foreground will appear in different lighting conditions. Early landscape photographers often visited locations at dawn or dusk when low-angle light created dramatic shadows and highlighted texture in foreground elements. They would frequently use small apertures (f/16 or f/22) to maintain sharp focus throughout the scene, a practice that remains valuable today.
Don’t be afraid to get close to your foreground elements – sometimes just inches away – to create a sense of depth and dimension that pulls viewers into the photograph. This technique, when combined with careful composition, helps create that timeless quality we associate with classic landscape imagery.
The Art of Patient Timing
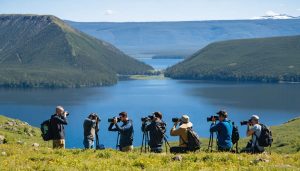
In vintage landscape photography, patience wasn’t just a virtue – it was an essential tool of the trade. Master photographers would often spend days studying their chosen locations, understanding how light moved across the terrain throughout different times of the day and various weather conditions.
The practice of waiting for the perfect moment meant arriving well before sunrise or staying long after sunset. Photographers would scout locations days or even weeks in advance, making detailed notes about the position of the sun, cloud patterns, and seasonal changes. They understood that exceptional landscape photographs weren’t just taken – they were carefully anticipated and planned.
This methodical approach required photographers to develop an intimate understanding of natural light. They learned to recognize the qualities of morning mist, the way shadows lengthened in the late afternoon, and how clouds could transform an ordinary scene into something extraordinary. Many would return to the same location dozens of times until conditions aligned perfectly with their vision.
The digital age hasn’t diminished the value of patient timing. If anything, it has allowed us to better predict these perfect moments through weather apps and sun-tracking tools. However, the fundamental principle remains unchanged: great landscape photography still requires the willingness to wait, observe, and connect with the environment. This patient approach often leads to deeper, more meaningful images that capture not just the scene, but the essence of the landscape itself.
Scale and Perspective
In vintage landscape photography, mastering scale and perspective was crucial for creating images that truly captured the grandeur of nature. Classic photographers like Ansel Adams and Carleton Watkins understood that conveying size relationships and depth required careful composition and technical precision.
One of the most effective traditional techniques was the inclusion of familiar objects in the foreground. Placing elements like trees, boulders, or even human figures helped viewers immediately grasp the massive scale of mountains or valleys behind them. These “anchor points” weren’t just compositional elements; they served as visual measuring sticks that drew viewers into the scene.
Layering was another essential approach, where photographers would intentionally frame their shots to show distinct foreground, middle ground, and background elements. This technique, particularly powerful when combined with telephoto landscape techniques, created a sense of depth that made two-dimensional prints feel three-dimensional.
Leading lines played a vital role too. Vintage photographers often used natural elements like rivers, fallen trees, or mountain ridges to guide the viewer’s eye through the frame. These lines, when properly positioned, created a natural progression from foreground to background, enhancing the perception of depth and distance.
The careful manipulation of atmospheric perspective – where distant objects appear lighter and less detailed due to atmospheric haze – was also deliberately emphasized to reinforce depth perception in black and white landscapes.
Post-Processing with a Vintage Mindset
Dodge and Burn Like the Masters
The art of dodging and burning, perfected by masters like Ansel Adams, remains a cornerstone of landscape photography. Today’s digital tools allow us to apply these traditional darkroom techniques with unprecedented precision and control.
In Photoshop or Lightroom, create a new layer set to Overlay blend mode and fill it with 50% gray. Using a soft brush at low opacity, paint with black to darken (burn) areas that need more depth, such as moody storm clouds or shadowy canyon walls. Use white to lighten (dodge) areas that need emphasis, like sunlit mountain peaks or flowing water.
The key to authentic-looking results lies in subtlety. Start with brush opacities around 10-15% and build up gradually. Focus on enhancing the natural flow of light in your image rather than creating artificial effects. Pay special attention to the edges of your adjustments – harsh transitions will immediately reveal your edits.
Consider the traditional landscape photographer’s workflow: they would often spend hours in the darkroom, carefully manipulating exposure times with hand-cut masks and precise movements. While our digital tools make the process more forgiving, maintain that same level of patience and intention. Think about where you want to guide the viewer’s eye and use dodging to create subtle leading lines through your composition.
Remember, the goal isn’t to completely transform your image, but to enhance the natural drama and depth already present in your capture.

Tonal Control and contrast
In vintage landscape photography, mastering tonal control was paramount, and these classic techniques remain invaluable in the digital age. The Zone System, developed by Ansel Adams, continues to guide photographers in visualizing and capturing the full range of tones from deep shadows to bright highlights.
Today’s digital photographers can apply these time-honored principles using modern tools. Instead of dodging and burning in the darkroom, we now use selective adjustment layers and masks. The key is to maintain the deliberate, thoughtful approach of traditional photographers while leveraging digital advantages.
When working with landscapes, pay special attention to the transition between tones. The subtle gradations in sky, water, and terrain define the mood and depth of your image. Start by capturing a well-exposed base image, ensuring you preserve detail in both highlights and shadows. During post-processing, your black and white conversion should emphasize these tonal relationships.
Consider using graduated neutral density filters in-camera, just as vintage photographers did. This helps balance exposure between bright skies and darker foregrounds. In post-processing, use selective contrast adjustments to guide the viewer’s eye through the frame, much like traditional darkroom techniques. Remember, the goal isn’t to replicate old photos exactly, but to capture their timeless quality while embracing modern capabilities.
In an age of instant filters and digital shortcuts, the enduring appeal of vintage landscape photography techniques offers something truly special to modern photographers. These time-tested methods teach us patience, precision, and a deeper appreciation for the craft of photography. By incorporating vintage approaches into our contemporary workflow, we develop a more thoughtful eye for composition and a better understanding of light’s fundamental behavior.
The marriage of classic techniques with modern technology creates unique opportunities for artistic expression. Whether it’s using traditional filters, embracing longer exposure times, or carefully considering each shot as if working with limited film, these vintage practices help us create images that stand out in today’s fast-paced digital world.
As we’ve explored throughout this article, vintage landscape photography isn’t just about nostalgia – it’s about creating timeless images that capture nature’s beauty with intention and craft. By combining the best of both worlds, photographers can develop their unique style while honoring the rich heritage of landscape photography. The result? Images that not only document our natural world but tell stories that resonate across generations.