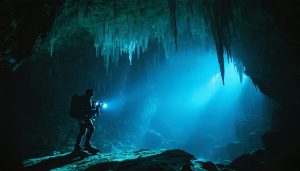
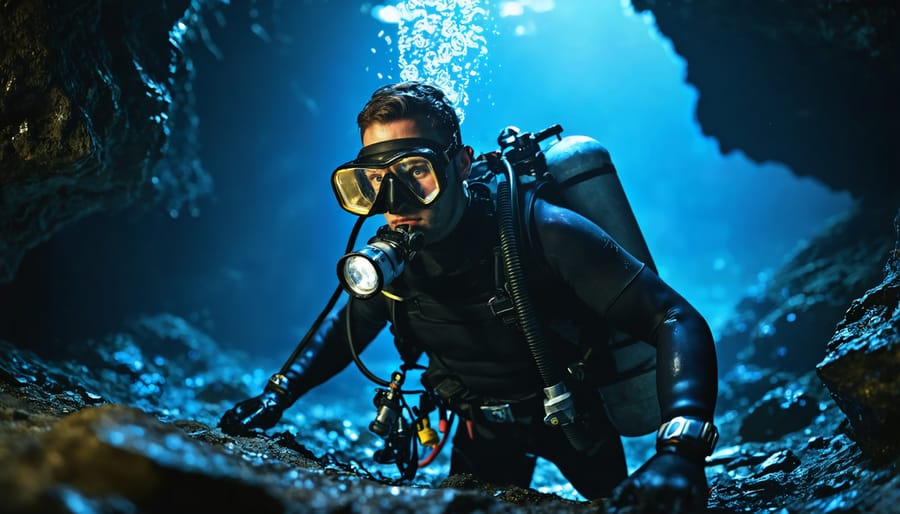
Descending into the otherworldly realm of underwater caves, photographers face one of diving’s most challenging and rewarding pursuits. In these lightless chambers, where crystalline formations have grown undisturbed for millennia, capturing compelling images demands a unique combination of technical diving expertise, advanced photography skills, and unwavering safety discipline.
Unlike open-water photography, cave photography requires mastery of multiple light sources, precise buoyancy control, and intimate knowledge of cave diving protocols. Every image represents a delicate balance between artistic vision and strict adherence to safety procedures, as photographers navigate tight spaces while managing complex camera systems and essential life-support equipment.
The rewards, however, are extraordinary. From prehistoric remains to pristine mineral formations that have never seen natural light, underwater caves offer photographers access to scenes few humans have witnessed, let alone documented. These environments present opportunities to create images that not only showcase technical excellence but also tell stories of Earth’s hidden geological treasures.
This comprehensive guide explores the essential techniques, specialized equipment, and crucial safety considerations required for successful underwater cave photography. Whether you’re an experienced cave diver looking to add photography to your skill set or an accomplished photographer ready to venture beneath the surface, you’ll discover how to capture these subterranean wonders while maintaining the highest standards of diving safety.
Essential Gear for Cave Photography
Camera and Housing Considerations
Selecting the right underwater photography gear for cave environments requires careful consideration of both functionality and durability. Unlike open-water photography, cave photography demands equipment that can withstand extreme conditions while maintaining reliability in low-light situations.
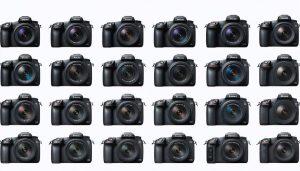
Full-frame mirrorless cameras have become increasingly popular for cave photography due to their excellent low-light performance and compact size. Models like the Sony A7S series or Nikon Z6 excel in high-ISO situations, crucial for capturing details in dark cave environments. However, crop-sensor cameras can also perform well when paired with appropriate lighting.
Your housing choice is equally critical. Opt for housings rated to at least 40 meters depth, even if you’re planning shallower dives. Look for robust construction with double O-ring seals and vacuum testing capability. Aluminum housings generally offer better protection than plastic ones, though they’re pricier. Essential features include ergonomic button placement and the ability to accommodate multiple strobe connections.
Consider housings with built-in vacuum systems for leak detection – they’re invaluable in cave environments where equipment failure isn’t just inconvenient but potentially dangerous. Additionally, ensure your housing has sufficient port options to accommodate wide-angle lenses, which are essential for cave photography. Remember that simplicity and reliability should take precedence over fancy features that might compromise dependability underwater.
Lighting Systems and Strobes
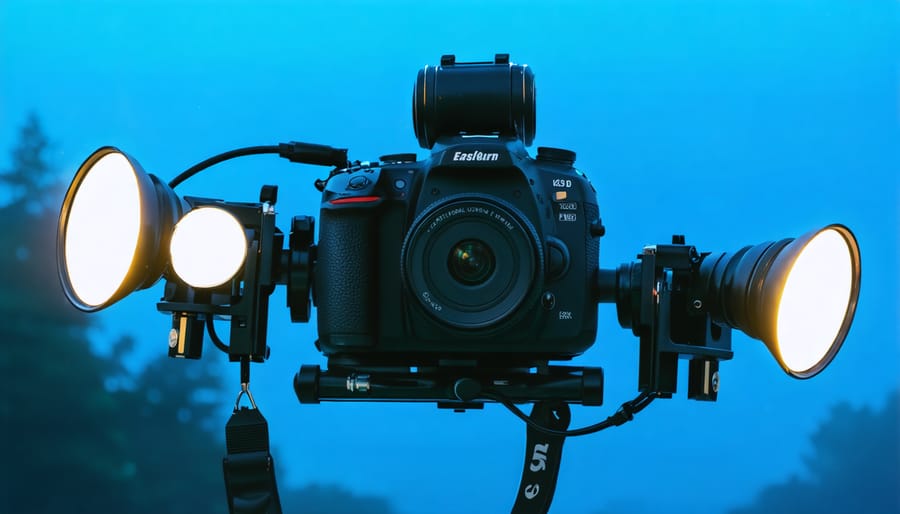
In underwater cave photography, your lighting system is absolutely crucial – it’s quite literally your lifeline to capturing stunning images in complete darkness. Unlike open water photography, cave environments present unique challenges that require specific lighting solutions.
Primary strobes are the workhorses of cave photography, with most photographers opting for at least two powerful units rated at 60-watt seconds or higher. Position these strobes slightly behind your camera housing to minimize backscatter – that’s the frustrating effect of suspended particles reflecting light back into your lens. Many experienced cave photographers recommend using strobes with a beam angle of 90 degrees or wider to ensure adequate coverage of larger cave passages.
For focus lights and video purposes, modern LED systems have become increasingly popular. High-powered focus lights in the 1000-2000 lumen range help you compose shots and navigate, while serving as modeling lights for strobe positioning. Consider carrying a backup light system – remember, you’re in an environment where equipment failure isn’t just an inconvenience, it’s a safety issue.
Light placement is critical in cave photography. The traditional approach involves positioning one strobe slightly higher than the other to create natural-looking shadows and depth. Some photographers use remote slave strobes, carefully placed in the cave environment to illuminate interesting features or create dramatic lighting effects. However, this advanced technique requires careful planning and additional safety considerations.
Color temperature matters significantly in cave environments. Most underwater strobes produce daylight-balanced light (around 5500K), which works well for bringing out the natural colors of cave formations. Some photographers use colored filters on their strobes to create specific moods or highlight particular features, though this requires careful white balance consideration in post-processing.
Battery life is another crucial factor – always carry backup batteries and ensure all lighting equipment is fully charged before each dive. Modern lithium-ion batteries offer excellent performance, but the cold cave environment can affect battery life, so plan accordingly.
Safety First: Critical Protocols
Cave Diving Certifications
Before even considering underwater cave photography, you must obtain proper cave diving certifications. The minimum requirement is typically a Full Cave Diver certification from a recognized agency such as NACD, NSS-CDS, or IANTD. This certification involves extensive training in cave navigation, line protocols, and emergency procedures.
Most training agencies recommend completing several prerequisite courses before pursuing cave certification, including Open Water, Advanced, and Cavern diving certifications. The journey typically takes several months to a year, depending on your dedication and diving frequency.
For photographers specifically, many experts recommend gaining significant cave diving experience before introducing camera equipment into the environment. A good benchmark is logging at least 100 cave dives post-certification before attempting photography. Some agencies also offer specialized cave photography courses that cover both safety protocols and photography techniques in cave environments.
Remember that cave diving certifications aren’t just formalities – they’re essential life-saving credentials that provide the foundation for safe underwater cave photography. No photo is worth compromising safety, and proper certification ensures you have the skills to handle both diving and photography responsibilities simultaneously.
Emergency Equipment and Procedures
When photographing in underwater caves, your emergency equipment is just as crucial as your camera gear. Beyond standard marine environment safety protocols, cave photography requires additional safety measures due to the confined spaces and limited exit points.
Always carry at least three independent light sources: your primary diving light, a backup, and an emergency light. Make sure each has fresh batteries and is rated for your planned dive depth. A safety reel with at least 150 feet of guide line is essential, as is redundant breathing equipment, including a spare air source and regulator.
Your emergency kit should include a dive slate for communication, a dive computer with remaining air display, and a cutting tool for entanglement situations. Consider carrying a small emergency strobe or marker light that can help rescuers locate you in case of an emergency.
Never enter a cave without proper cave diving certification and familiarity with emergency procedures. Always dive with a qualified buddy who understands both cave diving and photography protocols. Establish clear communication signals before the dive, particularly for photography-specific situations like when you need to stop for a shot or when it’s time to turn back.
Keep emergency gear easily accessible, not buried under camera equipment. Remember the “rule of thirds” for air management: one-third for entering, one-third for exiting, and one-third reserved for emergencies. When setting up shots, always maintain awareness of your exit route and monitor your air supply frequently. If any equipment malfunctions, abort the photo shoot immediately and exit following proper emergency protocols.
Technical Photography Skills
Camera Settings for Cave Environments
Mastering exposure in challenging environments like underwater caves requires a solid understanding of your camera’s settings. Start with shooting in RAW format to maximize post-processing flexibility, as cave environments often present extreme contrast situations.
For most cave scenarios, set your ISO between 400-800 to balance noise and sensitivity. In particularly dark sections, you might need to push to 1600, but be mindful of your camera’s noise performance. Aperture choice typically falls between f/4 and f/8, depending on your desired depth of field and available light.
Shutter speed becomes crucial when using artificial lighting. With strobes, sync at 1/125 or slower to ensure proper flash exposure. For continuous lighting, you may need to drop to 1/60 or slower, making a steady hand or support essential.
White balance settings vary depending on your lighting setup. When using artificial lights, start with 4500K-5500K and adjust based on your specific lights. If shooting in ambient light near cave entrances, consider using the cloudy preset (around 6500K) as a starting point.
Focus manually whenever possible, as autofocus systems often struggle in low-contrast cave environments. Use your diving lights to aid focusing, and consider using focus-assist lights specifically designed for underwater photography.
Composition Techniques
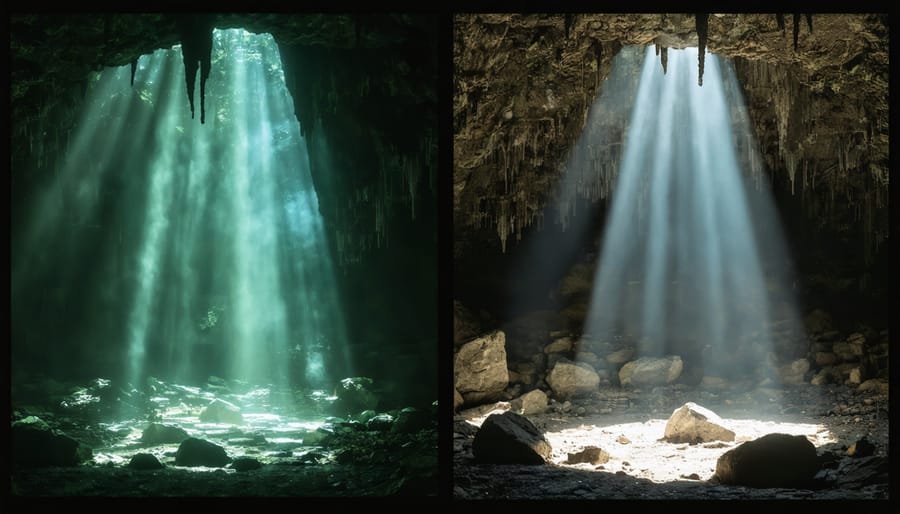
Composing striking images in underwater caves presents unique challenges due to confined spaces, but these limitations can actually help create dramatic and compelling photographs. Start by identifying natural frames within the cave structure – rock formations, stalactites, or entrance arches can serve as powerful framing elements that draw viewers into your image.
Leading lines are particularly effective in cave photography. Use guidelines created by rock formations, rope lines, or bubble trails to direct attention through your composition. These elements can create depth and guide viewers’ eyes toward your main subject, whether it’s a diver, marine life, or interesting geological features.
Consider the rule of thirds, but don’t be afraid to break it when the cave environment demands. Position your subject where the space allows while maintaining visual balance. In tight passages, try shooting diagonally to create a sense of depth and movement. When photographing larger chambers, include a diver or object for scale – this helps convey the impressive dimensions of the space.
Negative space can be particularly powerful in cave photography. The darkness surrounding your subject can create mood and mystery, while strategic lighting can reveal textures and shapes that emerge from the void. Work with your dive buddy to experiment with different positions for both subject and lights to find the most dramatic angles.
Remember that less is often more in confined spaces. Clean, simple compositions typically work better than cluttered scenes, allowing viewers to focus on the most compelling elements of your underwater cave photographs.
Lighting Techniques
Lighting in underwater caves presents unique challenges that require mastering advanced lighting techniques specific to this environment. Unlike open water photography, cave environments demand careful consideration of both primary and backup lighting sources.
The most effective setup typically involves a combination of continuous lighting and strobes. Your primary light source should be a powerful diving torch with a wide beam angle, ideally 100 degrees or more, to illuminate the cave’s structure. Position this light at a 45-degree angle to reveal textures and prevent backscatter.
For detailed shots, use multiple strobes positioned off-camera to create depth and dimension. Place one strobe at approximately 45 degrees to your subject as your key light, and position a second strobe at a wider angle (around 90 degrees) for fill light. This setup helps prevent harsh shadows while maintaining the cave’s natural ambiance.
Color temperature management is crucial underground. Water absorbs different wavelengths of light at varying rates, so use lights with color temperatures between 5000K and 6500K for the most natural results. Consider using colored filters on your strobes to restore the warmer tones that water typically filters out.
Remember to avoid pointing lights directly at silty surfaces, as this can stir up particles and create unwanted backscatter in your images. Instead, practice indirect lighting by bouncing light off cave walls for a softer, more natural illumination.
Post-Processing Cave Photos
Color Correction
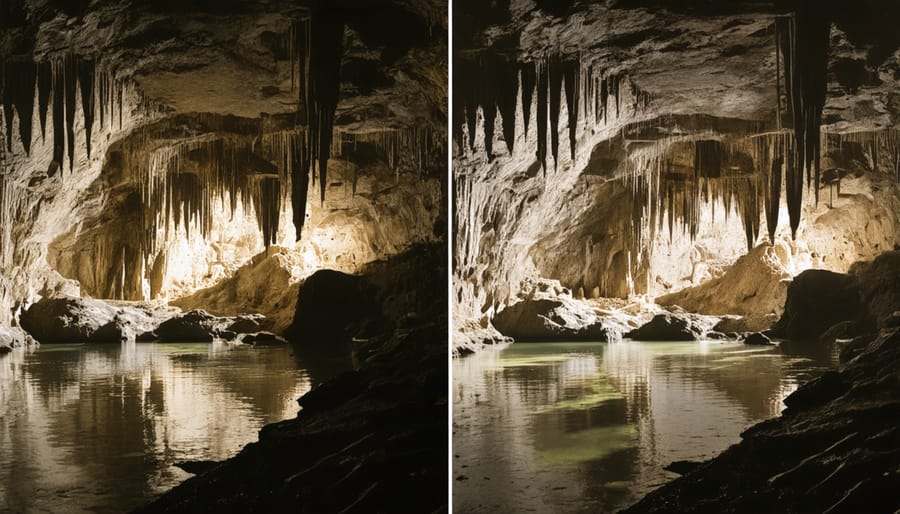
One of the biggest challenges in underwater cave photography is dealing with the loss of natural colors as light penetrates water. Even the most vibrant scenes can appear monotonously blue or green without proper color correction techniques. The key to restoring natural colors starts with proper in-camera settings and continues through post-processing.
When shooting, using a powerful underwater strobe or video light helps capture true colors by providing artificial illumination. However, be mindful of backscatter, which occurs when your light source illuminates suspended particles in the water. Position your strobes at 45-degree angles away from your camera to minimize this effect.
In post-processing, start by adjusting your white balance. Raw files offer more flexibility here, so always shoot in RAW format when possible. Use the white balance dropper tool on a neutral area of your image, such as a gray rock or white cave formation. This helps establish a natural color baseline.
Next, work on color channels individually. Red is typically the first color to disappear underwater, so you’ll often need to boost red channels while reducing blues and greens. Use selective color adjustments to target specific hues without affecting others. Split toning can help balance the cooler tones in shadows with warmer highlights.
Remember that natural-looking results are key – avoid over-saturating your images, as this can make them appear artificial and detract from the cave’s natural beauty. Subtle adjustments often yield the most professional results.
Managing Contrast and Details
Managing contrast in underwater cave photography presents unique challenges due to the extreme lighting conditions. The stark difference between the dark cave walls and your artificial lighting can create harsh shadows and blown-out highlights if not properly controlled.
To tame these contrasts, start by positioning your strobes at a 45-degree angle away from the subject, which helps reduce backscatter and creates more even illumination. Consider using multiple light sources at different intensities to fill shadows without overwhelming the scene. A good technique is to use your primary strobe at full power for main illumination while setting secondary lights at half power for fill lighting.
When photographing cave features, pay special attention to texture and depth. Position your lights to create side-lighting effects that emphasize the geological formations’ details. The play of light and shadow can reveal intricate patterns in stalactites and flow stones that might otherwise go unnoticed.
Color management is crucial in cave environments. Water absorbs different wavelengths of light at varying rates, so adjust your white balance accordingly. Using manual white balance settings with a gray card can help maintain consistent colors throughout your shoot. Remember that the deeper you go into the cave, the more critical proper lighting becomes.
For capturing fine details, consider using a focusing light separate from your strobes. This helps you achieve precise focus in the dark environment while allowing creative control over your final lighting setup. When shooting particularly detailed subjects, try bracketing your exposures to ensure you capture both shadow and highlight details effectively.
Underwater cave photography represents one of the most challenging and rewarding specialties in the photography world, combining technical expertise with artistic vision in a uniquely demanding environment. Throughout this guide, we’ve explored the essential equipment, techniques, and safety considerations that form the foundation of successful cave photography.
Remember that while capturing stunning images is important, safety must always be your top priority. Never compromise your diving safety for a shot, and always follow proper cave diving protocols. This means maintaining appropriate certification levels, diving with qualified buddies, and adhering to the rule of thirds for gas management.
The key to success lies in thorough preparation and practice. Start with simpler cave environments and gradually work your way up to more challenging locations as your skills improve. Master your buoyancy control and positioning techniques in open water before attempting complex shots in overhead environments. Take time to understand how your strobes interact with different cave formations and practice your lighting techniques extensively.
Equipment maintenance is crucial in this environment. Regularly service your camera housing, check O-rings, and maintain your diving gear to prevent equipment failures that could compromise both your safety and your shots. Consider redundancy in critical equipment, particularly lighting systems.
As you develop your underwater cave photography skills, remember that each cave system is unique and deserves respect. Be mindful of environmental impact, avoid touching formations, and follow local regulations and best practices for cave conservation. The most compelling images often come from photographers who take time to understand and appreciate the delicate ecosystems they’re documenting.
Finally, connect with the cave diving and underwater photography community. Share experiences, learn from others’ mistakes, and continue educating yourself about new techniques and safety practices. With patience, dedication, and a strong foundation in both diving and photography skills, you’ll be well-equipped to capture the mysterious beauty of underwater caves while maintaining the highest standards of safety and professionalism.