Transform your photography studio into a professional lighting environment by mastering three fundamental elements: key light positioning, fill light balance, and background illumination. Position your main light source 45 degrees from your subject at eye level to create dimensional shadows and reveal form – this single decision shapes the entire mood of your image. Add a fill light at half the intensity of your key light to soften shadows while maintaining depth, particularly crucial for portrait and product photography. Control your background lighting separately with dedicated strobes or continuous lights to create depth and separation, preventing your subject from appearing flat against the backdrop.
Proper lighting transforms amateur shots into professional images, yet many photographers overcomplicate their setup. Start with these core principles, then expand your lighting arsenal based on your specific needs. Whether you’re shooting in a dedicated studio or creating a portable setup on location, understanding these foundational lighting concepts enables you to craft professional-quality images consistently. Master these essentials first, then experiment with more advanced techniques like rim lighting and specialty modifiers to develop your signature style.
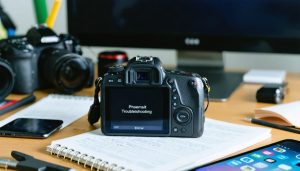
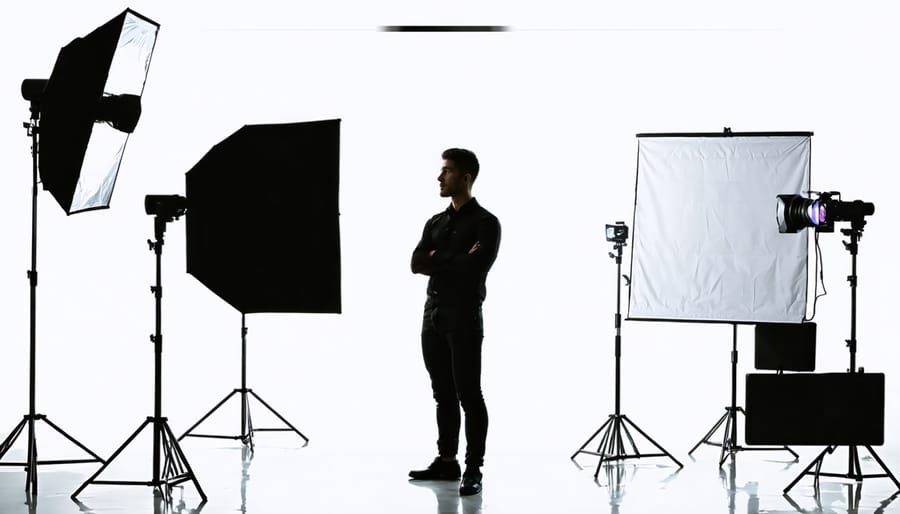
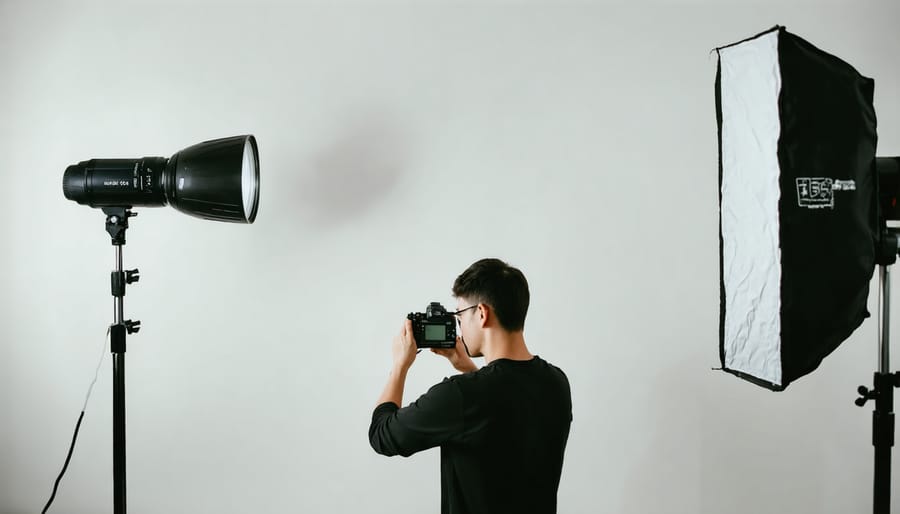
Essential Lighting Equipment for Professional Photography
Continuous vs. Strobe Lighting
When setting up professional lighting, you’ll encounter two main types: continuous and strobe lighting. Each has distinct advantages that make them suitable for different photography scenarios.
Continuous lighting, as the name suggests, provides a constant light source. Think of it as “what you see is what you get.” These lights allow you to visualize exactly how your shadows and highlights will appear before taking the shot. They’re particularly valuable for beginners learning light placement and for video work. LED panels have become increasingly popular in continuous lighting, offering adjustable color temperature and intensity while running cool and energy-efficient.
Strobe lighting, on the other hand, delivers powerful bursts of light when triggered. These flash units produce significantly more light output than continuous sources, making them ideal for freezing motion and achieving sharp images even in challenging conditions. They’re the go-to choice for most professional studio photographers, especially when working with moving subjects or when you need to overpower ambient light.
Consider your specific needs when choosing between the two. If you’re primarily shooting portraits or product photography where your subject isn’t moving, continuous lighting might be your best bet. However, if you’re photographing events, fashion, or any fast-moving subjects, strobes will give you the power and speed you need. Many photographers actually maintain both types in their kit, switching between them based on the project requirements.
Remember that both types can be modified with softboxes, umbrellas, and other light-shaping tools to achieve your desired lighting effect.
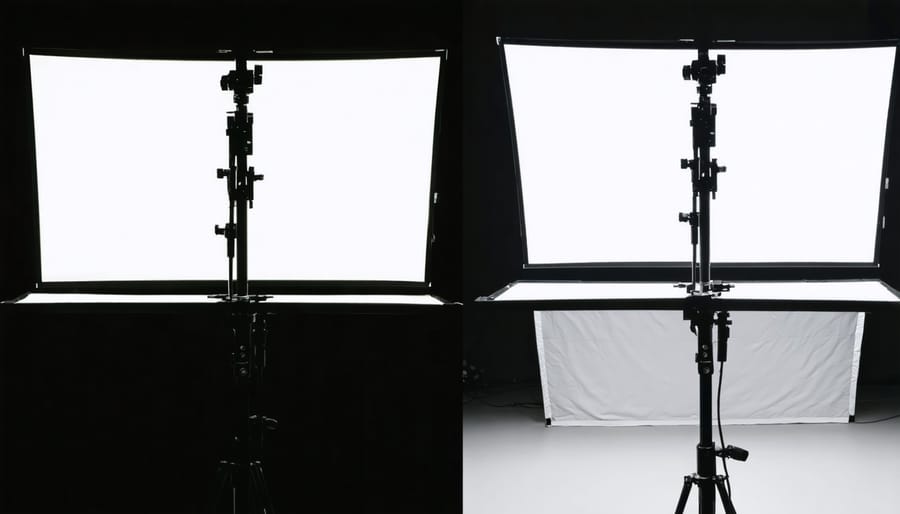
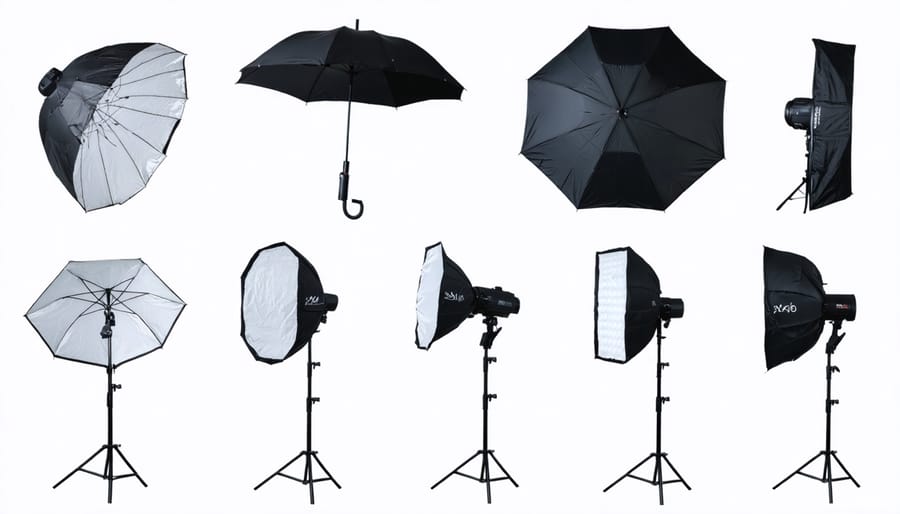
Light Modifiers and Their Effects
Light modifiers are essential tools that help photographers shape and control light to achieve their desired effects. Let’s explore the most common types and their unique characteristics.
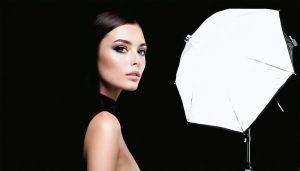
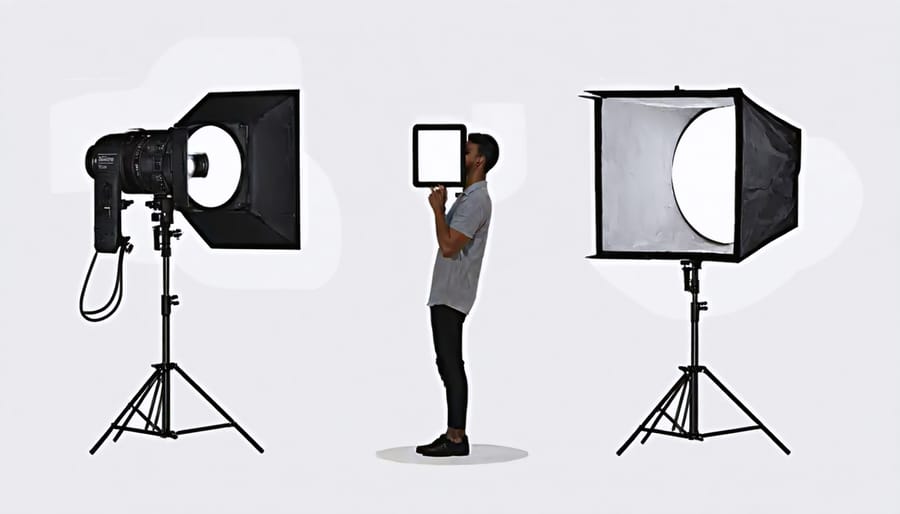
Softboxes are rectangular or octagonal modifiers that create soft, even lighting perfect for portraits and product photography. They work by diffusing light through multiple layers of material, producing gentle shadows and reducing harsh highlights. The larger the softbox, the softer the light output will be.
Photography umbrellas come in two main varieties: reflective and shoot-through. Reflective umbrellas bounce light off their metallic interior surface, creating a broad, slightly more contrasty light than softboxes. Shoot-through umbrellas diffuse light directly through their translucent material, offering quick setup and a soft, wrap-around effect.
Reflectors are versatile and cost-effective tools that bounce existing light onto your subject. They typically come with multiple surfaces: silver for increasing contrast, gold for adding warmth, and white for subtle fill light. The black side can also be used to subtract light and enhance shadows.
Diffusers act as transparent barriers that scatter light, reducing its intensity and harshness. They’re particularly useful for outdoor shoots when you need to tame harsh sunlight or in-studio when you want to create the most flattering light possible. Small diffusion panels can even be handheld for precise control over your lighting.
Building Your First Professional Lighting Kit
Core Equipment Selection
Selecting the right core lighting equipment is crucial for creating professional-quality photos. Let’s start with the essential pieces you’ll need to build a versatile lighting kit.
First, consider your primary light source. For beginners and intermediate photographers, I recommend starting with two to three strobe lights or continuous LED panels. Strobes offer more power and freeze motion effectively, while LED panels provide constant lighting that’s perfect for both photo and video work. Look for lights with at least 200-300 watt-seconds for strobes or 1000+ lumens for LEDs.
Light stands are equally important – invest in sturdy C-stands or heavy-duty aluminum stands that can safely support your equipment. For maximum stability, choose stands with a wide footprint and air-cushioned columns to protect your lights if the locking mechanism accidentally releases.
Your modifier mount system deserves careful consideration. Bowens and Profoto are industry standards, with Bowens being more budget-friendly while maintaining compatibility with numerous third-party modifiers. Having a universal mount system makes it easier to expand your modifier collection over time.
For power solutions, consider whether you need battery-powered units for location shoots or if studio-based AC power will suffice. Modern battery-powered strobes offer excellent portability without sacrificing power, though they typically cost more than their AC-only counterparts.
Don’t forget about sync solutions. While most modern lights include built-in receivers, you’ll need a reliable trigger system. Look for ones with TTL capability if you shoot events or need quick adjustments, though manual triggers work fine for controlled studio environments.
For those just starting, here’s a basic kit recommendation:
– Two 400Ws strobes or 1500-lumen LED panels
– Three heavy-duty light stands (one as backup)
– One wireless trigger system
– Basic modifier set (softbox, umbrella, and reflector)
Remember, it’s better to invest in fewer high-quality pieces than many budget items that might need replacement soon.
Essential Accessories and Backup Equipment
No professional lighting setup is complete without the right essential accessories and backup equipment to ensure smooth operation during critical shoots. Let’s explore the must-have items that will help you avoid common pitfalls and technical difficulties.
First up are light stands and boom arms. Always keep at least one extra light stand on hand – they’re relatively inexpensive and can be lifesavers if one fails during a shoot. Quality sandbags are non-negotiable for stability and safety, especially when working with overhead lighting or in outdoor conditions.
Power management is crucial. Pack multiple extension cords of varying lengths, and always bring a surge protector to safeguard your equipment. For location shoots, invest in reliable battery packs and keep fully charged spares ready. A portable generator can be invaluable for outdoor sessions where power access is limited.
Modifiers are another critical component. Keep spare diffusion materials, extra softbox covers, and backup umbrellas in your kit. These items can tear or break unexpectedly, and having replacements readily available can save your shoot.
Don’t forget about the small yet vital accessories: gaffer tape, clips, and zip ties for securing cables and modifiers; a basic tool kit for quick repairs; and spare sync cables and triggers. These items might seem trivial, but they’re essential for troubleshooting common setup issues.
Color correction gels are another must-have. Keep a variety of CTO (Color Temperature Orange) and CTB (Color Temperature Blue) gels on hand for matching ambient light conditions or creating specific moods. Include spare sheets as these can easily get damaged or lost during busy shoots.
Lastly, invest in proper storage and transport solutions. Padded cases protect your lights during transport, while dedicated bags for stands and modifiers make setup and breakdown more efficient. Remember, organizing your backup gear is just as important as having it – you need to be able to access everything quickly when time is of the essence.
Setting Up Your Lighting Configuration
Basic Three-Point Lighting Setup
The foundation of professional studio lighting begins with mastering the classic three-point lighting arrangement. This time-tested setup consists of three essential lights: the key light, fill light, and back light, each serving a specific purpose in creating depth and dimension in your photographs.
Start by positioning your key light, which serves as your primary light source. Place it at approximately 45 degrees to one side of your subject and slightly above eye level. This creates appealing shadows and defines the subject’s features without appearing flat or harsh.
Next, set up your fill light on the opposite side of your key light, but at about half the intensity. Position it at the same height as your key light or slightly lower. The fill light’s job is to soften the shadows created by the key light, preventing them from becoming too dark while maintaining natural-looking dimensionality.
Finally, position your back light (also called a rim light) behind your subject, opposite the camera. Raise it above head height and aim it downward at roughly 45 degrees. This light creates a subtle highlight along the edges of your subject, separating them from the background and adding that professional polish to your images.
Remember to start with your lights at lower power settings and gradually adjust them until you achieve the desired balance. A good rule of thumb is to maintain a 2:1 ratio between your key and fill lights, with the back light set slightly brighter than the fill. Use light meters or test shots to fine-tune your setup, paying special attention to how the lights interact with each other and affect your subject’s features.
Advanced Lighting Patterns
Mastering lighting patterns and techniques is crucial for creating professional portraits and commercial photographs. Let’s explore the most effective patterns that professionals use and when to implement them.
Rembrandt lighting, characterized by a distinctive triangle of light on the subject’s cheek, creates dramatic portraits with depth and dimension. This pattern works beautifully for corporate headshots and artistic portraits, especially when you want to convey authority or thoughtfulness.
Butterfly lighting, created by positioning the main light directly above the subject’s face, produces a butterfly-shaped shadow under the nose. This glamour-style lighting is perfect for fashion photography and highlighting facial features, particularly for subjects with defined cheekbones.
Loop lighting, a versatile pattern where the light creates a small shadow of the nose on the cheek, offers a natural look that flatters most faces. It’s an excellent choice for family portraits and casual headshots, providing depth without being overly dramatic.
Split lighting divides the face into equal halves of light and shadow, creating a bold, artistic effect. Use this pattern for musician portraits, dramatic self-portraits, or when you want to convey mystery or duality in your image.
Broad lighting illuminates the side of the face turned toward the camera, making features appear fuller. This pattern helps when photographing subjects with narrow faces or when you want to create a more approachable, friendly appearance.
Short lighting, which illuminates the side of the face turned away from the camera, is slimming and adds dimension. It’s particularly effective for subjects with round faces or when you want to create more dramatic portraits with enhanced depth.
Remember to adjust these patterns based on your subject’s features and the mood you’re trying to convey. Small tweaks in light position can dramatically impact the final result.
Common Lighting Mistakes to Avoid
Even experienced photographers can fall into common lighting pitfalls that diminish their image quality. One frequent mistake is relying too heavily on direct, harsh lighting, which creates unflattering shadows and high contrast. Instead, diffuse your light source using softboxes or umbrellas to create more natural-looking results.
Another common error is positioning lights at eye level, which can create flat, uninteresting images. Experiment with different angles and heights to add depth and dimension to your subjects. Similarly, many photographers overlook the importance of fill lights, leaving shadows too dark and losing valuable detail in their images.
Background separation is often neglected, leading to subjects blending into their surroundings. Adding a rim light or hair light can help create that professional separation between subject and background. Watch out for mixed lighting temperatures too – combining daylight with artificial lighting without proper color correction can result in inconsistent color casts across your images.
Many beginners make the mistake of placing lights too close to their subjects, creating hot spots and harsh transitions. Remember the inverse square law: light intensity decreases dramatically as distance increases. Position your lights farther away for more even coverage and softer transitions.
Lastly, don’t forget about light spill control. Using grids, barn doors, or flags helps direct light precisely where you want it, preventing unwanted reflections and maintaining control over your lighting scene.
Testing and Fine-Tuning Your Setup
Light Metering Basics
Light metering is the foundation of professional lighting setup, helping you achieve consistent and accurate exposure across your images. Think of your light meter as your photography compass – it guides you through the technical aspects of lighting to reach your creative vision.
A handheld light meter measures the intensity of light falling on your subject (incident metering) or reflecting from it (reflective metering). For studio work, incident metering is typically more reliable as it’s not influenced by your subject’s reflectivity or color.
To take an incident reading, hold your meter at your subject’s position with the white dome facing your main light source. The meter will display the appropriate camera settings for proper exposure. Start with your main light, then measure fill lights and background lights separately to establish your lighting ratio.
For a classic portrait setup, aim for a 3:1 ratio between your main and fill lights. This means your main light should meter approximately 1.5 stops brighter than your fill light. When working with multiple lights, meter each one individually by turning off all other lights, then meter them together for the final exposure.
Remember that light falls off according to the inverse square law – when you double the distance between your light and subject, you lose two stops of light intensity. Keep this in mind when positioning your lights and taking measurements.
Making Real-Time Adjustments
Professional lighting setups require constant fine-tuning during photo shoots to achieve the perfect result. Start by taking test shots and reviewing them on a large screen or monitor whenever possible. This allows you to spot subtle lighting issues that might not be apparent through your camera’s LCD screen.
Pay attention to unwanted shadows, hot spots, or areas that appear too dark. If you notice harsh shadows, try adjusting your diffusion materials or moving your lights slightly farther from your subject. For hot spots, reduce the power output of the problematic light or increase the distance between the light and your subject.
Keep a collection of quick-fix tools within arm’s reach: white and black cards for fill and negative fill, small flags or gobos to control light spill, and gaffer tape for securing modifiers. These tools enable you to make swift adjustments without disrupting your shoot’s flow.
Monitor your histogram frequently, especially when shooting in challenging conditions. If you’re working with multiple lights, adjust one light at a time and observe its impact before moving on to the next. This methodical approach helps you maintain control over your lighting ratios and prevents confusion about which light is causing specific effects.
Remember that your subject might move during the shoot, so be prepared to make quick adjustments to maintain consistent lighting. Having an assistant who can help with real-time modifications can significantly streamline this process.
Mastering professional lighting setup is a journey that combines technical knowledge with artistic vision. Throughout this guide, we’ve covered the essential elements of creating stunning, well-lit photographs, from understanding basic lighting equipment to mastering complex multi-light setups. Remember that the key to success lies in starting with the fundamentals: a single light source, proper positioning, and understanding how light affects your subject.
Don’t feel overwhelmed by the array of equipment options available. Start with basic tools and gradually expand your kit as your skills and needs grow. Practice regularly with different lighting patterns, and don’t be afraid to experiment with various modifiers to achieve your desired effects. The beauty of photography lighting lies in its versatility – the same basic setup can yield dramatically different results with subtle adjustments.
Keep in mind that even professional photographers occasionally face lighting challenges. When you encounter difficulties, return to the basics: check your light placement, review your camera settings, and consider how different modifiers might help achieve your vision. Take notes during your sessions, photograph your successful setups, and build a personal reference library of lighting arrangements that work for you.
Most importantly, remember that perfect lighting isn’t about having the most expensive equipment – it’s about understanding how to use what you have effectively. With practice, patience, and the knowledge you’ve gained from this guide, you’re well-equipped to create professional-quality lighting for your photography projects. Now, it’s time to put these concepts into practice and develop your unique lighting style.