Every compelling photograph tells a story through the masterful application of fundamental principles. Whether you’re capturing breathtaking landscapes or intimate portraits, these seven timeless principles serve as your foundation to unleash your creative vision and create images that resonate with viewers.
From the decisive moment when light meets lens to the final composition that stops viewers in their tracks, these principles transcend gear and technical specifications. They represent the difference between taking snapshots and crafting photographs that command attention. Even seasoned professionals return to these core concepts repeatedly, finding new depths and applications as their artistry evolves.
In this guide, we’ll explore how composition, light, timing, perspective, color, contrast, and balance work together to transform ordinary scenes into extraordinary images. Whether you’re wielding a professional DSLR or a smartphone, these principles remain constant, providing a framework for artistic growth and technical excellence in any photographic situation.
Get ready to elevate your photography from good to exceptional as we dive into these essential principles that have guided masters of the craft for generations.
The Power of Light and Shadow

Reading Natural Light
Natural light is photography’s most versatile and rewarding tool, and mastering its nuances can elevate your images from good to exceptional. Just like the classic photography techniques, understanding natural light is fundamental to creating compelling images.
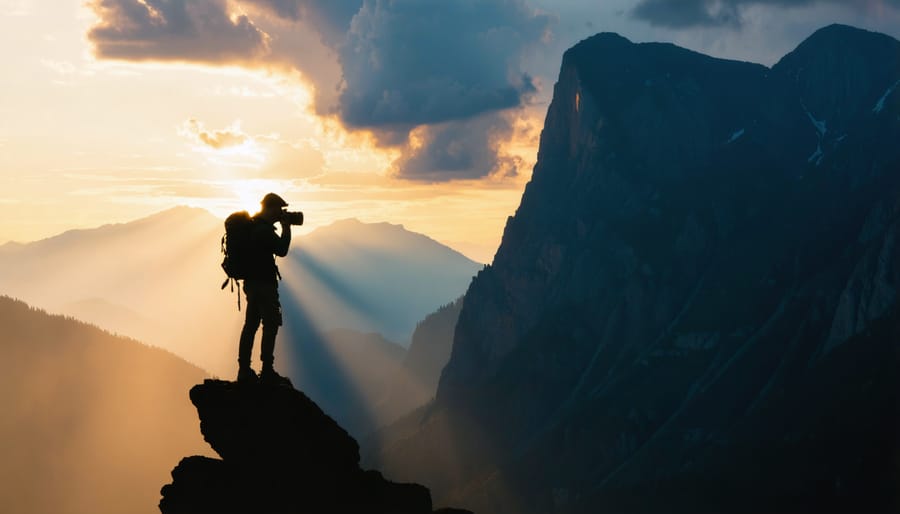
The golden hour, occurring during the first and last hours of sunlight, bathes subjects in warm, directional light that creates long, dramatic shadows. This light is perfect for landscapes and portraits, offering soft, flattering illumination. During midday, harsh overhead sun produces strong contrasts and deep shadows – while challenging, this light can be perfect for creating dramatic black and white images or highlighting texture.
Overcast days provide nature’s softbox, creating even, diffused light that’s ideal for portraits and macro photography. The subtle gradations in tone make it easier to capture detail in both highlights and shadows. Blue hour, just before sunrise and after sunset, offers ethereal blue tones perfect for cityscapes and moody landscapes.
Pay attention to the direction of light: side lighting reveals texture, backlighting creates striking silhouettes, and front lighting minimizes shadows. Watch how light interacts with your environment – reflected light from buildings or water can provide unexpected fill light, while dappled light through trees can create interesting patterns.
Understanding these natural lighting conditions helps you anticipate and adapt to changing conditions, ensuring you capture the perfect shot regardless of the time of day.
Creating Mood Through Shadows
Shadows aren’t just the absence of light – they’re powerful tools that can transform an ordinary photograph into a compelling visual story. When used intentionally, shadows can create depth, drama, and emotional resonance that captivates viewers and elevates your artistic expression.
Consider shooting during the golden hour, when long shadows stretch across landscapes and faces, creating natural contrast and dimension. Low-angle sunlight produces dramatic shadows that can frame subjects or create leading lines, drawing viewers into your composition. In portrait photography, side lighting can sculpt features and create mood through carefully placed shadows, while harsh overhead light can generate abstract patterns and shapes.
Urban photographers often leverage the interplay between architecture and shadows to create geometric compositions. Look for opportunities where shadows fall across stairs, walls, or walkways to add visual interest and depth. The contrast between light and shadow can convey various emotions – from mystery and tension to serenity and contemplation.
To master shadow work, experiment with different times of day and lighting conditions. Hard light creates bold, defined shadows perfect for dramatic effect, while soft light produces gentle, graduated shadows that add subtle dimension. Don’t be afraid to underexpose slightly to preserve shadow detail and create more impactful images.
Remember that shadows can be both the subject and the supporting element in your photographs. Whether you’re creating silhouettes or using shadows to frame your main subject, thoughtful shadow placement can transform ordinary scenes into extraordinary images.
Composition as Visual Language
Balance and Visual Weight
Balance in photography is like choreographing a visual dance, where every element plays a crucial role in creating a harmonious composition. When mastering creative composition techniques, understanding visual weight is essential for crafting images that feel naturally pleasing to the eye.
Think of your frame as a seesaw – larger objects, bold colors, and areas of high contrast naturally draw more attention and carry more visual weight. To achieve balance, you can either opt for symmetrical composition, where elements mirror each other across the frame, or asymmetrical balance, where different elements complement each other despite their uneven distribution.
For instance, a small, brightly colored flower in the foreground might balance out a larger, darker mountain in the background. The key is to distribute these elements thoughtfully across your frame. When photographing landscapes, you might balance a dramatic cloud formation on one side with a strong foreground element on the opposite side.
Remember that negative space also carries weight. Sometimes, the absence of elements can be just as powerful as their presence. Professional photographers often use this principle to create compelling minimalist compositions where a single subject is balanced against empty space, creating a sense of visual tension and interest.
Practice identifying visual weights in everyday scenes, and you’ll develop an intuitive sense for creating balanced compositions that guide your viewer’s eye exactly where you want it to go.
Leading Lines and Flow
Leading lines are one of photography’s most powerful compositional tools, acting as visual pathways that naturally guide viewers through your image. These lines can be found everywhere – in architecture, nature, roads, fences, or even shadows – and understanding how to use them effectively can transform your photos from static snapshots into dynamic visual stories.
Think of leading lines as silent tour guides for your viewer’s eyes. They can be straight, creating a strong, direct path to your subject, or curved, offering a more gentle, meandering journey through the frame. When photographing urban landscapes, look for architectural elements like staircases, building edges, or railway tracks that draw attention to your focal point. In natural settings, rivers, tree lines, or mountain ridges can serve the same purpose.
The direction of your leading lines matters significantly. Diagonal lines tend to create a sense of movement and drama, while horizontal lines can evoke calmness and stability. Vertical lines often convey strength and power. For maximum impact, try positioning your lines to originate from the corners or edges of your frame, leading inward toward your main subject.
Remember that leading lines don’t always need to be obvious or physical objects. The implied direction of movement, like a person’s gaze or the trajectory of a moving object, can create equally effective leading lines that subtly influence how viewers interact with your image.

The Art of Timing
Timing in photography is more than just pressing the shutter button – it’s about anticipating and capturing the perfect moment that tells your story. Henri Cartier-Bresson famously called this “the decisive moment,” when all elements in a scene come together to create something magical.
In street photography, timing means predicting human behavior and movement. Watch how people interact with their environment, notice patterns in foot traffic, and prepare yourself to capture those fleeting expressions or gestures that reveal genuine human emotion. Sometimes, it’s about waiting patiently in one spot until all elements align perfectly.
For wildlife photography, understanding animal behavior becomes crucial. Birds taking flight, for instance, often give subtle cues before they launch – a slight crouch, a change in head position, or ruffled feathers. Learning these signals helps you capture that split-second of action.
In landscape photography, timing takes on a different meaning. It’s about planning around natural light conditions, weather patterns, and seasonal changes. The golden hour just after sunrise or before sunset offers warm, directional light that can transform an ordinary scene into something extraordinary. Sometimes, waiting for clouds to move into just the right position can make the difference between a good photo and a great one.
Sports photography demands split-second precision. Success comes from understanding the sport, anticipating peak action moments, and developing quick reflexes. Pre-focusing on specific areas where you expect action to occur can help you nail those crucial shots.
Even in portrait photography, timing matters. The genuine smile that follows a laugh, the quiet moment of reflection, or the spontaneous interaction between subjects – these authentic moments often make for more compelling portraits than posed shots.
Digital cameras with high-speed continuous shooting modes can help, but they’re no substitute for developing your sense of timing. Practice observing, anticipating, and recognizing those perfect moments before they happen. Remember, sometimes the most powerful image comes just before or after what you think is the main event.
Color Theory in Practice
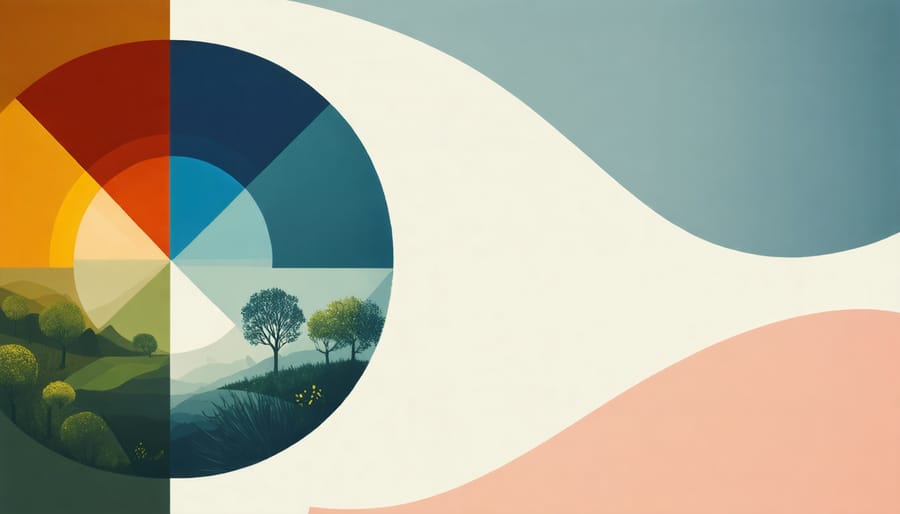
Understanding color theory in photography can transform your images from good to extraordinary. Colors work together to create harmony or tension, and knowing how to manipulate these relationships gives you powerful tools for visual storytelling.
Start by familiarizing yourself with the color wheel and its three primary relationships: complementary (opposite colors), analogous (adjacent colors), and triadic (three equidistant colors). Complementary colors, like blue and orange in a sunset shot, create dynamic contrast that naturally draws the viewer’s eye. Analogous colors, such as the varying greens in a forest scene, create a sense of harmony and peace.
When composing your shots, consider the emotional impact of different color combinations. Warm colors (reds, oranges, yellows) tend to evoke energy and passion, while cool colors (blues, greens, purples) suggest calm and tranquility. You can use this knowledge to reinforce the mood you’re trying to convey.
Pay attention to color saturation and intensity. Sometimes, a pop of vibrant color against a muted background creates more impact than an image full of bright colors. Think of a red umbrella against a gray cityscape – the contrast tells a compelling visual story.
In post-processing, use color adjustments thoughtfully. Split-toning can add depth to your images by introducing subtle color variations in highlights and shadows. The HSL (Hue, Saturation, Luminance) panel lets you fine-tune specific colors without affecting the entire image.
Remember that color perception is subjective and can be influenced by cultural context. What works in one situation might not work in another, so experiment with different combinations while staying true to your creative vision. Keep your camera’s white balance settings in mind, as they significantly affect how colors appear in your final image.
Negative Space as a Creative Tool
Negative space, often overlooked by beginners, is one of the most powerful tools in a photographer’s creative arsenal. It’s the area around and between your subject that, when used intentionally, can transform an ordinary image into something extraordinary. Think of it as the breathing room that allows your main subject to truly shine.
Consider a lone tree standing against a vast, empty sky. The emptiness isn’t just background – it’s an active element that emphasizes the tree’s solitude and creates a sense of scale. This deliberate use of negative space guides the viewer’s eye and evokes emotional responses that a cluttered composition simply cannot achieve.
To effectively use negative space, start by identifying your primary subject. Then, instead of filling the frame with supporting elements, consciously leave areas empty. This technique works particularly well in minimalist photography, where the contrast between the subject and the surrounding void creates visual tension and interest.
Here are some practical ways to incorporate negative space:
– When photographing portraits, position your subject off-center against a clean background
– In architectural photography, capture buildings against empty skies to emphasize their structural elements
– For nature photography, isolate single elements against simple backgrounds like water, sand, or snow
– In street photography, use walls, pavements, or sky to frame isolated subjects
Remember that negative space doesn’t have to be completely empty or white – it can be any relatively uniform area that contrasts with your main subject. The key is maintaining simplicity in these areas to avoid competing with your intended focal point.
Common mistakes to avoid include filling every corner of the frame out of habit or fear of “wasting” space. Instead, embrace the power of emptiness. Start experimenting by leaving at least two-thirds of your frame as negative space and observe how it affects the visual impact of your images.

Perspective and Point of View
The way you position your camera can dramatically alter how viewers interpret and connect with your image. Think of your camera as your audience’s eyes – where you place it determines not just what they see, but how they feel about what they’re seeing.
Shooting from a low angle, known as a worm’s eye view, makes subjects appear larger and more imposing. This perspective can create a sense of power, dominance, or even intimidation – perfect for architectural photography or portraying strong characters. Conversely, photographing from above (bird’s eye view) can make subjects appear smaller or more vulnerable, which works wonderfully for intimate portraits or telling stories of isolation.
Eye-level shots create a sense of equality and connection, making them ideal for portraits where you want to establish rapport with the subject. This natural perspective helps viewers relate to the scene as if they were standing there themselves. However, don’t be afraid to break this convention – sometimes the most compelling images come from unexpected angles.
Consider the emotional impact of your perspective choices. Shooting through objects in the foreground (like branches or doorways) can create a sense of voyeurism or discovery. Tilted angles, or Dutch angles, can convey tension or unease. Even slight adjustments to your camera height can change the relationship between foreground and background elements, affecting the image’s spatial dynamics.
Remember that perspective isn’t just about physical camera position – it’s also about the story you’re telling. A crowd scene shot from within the masses feels immersive and chaotic, while the same scene captured from above might convey order and pattern. When choosing your perspective, ask yourself: What emotion do I want to evoke? What relationship should the viewer have with the subject?
Experiment with different viewpoints of the same subject to understand how perspective shapes narrative. Often, the most powerful images come from perspectives that show familiar subjects in unexpected ways, challenging viewers’ preconceptions and creating lasting visual impact.
Breaking the Rules with Purpose
While mastering the fundamental principles of photography is crucial, there’s something exhilarating about breaking traditional photography rules with intention and purpose. Think of these principles as guidelines rather than strict laws – knowing when to bend or break them can lead to uniquely compelling images.
Consider the rule of thirds. While it’s a reliable composition technique, deliberately placing your subject dead center can create powerful, symmetrical images that command attention. Fashion photographers often do this to dramatic effect, making their subjects appear more commanding and authoritative.
The conventional wisdom about keeping horizons straight can also be challenged. Tilted horizons, when used purposefully, can inject energy and dynamism into an image. Street photographers frequently employ this technique to create a sense of urgency or chaos in urban scenes.
Even exposure “rules” are meant to be broken. While proper exposure is typically desired, deliberately underexposing can create moody, dramatic shadows, while overexposure might produce ethereal, dreamlike effects. Think of silhouettes against a bright sky or high-key portraits that almost seem to glow.
The key to breaking rules successfully lies in understanding them thoroughly first. This knowledge allows you to make conscious creative decisions rather than random experiments. Ask yourself: What effect am I trying to achieve? How does breaking this rule serve my creative vision?
Remember that great photographs often come from pushing boundaries and challenging conventions. Whether it’s using shallow depth of field where everything “should” be in focus, or incorporating motion blur in situations that traditionally call for sharp images, intentional rule-breaking can transform good photographs into memorable ones.
Just ensure your departures from convention serve a purpose. Breaking rules simply for the sake of being different rarely produces compelling results. Let your creative vision guide your technical choices, and you’ll find that sometimes the most impactful images come from knowing exactly which rules to break – and why.
Understanding and mastering these seven principles of photography isn’t about following rigid rules, but rather developing an intuitive sense of how they work together to create compelling images. Each principle – from composition and lighting to color theory and perspective – builds upon the others, creating a foundation for your unique photographic vision. As you practice, you’ll find these elements naturally flowing together: your understanding of light will influence your composition choices, while your grasp of balance will enhance your use of negative space. Remember, the best way to internalize these principles is through hands-on experience. Start by focusing on one principle at a time in your photography sessions, then gradually combine them as they become second nature. With time and practice, these foundational elements will become natural tools in your creative arsenal, helping you capture images that not only tell stories but also evoke emotions in your viewers.