Light shapes the story of every portrait, transforming ordinary photographs into compelling visual narratives. Master photographers know that understanding light isn’t just about technical precision—it’s about crafting emotion, depth, and character in every frame. When you control light, you control the entire mood of your portrait, from the subtle catch-lights that bring eyes to life to the dramatic shadows that sculpt facial features.
Natural light streaming through a window, the focused beam of a studio strobe, or the soft glow of a reflector—each light source writes its own unique story on your subject’s face. Yet mastering portrait lighting goes beyond simply knowing where to place your lights. It’s about understanding how light interacts with human features, recognizing how different lighting patterns create distinct emotional responses, and knowing exactly when to break the traditional rules for creative impact.
In this comprehensive guide, we’ll explore the fundamental lighting patterns that have defined portrait photography for generations, alongside modern techniques that push creative boundaries. Whether you’re working in a professional studio or creating intimate portraits in your home, these lighting principles will transform your approach to portrait photography and help you craft images that truly connect with viewers.
The Building Blocks of Portrait Lighting
Essential Lighting Equipment
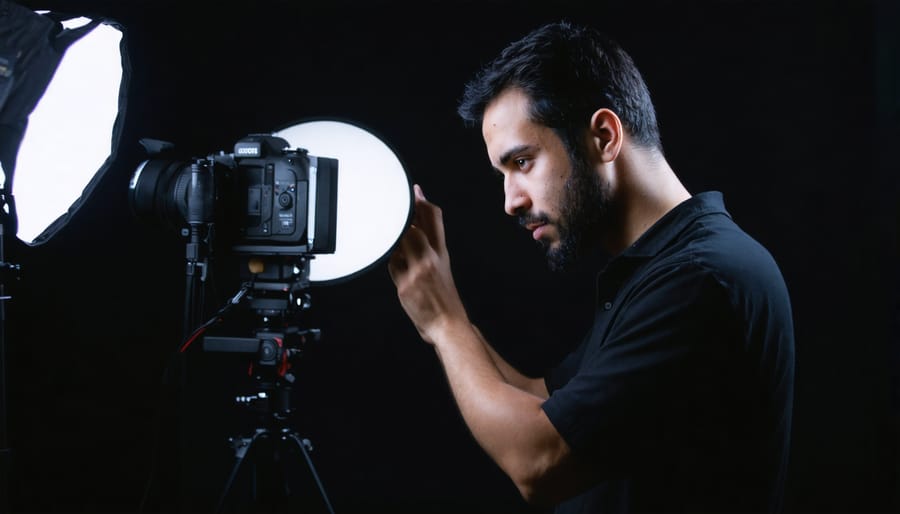
Mastering portrait photography starts with understanding your essential lighting equipment and how each tool shapes your final image. Let’s explore the fundamental lighting options at your disposal.
Natural light remains the most accessible and versatile light source. Working with window light or outdoor ambient light can produce stunning portraits, especially during golden hour. However, to maintain consistency and control, you’ll want to expand your lighting toolkit.
Strobes (flash units) are the workhorses of portrait photography, offering powerful, precise light output. Choose between speedlights for mobility or studio strobes for more power and faster recycling times. For beginners, a single speedlight with basic modifiers can create professional-looking results.
Continuous lights, such as LED panels or traditional tungsten lights, help you visualize your lighting setup in real-time. They’re particularly useful for video work and when photographing subjects who might be uncomfortable with flash.
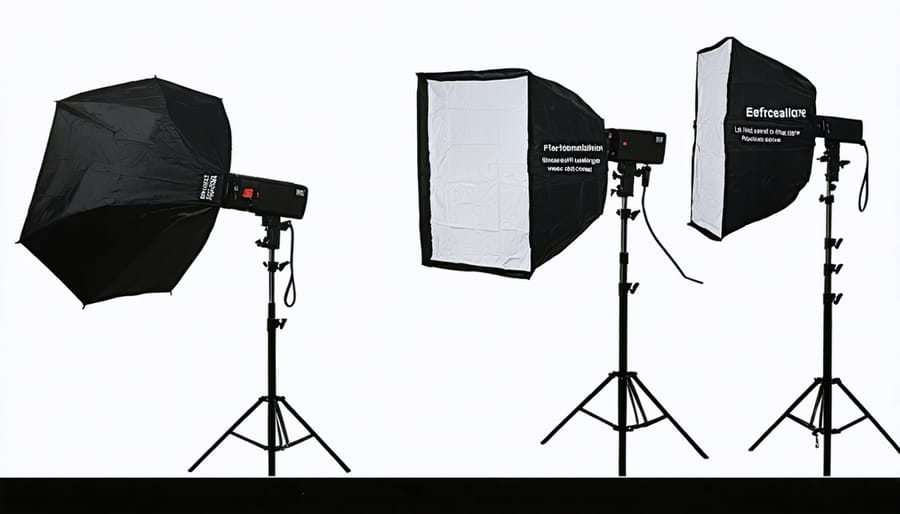
Light modifiers are crucial for shaping and softening light. Start with a basic kit including:
– Softboxes for flattering, diffused light
– Umbrellas for broad, even coverage
– Reflectors for filling shadows
– Grids for controlling light spread
Additional tools like light stands, sandbags for stability, and sync triggers for off-camera flash complete your essential kit. Remember, it’s not about having every piece of equipment – it’s about mastering what you have.
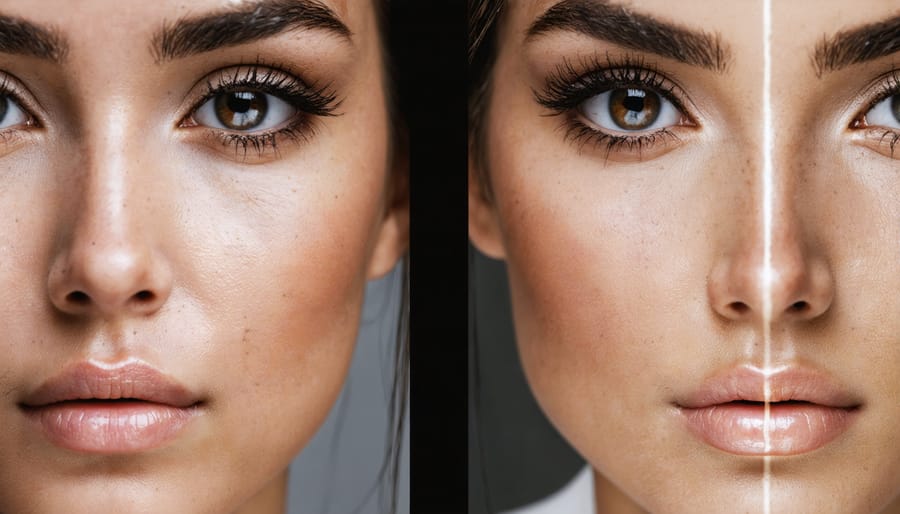
Understanding Light Quality
Light quality is one of the most crucial elements in portrait photography, fundamentally affecting how your subject appears in the final image. Understanding the characteristics of light helps you make intentional creative decisions that enhance your portraits.
Hard light creates strong, defined shadows and high contrast, typically produced by small light sources relative to your subject, like direct sunlight or a bare flash. While challenging to work with, hard light can create dramatic portraits with strong visual impact and mood.
Soft light, on the other hand, produces gentle transitions between light and shadow, creating a flattering effect that’s ideal for most portraits. Large light sources like softboxes, umbrellas, or light passing through a diffuser create this type of illumination. On overcast days, the entire sky becomes a massive softbox, providing beautiful, even lighting.
The direction of light shapes how features are revealed or concealed in your portrait. Front lighting minimizes texture and shadows, while side lighting emphasizes contours and creates depth. Light intensity determines exposure and mood – stronger light creates more dramatic contrasts, while softer intensity yields subtler results.
Color temperature adds another dimension to your portraits. Warm light (around 3000K) creates an inviting, intimate atmosphere, while cooler temperatures (5500K and above) can convey clarity and crispness. Understanding these characteristics allows you to manipulate light to achieve your desired emotional impact and visual style.
Classic Portrait Lighting Patterns
Rembrandt and Loop Lighting
Rembrandt and loop lighting are two of the most versatile and impactful dramatic lighting patterns you can master in portrait photography. Let’s break down how to achieve each one.
Rembrandt lighting, named after the Dutch master painter, creates a distinctive triangle of light on the subject’s cheek opposite to the main light source. To achieve this effect, position your main light about 45 degrees to the side and slightly above your subject’s face. The key is to ensure that the shadow from the nose connects with the shadow on the cheek, forming that characteristic triangle.
Loop lighting, on the other hand, creates a small shadow of the nose that falls diagonally on the cheek. Position your light source slightly higher than eye level and about 30-45 degrees to the side of your subject. The shadow should appear short and pointed, without connecting to the cheek shadow.
Both patterns work beautifully for different scenarios. Use Rembrandt lighting when you want to create moody, dramatic portraits with strong character. It’s particularly flattering for subjects with defined facial features. Loop lighting is more versatile and works well for most face shapes, making it perfect for corporate headshots or casual portraits where you want a natural, dimensional look without too much drama.
Remember to start with these basic positions and then fine-tune based on your subject’s unique facial features. A reflector placed opposite the main light can help soften shadows if they appear too harsh.
Butterfly and Split Lighting
Butterfly and split lighting are two of the most dramatic and impactful patterns you can create in portrait photography. Butterfly lighting, named for the distinctive shadow it creates under the nose, is achieved by positioning the main light source directly above and slightly in front of your subject’s face. This classic technique creates a glamorous look that’s particularly flattering for subjects with defined cheekbones and even facial features.
To create butterfly lighting, position your light at about 45 degrees above your subject’s eye level, pointing downward. The shadow beneath the nose should be small and symmetrical. This pattern is a favorite in beauty and fashion photography because it emphasizes facial structure and creates a slimming effect.
Split lighting, on the other hand, creates a dramatic division of light and shadow right down the center of the face. Position your light source at a 90-degree angle to your subject’s face, illuminating exactly half while leaving the other in shadow. This pattern works exceptionally well for creating moody portraits and highlighting facial textures.
Both patterns can be modified with fill lights or reflectors to control shadow intensity. For butterfly lighting, a reflector beneath the chin can soften harsh shadows, while with split lighting, a subtle fill light can add detail to the shadowed side without losing the dramatic effect. Remember that the distance between your light source and subject will affect shadow intensity – closer lights create harder shadows, while further lights produce softer transitions.
Broad and Short Lighting
Broad and short lighting techniques are fundamental approaches that can dramatically shape your subject’s face and establish the mood of your portrait. With broad lighting, the side of the face turned toward the camera receives the most light, creating a wider, more open appearance. This technique works well for subjects with narrow faces or when you want to create a more approachable, friendly atmosphere.
Short lighting, conversely, illuminates the side of the face turned away from the camera, leaving the camera-facing side in partial shadow. This creates a slimming effect and adds depth and dimension to the portrait. It’s particularly flattering for subjects with fuller faces and excellent for creating dramatic, moody images.
To achieve broad lighting, position your main light source on the same side as the face turned toward the camera. For short lighting, place your light on the opposite side. The angle between the light and your subject typically ranges from 30 to 45 degrees, but don’t be afraid to experiment.
Remember that these techniques aren’t just about face shape – they’re powerful tools for storytelling. Broad lighting can convey openness and accessibility, making it perfect for corporate headshots or friendly portraits. Short lighting often creates mystery and drama, ideal for artistic portraits or character studies. The choice between broad and short lighting should align with both your subject’s features and the story you want to tell.
Creative Lighting Techniques
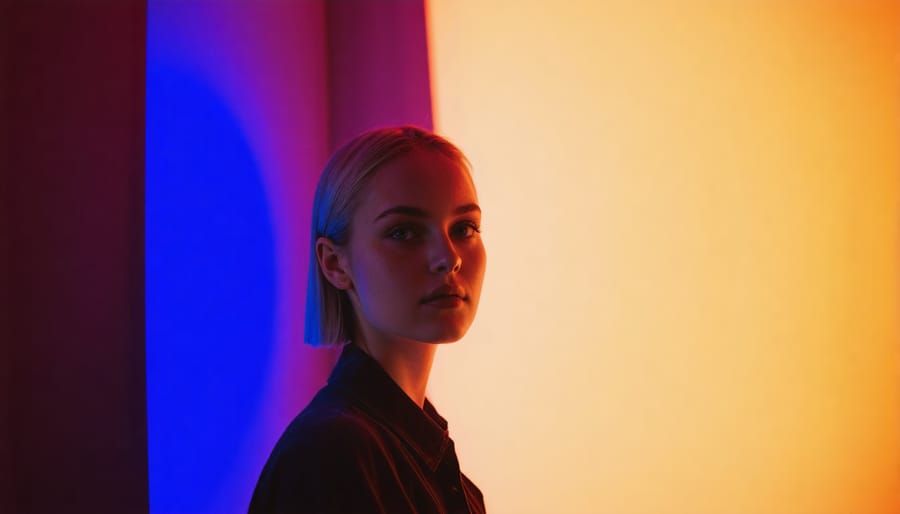
Color Gels and Mixed Lighting
Color gels and mixed lighting can transform ordinary portraits into extraordinary works of art. By incorporating creative lighting techniques with colored gels, photographers can create mood, depth, and visual interest that wouldn’t be possible with standard white light alone.
Start by experimenting with complementary colors, such as blue and orange, to create dynamic contrast in your images. Place a blue gel on your background light while maintaining warm lighting on your subject’s face. This creates a cinematic look that’s both striking and professional.
When mixing different light sources, remember that each type of light has its own color temperature. For instance, combining tungsten indoor lighting (warm) with window light (cool) can create interesting color contrasts naturally. You can enhance or modify these differences using gels to achieve your desired effect.
A popular technique is using a magenta gel on your key light while adding a cyan-gelled fill light. This creates a modern, editorial look that’s perfect for fashion portraits. For subtle effects, try using quarter or half CTO (Color Temperature Orange) gels to warm up specific areas of your composition.
Remember to start with simple setups and gradually build complexity. Test how different colors interact and affect skin tones before your actual shoot. This way, you’ll develop an intuitive understanding of how colored lights blend and complement each other in your portraits.
Environmental Light Integration
One of the most challenging yet rewarding aspects of portrait photography is seamlessly blending artificial lighting with existing ambient light. Rather than fighting against natural light sources, skilled photographers learn to work with them to create harmonious, natural-looking portraits.
Start by assessing the available environmental light – whether it’s sunlight streaming through windows, fluorescent office lighting, or the warm glow of sunset. Your artificial lights should complement these existing sources rather than overpower them. For example, if you’re shooting in an office with overhead fluorescent lights, you might use a softbox with daylight-balanced LEDs to maintain consistent color temperature while adding dimension to your subject.
The key is to maintain a natural feel while enhancing the scene. If you’re working with window light, position your strobe or continuous light to match the direction and quality of the natural light. This creates depth while preserving the organic look of the environment. Consider using CTOs (Color Temperature Orange gels) or CTBs (Color Temperature Blue gels) to match your artificial lights with the ambient color temperature.
A helpful technique is to first meter the ambient light, then add your artificial lighting at a ratio that enhances rather than dominates the scene. Start with your artificial light at about one stop above the ambient level, then adjust based on your creative vision and the mood you want to achieve.
Low-Key and High-Key Effects
Low-key and high-key effects represent two powerful techniques in portrait photography that can dramatically alter the mood and impact of your images. In low-key lighting, photographers emphasize shadows and contrast, creating dramatic, moody portraits where dark tones dominate the frame. This technique works particularly well for creating mysterious, dramatic, or contemplative portraits, especially when you master the right low-light settings.
To achieve a striking low-key effect, position your main light source to one side of your subject, allowing shadows to naturally fall across portions of their face. The key is to minimize fill light, letting the darker areas remain rich and deep. Think film noir portraits – dramatic, mysterious, and full of character.
In contrast, high-key lighting creates bright, airy images with minimal shadows and an overall light, ethereal feel. This technique traditionally uses multiple light sources to eliminate most shadows, resulting in clean, optimistic, and often fashion-forward portraits. The background is typically white or very bright, and the overall image contains predominantly light tones.
For high-key portraits, start with a bright, evenly lit background and position your main light source frontally, with fill lights on either side to minimize shadows. This creates that characteristic bright, cheerful aesthetic perfect for fashion, beauty, and contemporary portrait work. Remember, both techniques require careful exposure control to maintain detail in either the shadows or highlights, depending on your chosen effect.
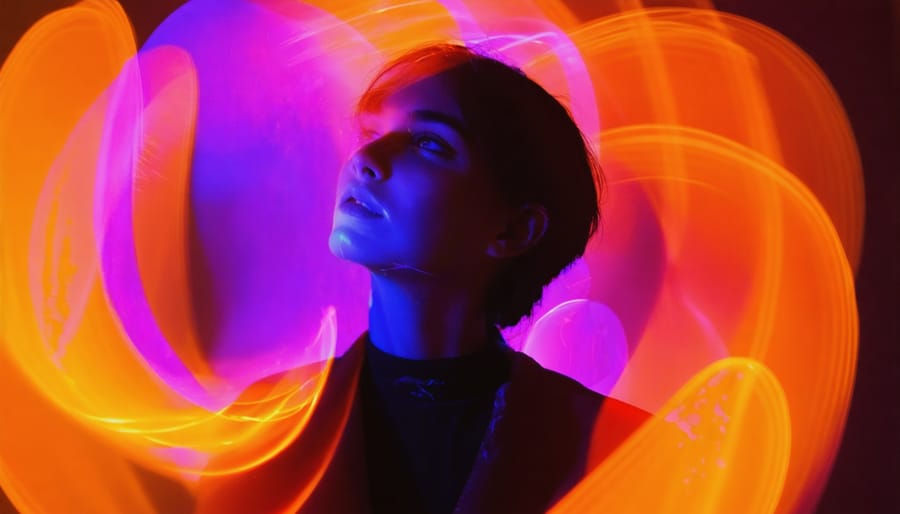
Light Painting in Portraits
Light painting in portraiture opens up a magical world of creative possibilities, blending traditional portrait techniques with mesmerizing light effects. By using long exposures and movable light sources, photographers can create ethereal, artistic portraits that stand out from conventional shots.
To get started with light painting techniques, you’ll need a camera capable of manual settings, a sturdy tripod, and various light sources like LED wands, flashlights, or even smartphone lights. Set your camera to bulb mode or use exposures between 5-30 seconds, depending on your creative vision.
The key to successful light painting portraits lies in maintaining your subject’s stillness while painting with light around them. Have your subject stay perfectly still while you or an assistant moves the light source to create patterns, halos, or illuminated outlines. A small constant light on your subject’s face ensures they remain visible while you craft the light effects around them.
Popular effects include creating angel wings with sweeping light movements, drawing geometric patterns around the subject, or using multiple colored lights for a psychedelic effect. Remember to experiment with different light sources and movements – each creates unique textures and patterns that can dramatically transform your portraits.
Start with simple movements and gradually progress to more complex patterns as you become comfortable with the technique. The beauty of light painting is that each shot becomes a unique piece of art, impossible to perfectly replicate.
Common Lighting Challenges and Solutions
Every portrait photographer encounters challenging lighting situations, but with the right approach, these obstacles can become opportunities for creative solutions. Let’s explore some common lighting challenges and their practical fixes.
One frequent challenge is harsh midday sunlight, which creates unflattering shadows and causes subjects to squint. To overcome this, seek open shade under trees or buildings, or use a diffuser to soften the light. Alternatively, position your subject so the sun acts as a rim light, using a reflector or flash to illuminate their face.
Mixed lighting temperatures can create color casting issues, particularly when dealing with indoor locations with both artificial and natural light. Combat this by either committing to one light source (blocking out the other) or using color correction gels on your flash to match the ambient lighting temperature.
Dark or dimly lit indoor venues present another common challenge. While raising your ISO is one solution, it can introduce unwanted noise. Instead, consider using a combination of bounce flash (if there are light-colored walls or ceilings) and a wider aperture. A simple LED continuous light can also provide predictable illumination in these situations.
Shooting in backlit situations often leads to underexposed subjects or blown-out backgrounds. To address this, spot meter for your subject’s face and use fill flash or a reflector to balance the exposure. For a more dramatic look, slightly underexpose the background while properly lighting your subject.
Uneven group lighting can make some subjects appear brighter than others. Solve this by positioning your subjects in a curved formation rather than a straight line, ensuring equal distance from the light source. Using multiple lights or a larger light source can also help maintain consistent illumination across the group.
Remember that challenging lighting conditions often lead to the most unique and memorable portraits. The key is to remain flexible and view these situations as creative opportunities rather than obstacles.
Mastering portrait lighting is a journey that combines technical knowledge with creative vision. Throughout this guide, we’ve explored the fundamental principles of lighting, from understanding the qualities of light to manipulating various lighting setups. Remember that while these techniques provide a solid foundation, they’re meant to be starting points for your own experimentation and creative expression.
Whether you’re working with natural light streaming through a window, crafting dramatic looks with a single speedlight, or orchestrating complex multi-light setups, the key is to understand how light shapes your subject and tells their story. Don’t be afraid to break the “rules” once you understand them – some of the most compelling portraits come from pushing boundaries and trying unexpected approaches.
Start simple and gradually build your expertise. Practice with one light source until you can consistently achieve the results you want, then slowly incorporate additional elements. Keep a lighting journal to document your setups and results, including both successes and failures – they’re equally valuable learning experiences.
Most importantly, remember that technical perfection isn’t always the goal. Sometimes the most powerful portraits come from embracing imperfection and focusing on capturing genuine emotion and connection with your subject. Let your lighting choices serve your creative vision rather than constrain it.
As you continue your photography journey, stay curious and keep experimenting. Every face you photograph is an opportunity to refine your skills and discover new possibilities in portrait lighting.