Transform ordinary portraits into compelling visual stories by mastering dramatic lighting techniques that push creative boundaries. Position a single LED light source behind your subject to create ethereal rim lighting that separates them from dark backgrounds. Experiment with colored gels on speedlights to paint with light, introducing bold hues that evoke specific moods and atmospheres. Combine natural window light with reflective surfaces—mirrors, metallic boards, or even everyday aluminum foil—to craft intricate light patterns that add depth and dimension to your compositions.
Light shapes the soul of an image, transforming simple portraits into powerful visual narratives. Whether you’re working with professional studio equipment or household lamps, the principles of creative lighting remain constant: control, direction, and intention. By understanding how light behaves and interacts with your subject, you’ll unlock endless possibilities for artistic expression in your photography.
The most striking images often emerge from unconventional lighting choices—breaking traditional rules while maintaining technical precision. This guide explores both time-tested techniques and innovative approaches, helping you develop your unique lighting signature while mastering the fundamentals of photographic illumination.
Natural Light Mastery
Window Light Magic
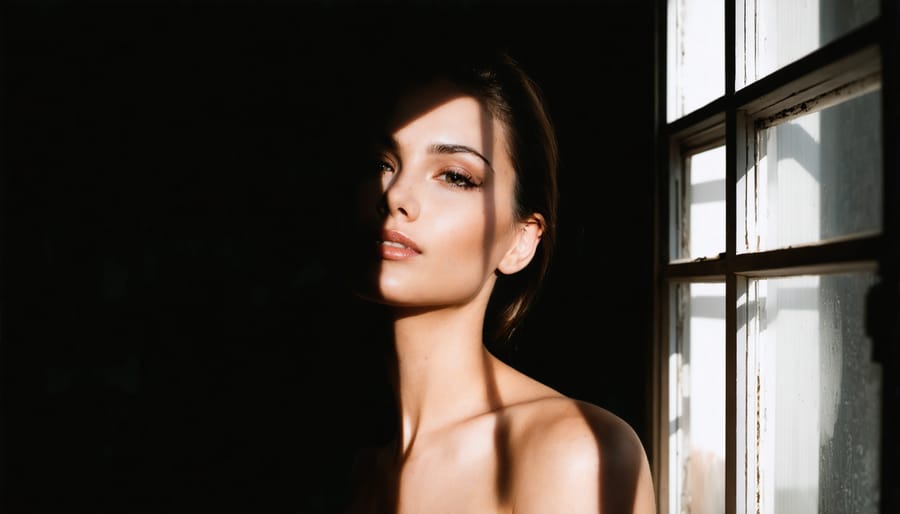
Window light is nature’s softbox, offering photographers an incredibly versatile and beautiful lighting source that’s available to everyone. The key to mastering window light lies in understanding how to position your subject relative to the window and how to manipulate the light’s direction and intensity.
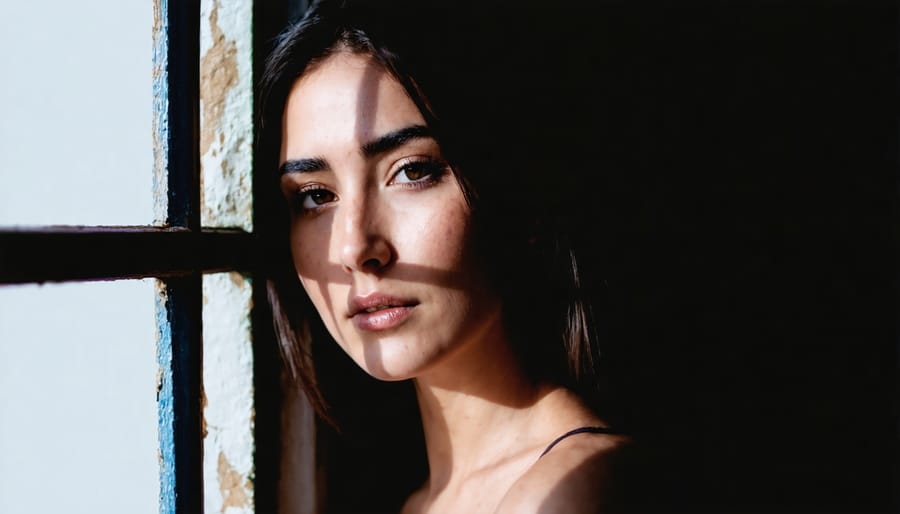
For dramatic portraits, try positioning your subject directly beside a window, with one side of their face toward the light. This creates stunning split lighting, where one half of the face is illuminated while the other falls into shadow, adding depth and dimension to your images. To soften the transition between light and shadow, use a white reflector on the shadow side.
Silhouettes can be achieved by placing your subject between the camera and a bright window. Expose for the bright background, and your subject will become a striking dark shape against the light. For best results, look for clean, recognizable profiles and eliminate any distracting elements in the frame.
For softer, more ethereal portraits, position your subject facing the window at a 45-degree angle. This creates gentle shadows that wrap around their features, highlighting facial contours while maintaining detail in the shadow areas. On overcast days, windows act as giant diffusers, creating even, flattering light perfect for headshots and beauty portraits.
Remember that timing matters – early morning and late afternoon light tends to be warmer and more directional, while midday light is typically harder and more neutral in color.
Golden Hour Secrets
The golden hour – that magical period just after sunrise or before sunset – offers photographers unparalleled opportunities for creating stunning portraits with natural light. During these precious moments, the sun’s low position creates a warm, diffused glow that can transform ordinary shots into extraordinary images.
To make the most of golden hour lighting, position your subject with the sun behind them to create beautiful backlighting effects. This technique creates a ethereal glow around your subject, particularly effective with subjects who have wispy hair or flowing fabric. Experiment with different angles – even a slight shift in position can dramatically change how the light wraps around your subject.
Rim lighting, another golden hour specialty, involves positioning your subject so that the sun creates a defined outline of light around their silhouette. For best results, expose for the highlights and let the shadows fall naturally, creating depth and dimension in your images. Consider using a reflector positioned at a 45-degree angle to bounce some of that golden light back onto your subject’s face, preventing them from becoming too silhouetted.
Don’t forget to scout your location in advance – knowing exactly where the sun will set allows you to plan your shoot more effectively. Apps that track the sun’s position can be invaluable tools for timing your sessions perfectly. Remember that you typically have about an hour of optimal light, so work efficiently and have your camera settings ready before the magic begins.
Artificial Light Innovation
Single-Flash Creativity
Don’t let having just one flash limit your creative potential. With the right techniques and a bit of imagination, a single speedlight or strobe can produce stunning results. Mastering single-light portrait techniques is often the foundation for more complex lighting setups.
Start by experimenting with flash position. Moving your light from the traditional 45-degree angle can create dramatically different moods. Try placing it behind your subject for ethereal rim lighting, or position it low and to the side for mysterious shadow play. A simple black backdrop can transform these techniques into striking low-key portraits.
Light modifiers are your best friends when working with one flash. A basic softbox creates flattering diffused light, while a snoot can spotlight specific features. Don’t have professional modifiers? Get creative with household items. A white shower curtain makes an excellent diffuser, and black cardboard can become an impromptu flag to control light spill.
Distance manipulation is another powerful tool. Moving your flash closer creates softer light with faster falloff, while increasing distance produces harder shadows and more dramatic contrast. Try combining these principles with slow shutter speeds to mix ambient light with flash, creating unique double-exposure effects in-camera.
Remember, limitations often spark the most innovative solutions. The key is understanding how to shape and control your single light source effectively.
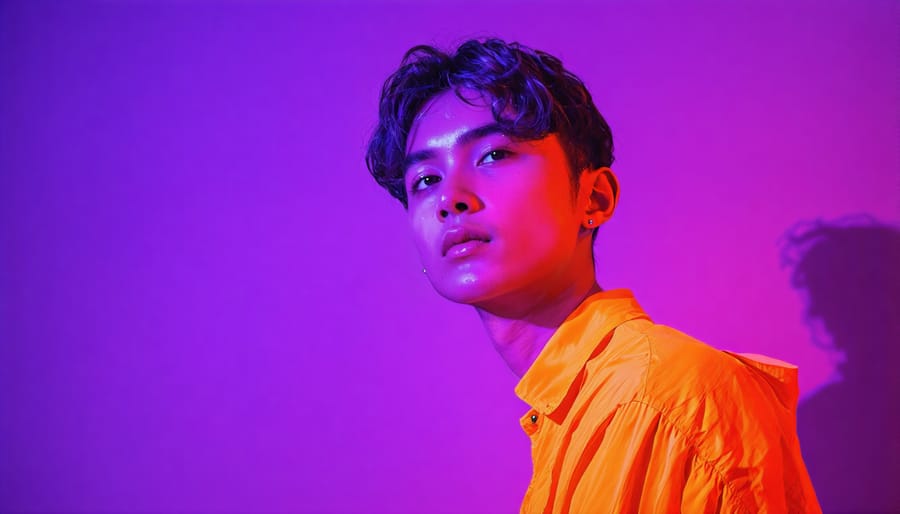
Color Gel Excellence
Color gels offer an exciting way to transform ordinary portraits into vibrant masterpieces. These translucent sheets of colored material, when placed over your light sources, can create dramatic mood shifts and add emotional depth to your images. Think of them as paintbrushes that let you paint with light.
Start by experimenting with a single gel on your main light. Blues can evoke a sense of mystery or night, while warm oranges and reds can simulate sunset or create a cozy atmosphere. For more dynamic results, try combining complementary colors – perhaps a blue-gelled key light with an orange-gelled rim light to create striking contrast.
The magic of color gels truly shines in creative portraiture. Try splitting your subject’s face with contrasting colors, using magenta on one side and cyan on the other for a modern, cyberpunk aesthetic. Or create depth by gelling your background light differently from your main light, making your subject pop against a colored backdrop.
Remember that gels affect exposure – darker colors like deep blue or red will reduce light output more than lighter ones. Start with a proper exposure, then adjust your power settings to compensate. For the best results, shoot in a dark environment where you have complete control over your lighting.
A pro tip: Stack multiple gels to create unique color combinations, but be mindful of light loss. Keep a few basic colors in your kit – blue, orange, and magenta are versatile starting points that can create numerous combinations.
DIY Lighting Solutions
Unleashing your creativity doesn’t always require expensive lighting equipment. In fact, some of the most striking portrait effects can be achieved using common household items. As part of broader DIY photography solutions, these lighting hacks can produce professional-looking results on a budget.
Consider using aluminum foil as a reflector by crumpling it slightly and mounting it on cardboard. This creates a beautiful scattered light effect that’s perfect for soft portraits. Christmas lights can transform into magical bokeh backgrounds or provide subtle ambient lighting when diffused through translucent fabric.
A desk lamp with a flexible neck becomes a versatile key light when paired with parchment paper as a diffuser. For dramatic shadows, try using venetian blinds or a simple window frame to create striking patterns across your subject’s face.
Clear plastic bottles filled with water can act as prisms, creating ethereal light patterns and rainbow effects. Even your smartphone’s flashlight can become a powerful tool when directed through everyday objects like cheese graters or decorative glass bowls.
Remember to experiment with different distances and angles when using these DIY tools. The key is to start simple and build complexity as you become more comfortable with how light behaves. Often, the most innovative results come from unexpected combinations of ordinary items.
Advanced Light Painting
Tool Selection
The right tools can make or break your creative lighting portraits, so let’s explore some essential equipment and their unique effects. LED light wands are perfect for creating smooth, colorful trails and work exceptionally well for outlining subjects. Their adjustable colors and brightness levels offer versatile creative possibilities while maintaining consistent light output.
For more organic effects, fiber optic whips produce ethereal, fairy-like light streaks that add a magical quality to portraits. Steel wool (used with proper safety precautions) creates dramatic sparks and ember effects, though it’s best reserved for outdoor shoots with ample space and safety measures in place.
Flashlights with different colored gels can produce precise light painting effects, and their focused beam allows for detailed work. Small LED panels are excellent for subtle ambient lighting or creating interesting background effects. For more experimental results, try using EL wire, which creates consistent, vibrant lines perfect for geometric patterns around your subject.
Don’t overlook everyday items – smartphone screens, glow sticks, or even Christmas lights can produce unique effects. The key is understanding how each tool interacts with your camera settings. Start with longer exposures (15-30 seconds) and adjust based on your tool’s brightness and the effect you’re trying to achieve.
Remember, the best results often come from combining different tools in creative ways. Experiment with layering effects from multiple light sources to create depth and dimension in your portraits.
Movement Techniques
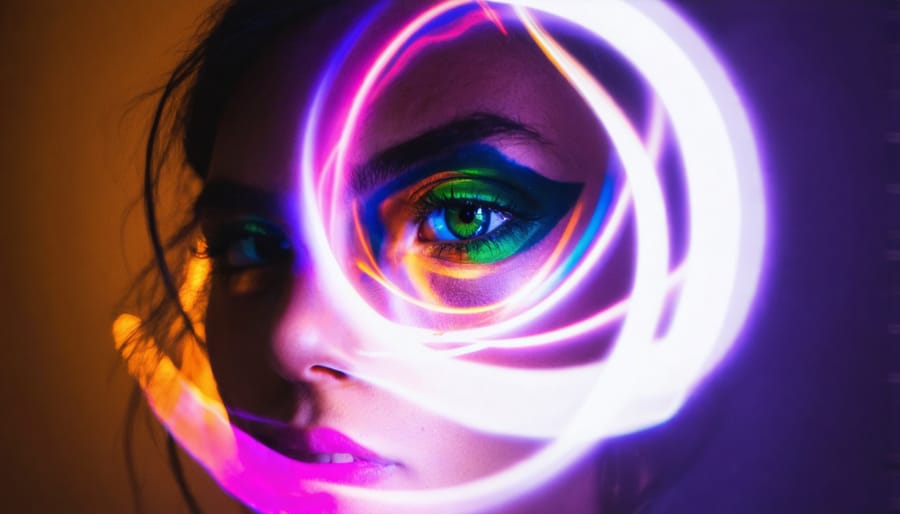
Movement in photography isn’t just about capturing motion – it’s about creating stunning light patterns that transform ordinary scenes into extraordinary images. One of the most popular techniques is light painting, where you can use any light source – from flashlights to LED strips – during a long exposure to “draw” in the air. Set your camera on a tripod, use a slow shutter speed (typically 10-30 seconds), and move your light source to create shapes, words, or abstract patterns.
Another captivating movement technique is camera rotation, where you slowly rotate your camera around its axis during exposure while pointing at a light source. This creates mesmerizing circular patterns, especially effective with city lights or holiday decorations. Try varying your rotation speed for different effects.
Zooming while shooting is another dynamic approach. Start with a longer focal length and zoom out during exposure, or vice versa, to create a burst effect that draws viewers into your image. This technique works particularly well with strong point light sources like street lamps or spotlights.
For a more experimental approach, try intentional camera movement (ICM). Instead of keeping your camera steady, deliberately move it during exposure. Try vertical pans with city lights, horizontal movements with string lights, or even random movements to create abstract light trails. The key is to experiment with different shutter speeds and movement patterns until you achieve your desired effect.
Environmental Lighting
Urban Light Sources
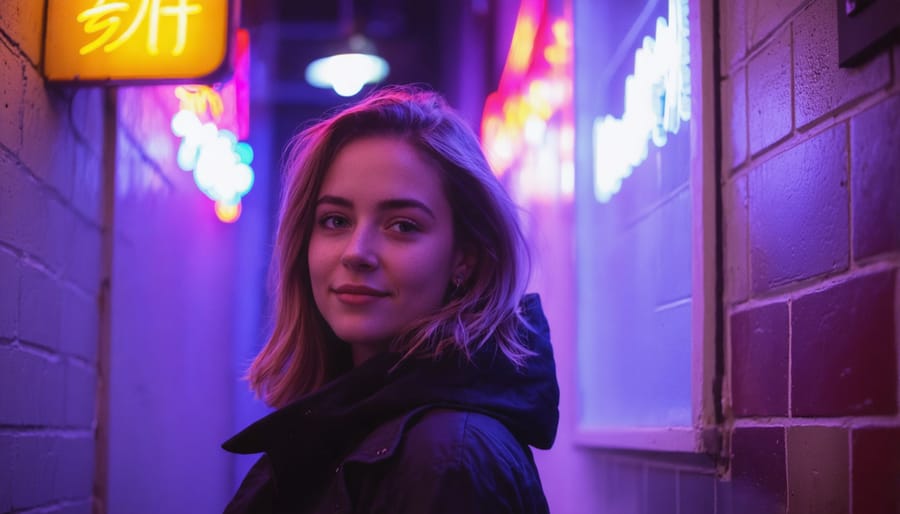
The urban landscape offers a treasure trove of creative lighting opportunities for photographers willing to explore after dark. City lights, from storefront displays to neon signs, can transform ordinary portraits into striking visual narratives. When working with night photography lighting, urban environments provide unique color combinations and bokeh effects that are impossible to replicate in studio settings.
Try positioning your subject near illuminated shop windows, using the warm glow as a natural side light. Neon signs can serve as both a creative backdrop and a distinctive light source, casting otherworldly colors across your subject’s features. Look for reflective surfaces like wet pavements or glass buildings, which can multiply light sources and add depth to your compositions.
Traffic lights and car trails offer dynamic lighting elements – experiment with slow shutter speeds to capture light streaks while keeping your subject sharp with a flash. Modern architectural lighting can provide dramatic uplighting effects, perfect for creating moody portraits with strong shadows and highlights.
For maximum impact, scout locations during daylight hours to plan your shots, noting how different light sources interact. Consider the color temperature of various urban lights – mixing cool LED streetlights with warm store windows can create fascinating color contrasts that add dimension to your images.
Mixed Light Mastery
The magic happens when you skillfully blend natural and artificial light sources, creating dynamic and striking portraits that wouldn’t be possible with either light source alone. This technique, often called mixed lighting, opens up endless creative possibilities for photographers willing to experiment.
Start by identifying your primary light source – usually natural light from a window or doorway – and then introduce artificial lighting as your secondary source. For example, position your subject near a window for soft, directional lighting, then add a small LED panel or speedlight from the opposite side to fill in shadows. This creates depth while maintaining natural-looking skin tones.
One particularly effective approach is using warm artificial light to complement cool natural light. During blue hour, try positioning your subject by a window while using a tungsten-balanced continuous light or gelled flash to add warmth to one side of their face. The contrast between cool and warm tones creates a cinematic mood that’s both striking and sophisticated.
Don’t be afraid to break conventional rules. Try using flash as your main light while allowing natural light to wrap around your subject as fill. Or experiment with colored gels on your artificial lights while maintaining natural daylight as your base. The key is finding the right balance – start with a 2:1 lighting ratio between your sources and adjust based on the mood you’re trying to achieve.
Common Challenges and Solutions
Every photographer faces common lighting challenges, but with the right approach, these obstacles can become opportunities for creativity. Let’s explore some frequent issues and their practical solutions.
One of the most common challenges is harsh midday sunlight, which can create unflattering shadows and cause subjects to squint. Combat this by finding open shade or using a diffuser to soften the light. Alternatively, position your subject so the sun acts as a backlight, creating a beautiful rim light effect while keeping their face in shadow, which you can fill with a reflector.
Indoor lighting presents its own set of challenges, particularly mixed lighting sources with different color temperatures. To address this, either commit to one light source by turning off competing lights or use gels on your artificial lights to match the ambient color temperature. When working in low-light situations, resist the urge to immediately boost ISO; instead, consider using a slower shutter speed with stabilization or introducing controlled artificial light.
Uneven lighting across group portraits can be particularly frustrating. Solve this by positioning your subjects in a curved formation rather than a straight line, ensuring equal light distribution. For larger groups, consider using multiple light sources or strategically placed reflectors to maintain consistent illumination across all faces.
Flash photography often results in flat, uninspiring images when used directly. Transform this challenge by bouncing the flash off walls or ceilings to create softer, more natural-looking light. When working outdoors at night, try slow-sync flash techniques to balance ambient light with flash illumination, creating dynamic images that capture both subject and environment.
Remember that shadows aren’t always the enemy – they can add depth and drama to your images. Instead of trying to eliminate all shadows, learn to work with them by controlling their intensity and direction using flags, gobos, or natural obstacles to shape the light creatively.
Creative lighting in photography is an endless journey of discovery and experimentation. Throughout this guide, we’ve explored various techniques, from working with natural light through windows to crafting dramatic effects with artificial lighting setups. The key takeaway is that there’s no single “right way” to approach lighting – it’s about finding what works best for your creative vision and the story you want to tell through your images.
Remember that mastering lighting techniques takes time and practice. Don’t be afraid to make mistakes; they’re often the stepping stones to your most innovative work. Start with the basics we’ve covered, like understanding the direction and quality of light, and gradually work your way up to more complex setups and creative techniques.
Keep a photography journal to document your lighting experiments. Note what worked, what didn’t, and why. This documentation will become an invaluable resource as you develop your unique style. Consider joining photography communities or workshops where you can share experiences and learn from fellow photographers.
Most importantly, let your creativity guide you. While technical knowledge is crucial, the most compelling images often come from pushing boundaries and thinking outside the box. Whether you’re working with a professional studio setup or just a simple flashlight, remember that every light source is a tool for creative expression.
The world of creative lighting is yours to explore – go forth and illuminate your photographic journey with confidence and curiosity.