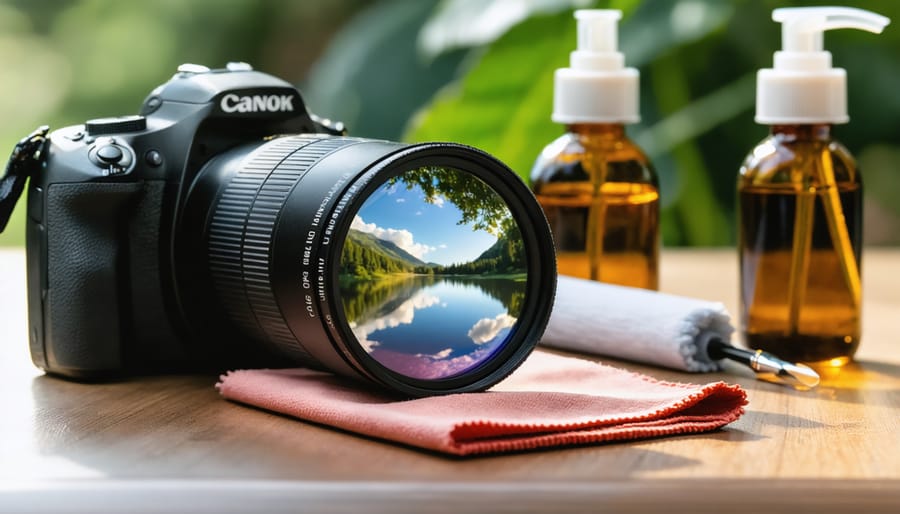
Protect your valuable camera gear by properly cleaning your UV lens filter – a critical yet often overlooked component of photography equipment. A clean UV filter not only preserves image quality but also serves as the first line of defense for your expensive lenses. Whether you’re dealing with fingerprints, dust, or stubborn smudges, using the right cleaning technique can extend your filter’s life while maintaining optimal light transmission. This guide walks you through professional-grade cleaning methods that prevent scratches and damage, ensuring your UV filter continues to perform its vital protective role without compromising image clarity. From essential cleaning supplies to expert techniques, you’ll learn everything needed to keep your UV filters in pristine condition, just like the pros do.
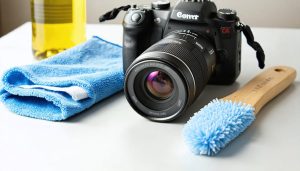
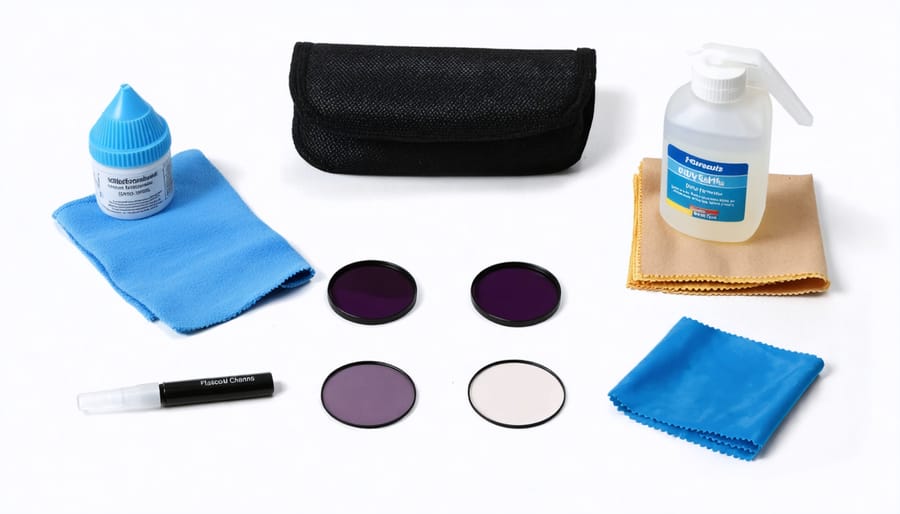
Essential Cleaning Supplies
Safe Cleaning Solutions
When it comes to cleaning your UV filter, using the right solutions is crucial for maintaining its optical quality. The safest and most effective primary cleaning solution is a mixture of distilled water and isopropyl alcohol in a 50:50 ratio. This combination effectively removes fingerprints and debris without leaving residue.
Alternatively, you can use specialized lens cleaning solutions available from reputable photography brands. These are specifically formulated to be safe for coated glass surfaces and typically include anti-static properties to prevent dust attraction.
Never use household glass cleaners, window sprays, or harsh chemicals, as these can damage the filter’s coating. Also avoid using tap water, which contains minerals that can leave spots on the filter surface. Paper towels, facial tissues, and clothing are absolute no-nos as cleaning materials – they can scratch the filter’s surface.
For quick cleaning in the field, pre-moistened lens cleaning wipes are a convenient and safe option, but make sure they’re specifically designed for camera equipment.
Cleaning Tools
Having the right cleaning tools is essential for maintaining your UV filter’s clarity without risking damage. Start with a high-quality microfiber cloth – not just any cloth will do. Look for specialized lens-cleaning microfiber cloths that are lint-free and regularly washed using proper microfiber cleaning techniques to prevent contamination.
A lens pen is another invaluable tool, featuring a soft brush on one end and a carbon-based cleaning tip on the other. The brush helps remove loose particles, while the cleaning tip tackles stubborn fingerprints and smudges. Consider investing in pre-moistened lens cleaning wipes for convenience, but ensure they’re specifically designed for optical surfaces.
For thorough cleaning sessions, keep a rocket blower handy to safely remove dust without making contact with the filter surface. Some photographers also find lens cleaning solutions useful, but remember to apply them to your cleaning cloth rather than directly on the filter. Always store these tools in a clean, dust-free case to maintain their effectiveness.
Step-by-Step Cleaning Process
Initial Dust Removal
Before using any cleaning solutions, it’s essential to remove loose dust and debris from your UV filter. Start by using a rubber air blower to gently puff away loose particles. Hold the blower close to the filter surface without touching it, and squeeze in short bursts while keeping the filter tilted downward so debris falls away naturally.
If you don’t have a blower, never substitute it with compressed air cans, as they can release harmful propellants onto your filter. For stubborn dust particles that won’t budge with air alone, use a clean, soft-bristled lens brush in gentle, circular motions from the center outward. The key is to avoid pressing too hard, which could scratch the filter’s surface.
A lesser-known but effective technique is to use an anti-static brush specifically designed for camera equipment. These brushes help prevent dust from being attracted back to the filter surface immediately after cleaning. Remember to clean your brush regularly by gently washing it with mild soap and allowing it to dry completely before use.
When working with delicate optical equipment, patience is crucial. Take your time with this initial step, as rushing could lead to scratches or smears that require more intensive cleaning methods.
Dealing with Fingerprints and Smudges
Fingerprints and smudges are perhaps the most common issues you’ll encounter with UV filters, and they can be particularly stubborn to remove. Start by using your breath to create a light fog on the filter surface – this gentle moisture can help loosen oils from fingerprints. Using a microfiber cloth, wipe in gentle circular motions from the center outward.
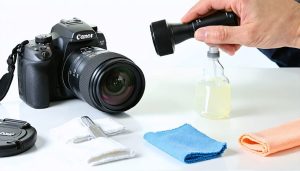
For more stubborn marks, slightly dampen a corner of your microfiber cloth with lens cleaning solution – never apply the solution directly to the filter. Use minimal pressure when cleaning, as excessive force could damage the coating or even crack the filter. If you’re dealing with particularly oily fingerprints, try using a lens cleaning tissue with a small amount of solution first, followed by a dry microfiber cloth to remove any residue.
Remember to check your work by holding the filter at an angle under good lighting. Sometimes fingerprints can leave behind invisible residue that only becomes apparent when light hits the surface at certain angles. If marks persist, repeat the process, but always err on the side of gentleness rather than force.
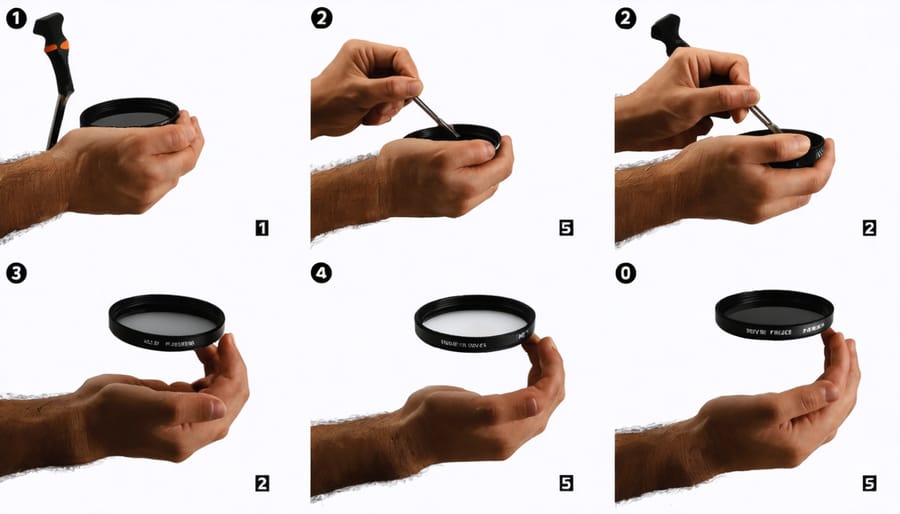
Final Polishing
For the final polish, use a clean microfiber cloth in a circular motion, working from the center outward. This technique helps eliminate any remaining streaks or residue that might have been left behind during the cleaning process. If you notice any persistent streaks, lightly breathe on the filter surface to create a small amount of moisture, then immediately wipe with the microfiber cloth.
Pay special attention to the edges where dirt can accumulate. A gentle touch is crucial here – avoid applying pressure that could potentially damage the filter or its coating. If you’re working in bright conditions, try viewing the filter at different angles against the light to spot any remaining smudges or streaks you might have missed.
For optimal results, use a fresh, clean section of your microfiber cloth for this final step. Once you’re satisfied with the clarity, give the filter one last gentle wipe with a dry portion of the cloth to ensure no lint or fibers remain. Remember to inspect both sides of the filter before reattaching it to your lens. The filter should now be crystal clear and ready for your next photoshoot.
Special Situations
Sometimes you’ll encounter stubborn contaminants that resist regular cleaning methods. For saltwater residue, use a solution of distilled water and white vinegar (1:1 ratio), applying it gently with a microfiber cloth. Be extra careful not to let the solution seep into the filter edges.
Tree sap or sticky residue can be particularly challenging. In these cases, use a specialized lens cleaning solution designed for removing tough substances. Apply it to a clean microfiber cloth first, never directly to the filter, and work in gentle circular motions from the center outward.
For filters exposed to sand or fine dust, use a rocket blower first to remove loose particles before attempting any wet cleaning. If you’re dealing with fingerprint smudges that won’t budge, breathe a small amount of warm air onto the filter and quickly wipe with a microfiber cloth.
In cases of water spots from rain or splashes, use a lens cleaning solution specifically formulated for removing mineral deposits. Never use household glass cleaners or alcohol-based products, as these can damage the filter’s coating.
Preventive Maintenance
Storage Best Practices
Adopting proper gear storage methods can significantly reduce how often you need to clean your UV filters. Store your filters in dedicated filter cases with individual compartments, which protect them from dust, moisture, and accidental scratches. Always keep the front and rear caps on when the filter isn’t in use.
Consider using a weatherproof filter pouch or case when shooting in challenging environments. These cases often include silica gel packets to prevent moisture buildup, which can lead to fungal growth and stubborn spots on your filter.
When traveling, avoid storing filters in your camera bag’s outer pockets where they’re more vulnerable to bumps and environmental exposure. Instead, keep them in the main compartment, preferably in a padded case.
If you’re storing filters for an extended period, maintain a stable environment with moderate temperature and humidity levels. Avoid leaving filters in cars or other places with extreme temperature fluctuations, as this can affect the coating and potentially cause warping.
Remember to inspect your storage solution regularly for wear and tear, replacing cases that show signs of deterioration to ensure continued protection of your valuable filters.
Handling Guidelines
Proper handling of your UV filter is just as important as cleaning it. Always hold the filter by its edges or rim to avoid leaving fingerprints on the glass surfaces. When mounting or removing the filter, grip it from the sides rather than touching the front or back glass elements. Consider wearing lint-free gloves if you need to handle the filter extensively during cleaning or maintenance.
When not in use, store your UV filter in a dedicated filter case or pouch to protect it from dust and scratches. If you’re carrying multiple filters, use filter pouches with separate compartments to prevent them from touching each other. Before attaching the filter to your lens, inspect both sides for dust or debris and give it a gentle blow with a blower brush.
During shooting sessions, keep your lens cap on when the camera isn’t in use to minimize exposure to environmental contaminants. If you need to swap filters in the field, find a clean, stable surface to work on, and always face the glass away from wind or potential sources of dust.
Remember that prevention is better than cure – the less you need to clean your filter, the lower the risk of accidentally damaging it during the cleaning process.
Maintaining a clean UV lens filter is essential for capturing crisp, high-quality images and protecting your valuable camera lens. Regular cleaning not only ensures optimal image quality but also extends the life of both your filter and lens. Remember to always start with the gentlest cleaning method first – a simple air blower and microfiber cloth are often all you need for routine maintenance.
By following the proper cleaning techniques we’ve discussed, you can avoid common mistakes that might damage your filter, such as using excessive force or inappropriate cleaning solutions. Make it a habit to inspect your UV filter before each shooting session and clean it as needed, rather than waiting until visible smudges affect your photos.
Keep your cleaning supplies readily available in your camera bag, and always work in a clean, well-lit environment when performing maintenance. While UV filters are designed to protect your lens, they require protection too. Store your camera properly when not in use, and use lens caps to minimize the accumulation of dust and debris.
Remember, a well-maintained UV filter is an investment in your photography, ensuring clear, professional-quality images for years to come.