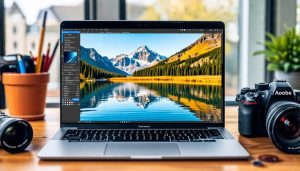
Transform your mobile photography with Z Camera Photo Editor, a professional-grade editing suite that brings studio-quality tools to your fingertips. This powerful application combines advanced AI-driven features with intuitive controls, empowering both casual photographers and seasoned professionals to achieve stunning results.
Unlike basic photo editors, Z Camera stands out with its comprehensive suite of professional tools – from advanced color grading and selective adjustments to sophisticated portrait enhancement algorithms. The editor’s streamlined interface masks complex editing capabilities behind an accessible design, making professional-level editing achievable for photographers at any skill level.
Whether you’re fine-tuning portrait shots with intelligent skin smoothing, creating dramatic landscapes with advanced HDR processing, or developing your signature style with custom filters, Z Camera Photo Editor provides the precision tools and creative freedom needed for professional-quality results. The editor’s real-time preview system and non-destructive editing workflow ensure you can experiment confidently while preserving your original images.
This comprehensive introduction to Z Camera Photo Editor will explore its most powerful features, advanced customization options, and professional techniques for achieving exceptional results in your mobile photography workflow.
Understanding Z Camera’s Advanced Interface
Custom Control Panel Navigation
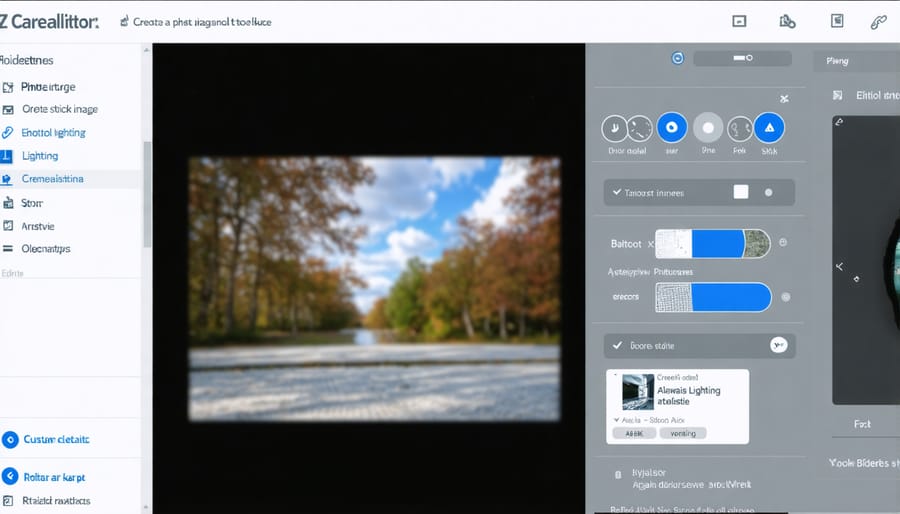
The custom control panel in Z Camera Photo Editor puts professional-grade editing tools right at your fingertips through an intuitive interface. Located along the right side of the screen, the main control panel can be customized to display your most frequently used tools, helping streamline your editing workflow.
To access advanced features, simply tap the menu icon in the top-right corner and select “Customize Panel.” From here, you can drag and drop tools into your preferred arrangement, creating a personalized workspace that matches your editing style. The panel supports up to 12 shortcut buttons, each of which can be assigned to specific tools or preset adjustments.
Key interface elements include the expandable curves panel, which slides out smoothly when needed, and the collapsible layers palette that can be minimized to maximize screen space. For precise adjustments, double-tap any slider to enter numerical values, or use the innovative radial control wheel for fine-tuning exposure, contrast, and color parameters.
Advanced users will appreciate the quick-access gesture controls – swipe right on any tool to reveal additional options, or use two-finger gestures to quickly adjust brush sizes and opacity levels. These thoughtful interface elements make complex editing tasks more efficient and enjoyable.
Essential Toolsets for Advanced Editing
Z Camera’s suite of advanced editing features sets it apart from standard photo editors. At its core, you’ll find professional-grade tools like the Adaptive Tone Mapping system, which intelligently balances exposure across challenging lighting conditions. The Color Grading Matrix offers unprecedented control over color relationships, allowing you to create distinctive visual styles while maintaining natural skin tones.
The editor’s Layer Fusion technology enables complex compositing with up to 50 layers, each supporting multiple blend modes and opacity controls. For portrait photographers, the AI-powered Face Enhancement suite provides subtle refinements while preserving natural features. The Perspective Correction tool stands out with its ability to handle complex architectural shots, automatically detecting lines and angles for precise adjustments.
What makes these tools truly essential is their intuitive integration within the workspace. Quick-access panels and customizable keyboard shortcuts streamline your workflow, while the non-destructive editing environment ensures your original images remain untouched. The Smart Filter system allows you to stack and adjust effects in real-time, making it easier to experiment with different creative approaches while maintaining professional quality output.
Advanced Camera Parameter Controls
Manual Exposure Controls
Z Camera’s manual exposure controls put professional-level adjustments right at your fingertips, allowing you to achieve precisely the look you’re aiming for. The exposure triangle – ISO, shutter speed, and aperture – can be fine-tuned independently, giving you complete creative control over your images.
The intuitive slider interface makes adjusting exposure values smooth and precise. You can dial in exposure compensation from -3.0 to +3.0 EV in 1/3 stop increments, perfect for challenging lighting situations like backlit portraits or high-contrast scenes. The real-time preview helps you visualize exactly how your adjustments will affect the final image.
For more nuanced control, Z Camera offers spot metering capability – simply tap anywhere on the screen to meter that specific area. This proves invaluable when photographing subjects with dramatic lighting variations, such as concerts or sunset landscapes. The histogram display updates in real-time as you adjust settings, helping you avoid unwanted highlight clipping or shadow loss.
Advanced users will appreciate the ability to save custom exposure presets for different shooting scenarios. Whether you’re shooting indoor events, outdoor sports, or night photography, you can quickly recall your preferred exposure settings with a single tap.
The exposure bracketing feature automatically captures multiple shots at different exposure values, perfect for HDR photography or ensuring you get the optimal exposure in tricky lighting conditions.
Custom Filter Creation
Creating your own custom filters in Z Camera Photo Editor empowers you to develop a signature style that sets your photos apart. Start by opening a photo you’d like to use as a reference for your filter. Navigate to the Filter menu and tap the “+” icon to begin crafting your unique look.
First, adjust the basic parameters like exposure, contrast, and saturation to establish your foundation. Fine-tune the color balance using the RGB curves, paying special attention to how different adjustments interact with each other. The histogram display helps you maintain proper exposure while making these adjustments.
Once you’re happy with the basic adjustments, explore advanced options like split toning, which allows you to add different colors to the highlights and shadows. Play with the grain settings to add texture, and experiment with vignetting to draw attention to your subject.
Before saving your custom filter, test it on different types of photos to ensure it works well across various lighting conditions and subjects. When satisfied, tap “Save Filter” and give it a memorable name. Your new filter will appear in the Custom Filters section, ready to be applied to future photos with a single tap.
Pro tip: Create variations of your favorite filter by saving multiple versions with slight adjustments. This builds a cohesive collection that works for different shooting scenarios while maintaining your distinctive style.
Professional Post-Processing Features
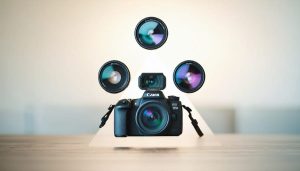
RAW Processing Capabilities
The Z Camera Photo Editor excels in RAW image processing, offering photographers comprehensive control over their uncompressed files. Whether you’re working with RAW files from popular camera brands like Canon, Nikon, or Sony, the editor handles these large files smoothly, preserving all the original image data for maximum editing flexibility.
The RAW processing engine provides precise adjustments for exposure, highlights, shadows, and white balance, allowing you to rescue details that might be lost in compressed formats. What sets this editor apart is its advanced color correction capabilities, featuring tools like selective color adjustment, HSL (Hue, Saturation, Luminance) controls, and custom color grading options.
One particularly useful feature is the ability to create and save custom processing presets, streamlining your workflow when handling multiple RAW files from the same shoot. The editor’s highlight recovery tool is especially powerful, helping you retain detail in overexposed areas without introducing unwanted artifacts.
For those concerned about color accuracy, the software includes built-in color profiles for various camera models, ensuring your processed images maintain true-to-life colors. The non-destructive editing approach means you can always return to your original RAW file, making it safe to experiment with different processing techniques.
Advanced users will appreciate the detailed histogram and waveform monitors, which provide real-time feedback during the editing process, helping maintain optimal exposure and color balance throughout your adjustments.
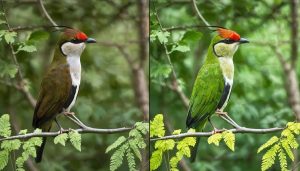
Advanced Masking Techniques
The Z Camera Photo Editor’s advanced masking capabilities take selective editing to the next level. With precision tools like the gradient mask and brush mask, you can create intricate selections that target specific areas of your image while leaving others untouched. The luminosity mask feature is particularly powerful, allowing you to create selections based on brightness values – perfect for enhancing sunset skies or balancing complex lighting situations.
One standout feature is the edge detection masking tool, which intelligently recognizes object boundaries in your image. This proves invaluable when working with challenging subjects like hair or foliage. You can refine these masks using the feather and opacity controls to achieve seamless transitions between edited and unedited areas.
The mask inversion tool adds another layer of control, letting you quickly flip your selection to work on the opposite areas of your image. Combined with the mask overlay view (which shows your selection in red), you can ensure precise masking every time. For complex edits, the ability to stack multiple masks allows for sophisticated combinations of selections.
Color range masking deserves special mention, as it enables you to isolate specific color tones in your image. This is particularly useful when adjusting individual elements like skin tones or specific clothing colors without affecting the rest of the image. You can even save your custom masks as presets for future use, streamlining your workflow for similar editing scenarios.
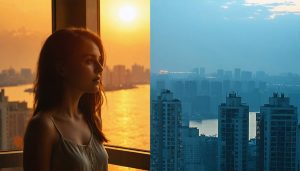
HDR and Tone Mapping
Z Camera’s HDR and tone mapping capabilities stand out as powerful tools for creating stunning, professional-grade images with exceptional dynamic range. The editor’s intelligent HDR processing allows you to merge multiple exposures seamlessly, capturing both the brightest highlights and darkest shadows in your scenes with remarkable detail.
When working with HDR in Z Camera, you have access to precise tone mapping controls that help you achieve natural-looking results. The smart exposure bracketing feature automatically captures three to five shots at different exposure levels, ensuring you don’t miss any details in high-contrast scenes. What sets this editor apart is its advanced ghost removal algorithm, which eliminates motion artifacts that typically plague HDR photography.
The tone mapping interface offers both automatic and manual adjustment options. The automatic mode analyzes your image and applies optimal settings for highlight recovery, shadow enhancement, and mid-tone balance. For more control, the manual mode provides sliders for fine-tuning local contrast, color saturation, and detail preservation. You can even adjust the strength of the HDR effect to achieve anything from subtle enhancement to dramatic artistic looks.
Real-time preview windows let you compare your original image with the HDR result, making it easier to achieve your desired look. The editor also includes several HDR presets designed for specific scenarios like landscape, architecture, and interior photography, serving as excellent starting points for your edits.
Optimizing Workflow with Presets
Building Custom Preset Libraries
Building your own preset library in Z Camera is a powerful way to streamline your editing workflow and maintain consistency across your photos. Start by creating a preset from your current editing settings by tapping the “+” icon in the preset panel. Give your preset a descriptive name that reflects its effect or intended use, such as “Golden Hour Portrait” or “Moody Landscape.”
To organize your presets effectively, create custom folders based on different categories like lighting conditions, color schemes, or photography genres. You can drag and drop presets between folders and rearrange them according to your preferences. This organizational system makes it easier to find the right preset when you’re working on specific types of photos.
Sharing your custom presets with other photographers is straightforward. Export your preset library by selecting the share option in the preset menu, which generates a shareable file. You can then send this file directly to other Z Camera users or upload it to photography communities. Similarly, you can import presets from other photographers by selecting the import option and choosing the preset file from your device.
Remember to regularly backup your preset library to prevent losing your carefully crafted editing styles. Consider creating variations of your favorite presets for different scenarios to build a versatile collection that suits various shooting conditions.
Batch Processing Strategies
The Z Camera Photo Editor excels in streamlining your workflow through efficient batch processing capabilities. When you need to apply consistent edits across multiple photos from a shoot, the batch processing feature becomes invaluable. Simply select your target images, choose a preset or create a custom editing sequence, and apply it to all selected photos simultaneously.
The editor offers smart filtering options to help you group similar images before batch processing. You can filter by capture time, camera settings, or even lighting conditions, ensuring that your edits make sense across the selected batch. What’s particularly useful is the ability to preview the effects on a sample image before committing changes to the entire set.
For wedding photographers and event shooters, the batch processing tool includes the option to maintain individual exposure adjustments while applying consistent color grading across all images. This preserves the unique characteristics of each shot while ensuring a cohesive look throughout the collection. You can also save your batch processing settings as custom presets for future use, making your editing workflow even more efficient.
Mastering Z Camera’s advanced features opens up a world of creative possibilities that can truly transform your photography workflow. Throughout this exploration, we’ve seen how the sophisticated tools and customization options enable photographers to achieve professional-grade results while maintaining creative control over every aspect of their images.
The combination of powerful RAW processing capabilities, advanced color grading tools, and precision masking features provides a comprehensive editing suite that rivals professional desktop applications. What sets Z Camera apart is its intuitive interface that makes these complex features accessible without sacrificing depth or functionality.
By investing time in learning these advanced features, you’ll develop a more efficient editing workflow and achieve consistent, high-quality results. The ability to save custom presets, create specialized adjustment layers, and fine-tune every detail of your images means you can develop a signature style that sets your work apart.
Remember that mastery comes with practice. Start with the basic adjustments, gradually incorporate more advanced techniques, and don’t be afraid to experiment with different combinations of tools. The beauty of Z Camera’s non-destructive editing means you can always return to your original image if needed.
Whether you’re a professional photographer or an enthusiastic hobbyist, Z Camera’s advanced features provide the perfect balance of power and accessibility. As you continue to explore and experiment with these tools, you’ll find yourself creating images that not only meet but exceed your creative vision.