Light shapes every photograph you’ll ever take, whether you’re shooting with a professional DSLR or a smartphone. Master three fundamental lighting principles, and you’ll transform ordinary snapshots into striking images that capture exactly what you envision.
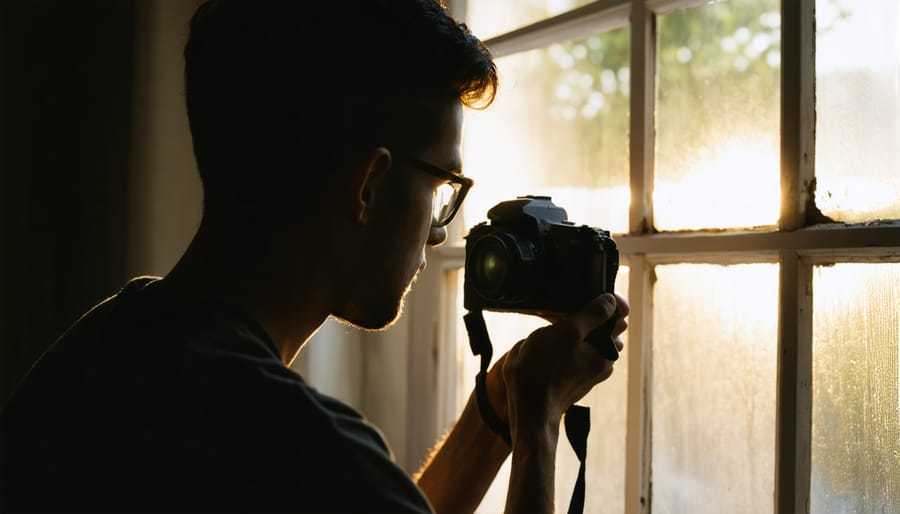
Start with window light – nature’s perfect softbox. Position your subject at a 45-degree angle to a large window, observe how shadows fall across their features, and watch as simple adjustments in distance and angle dramatically alter your image’s mood. This technique alone delivers professional-looking portraits without investing in expensive equipment.
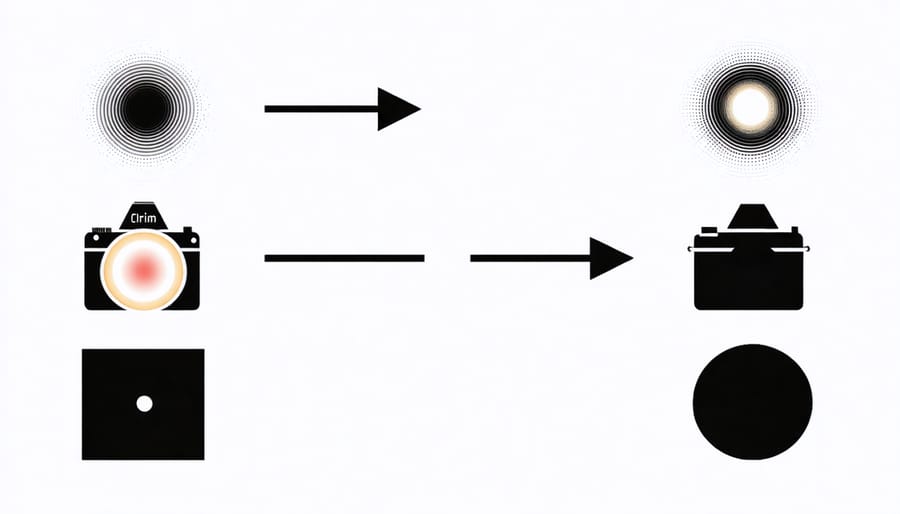
Understanding the inverse square law might sound technical, but its practical application is straightforward: moving your light source just a few inches closer or further from your subject profoundly impacts exposure and shadow intensity. Practice this concept with a basic desk lamp to internalize how light behaves before investing in studio equipment.
Natural or artificial, hard or soft, every light source tells a different story. A harsh midday sun creates dramatic shadows perfect for street photography, while diffused cloudy light flatters every subject. Begin experimenting with these contrasts, and you’ll develop an intuitive sense of how to manipulate light to achieve your creative vision.
Understanding Light: The Foundation of Great Photos
Natural vs. Artificial Light
Understanding the interplay between natural and artificial light is crucial for developing your photography skills. Natural light, provided by the sun, offers a warm, dynamic quality that’s difficult to replicate. It changes throughout the day, from the golden warmth of sunrise to the harsh midday sun and the soft, purple hues of twilight. Each of these phases presents unique opportunities and challenges for photographers.
Artificial light, on the other hand, gives you complete control over your lighting environment. Whether you’re using speedlights, continuous LED panels, or studio strobes, these tools allow you to apply various light manipulation techniques regardless of time or weather conditions.
Both types have their advantages. Natural light is free, readily available, and often produces the most flattering results for outdoor portraits and landscape photography. However, it’s unpredictable and can’t always be controlled effectively. Artificial light sources offer consistency and precision but require investment in equipment and technical knowledge to use effectively.
For beginners, it’s best to start by mastering natural light before investing heavily in artificial lighting equipment. Practice shooting during golden hour (the hour after sunrise or before sunset) when natural light is at its most flattering. As you grow more confident, experiment with basic artificial lighting tools like a single speedlight or LED panel to expand your creative possibilities.
The Magic Hours: Golden and Blue Light
Nature provides photographers with two magical windows of opportunity each day: the golden hour and the blue hour. These special times offer some of the most captivating natural lighting conditions you’ll ever encounter.
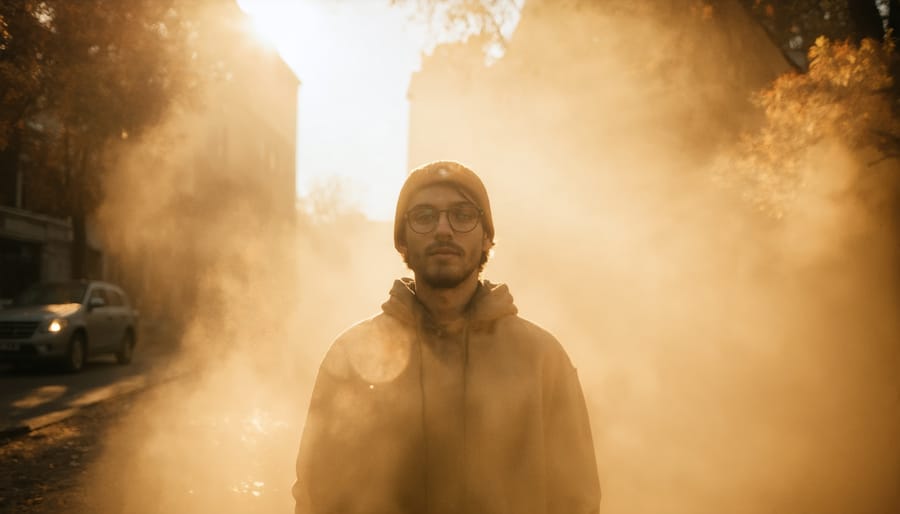
The golden hour occurs twice daily: just after sunrise and before sunset. During these periods, the sun sits low on the horizon, creating warm, soft light that bathes everything in rich golden hues. This gentle, directional lighting produces minimal harsh shadows and adds a wonderful depth to your subjects. It’s particularly flattering for portraits and landscape photography, as it creates a magical atmosphere that’s hard to replicate artificially.
The blue hour, occurring just before sunrise and after sunset, offers an entirely different aesthetic. During this brief period, the sky takes on deep blue tones while artificial lights begin to shine. This creates a beautiful balance between natural and artificial light, perfect for cityscape photography and architectural shots. The soft, diffused light during this time reduces contrast and creates a mysterious, ethereal quality in your images.
To make the most of these special times, plan your shoots in advance. Check local sunrise and sunset times, arrive early to set up your equipment, and be ready to work quickly – these precious moments don’t last long. Remember that weather conditions can dramatically affect the quality and duration of both golden and blue hours, so flexibility in your schedule is key.
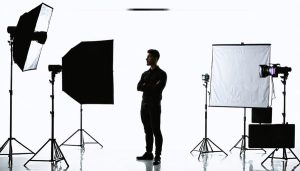
Essential Lighting Equipment for Beginners
Making the Most of Window Light
Window light is nature’s softbox and one of the most versatile lighting tools available to photographers – best of all, it’s completely free. To make the most of window light, start by observing how light enters your space throughout the day. North-facing windows typically provide consistent, soft light, while south-facing windows offer stronger, more dramatic lighting.
Position your subject at different distances from the window to control the light intensity. Placing them closer creates more dramatic shadows and stronger contrast, while moving them further back produces softer, more even illumination. For portraits, having your subject face the window at a 45-degree angle often creates beautiful, flattering light that enhances facial features.
Don’t overlook the power of diffusion. Sheer curtains can transform harsh midday sunlight into soft, dreamy illumination perfect for portraits or still life photography. On bright days, you can also use white sheets or translucent shower curtains as makeshift diffusers.
For more control over shadows, use a reflector or white foam board opposite the window to bounce light back onto your subject’s shadow side. This simple technique helps balance the lighting ratio and fills in harsh shadows. If you’re working with darker shadows, black foam board can enhance contrast and create more dramatic images.
Time of day matters significantly. Early morning and late afternoon light through windows tends to be warmer and more directional, perfect for creating mood. Cloudy days provide excellent conditions for soft, even lighting that’s ideal for portraits and product photography.
Remember to turn off all artificial lights when shooting with window light to maintain consistent color temperature and avoid mixed lighting situations that can complicate your white balance.
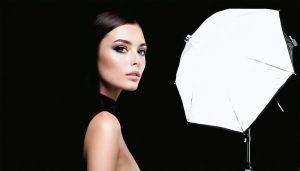
Budget-Friendly Light Modifiers
Creating professional-looking lighting setups doesn’t have to break the bank. In fact, some of the most effective light modifiers can be crafted from everyday household items or purchased at minimal cost. For photographers just starting their home studio setup, these budget-friendly options can deliver impressive results.
White foam board is perhaps the most versatile and affordable light modifier available. Use it as a reflector to bounce light back onto your subject, creating softer shadows and more even illumination. You can also position multiple boards to create a makeshift softbox or use them as flags to block unwanted light spill.
Another excellent DIY option is a white bed sheet, which can serve as a diffuser when placed between your light source and subject. This creates beautifully soft, wrapping light that’s perfect for portraits. For smaller subjects, parchment paper or white tissue paper can achieve similar results.
Clear plastic shower curtains make excellent diffusion material and can be cut to size for various applications. When combined with PVC pipes or lightweight frames, they can create large, professional-looking diffusion panels for a fraction of the cost of commercial solutions.
For those working with speedlights, ping pong balls make fantastic dome diffusers. Simply cut a small hole in the ball and place it over your flash head. The result is a beautifully even spread of light that’s particularly useful for event photography.
Remember, while these DIY solutions may not be as durable as their professional counterparts, they can help you understand lighting principles and achieve professional-looking results while you build your equipment collection.
Basic Lighting Patterns Every Beginner Should Know
Split Lighting and Rembrandt Lighting
Among the most striking classic portrait lighting patterns, Split and Rembrandt lighting stand out for their ability to create dramatic, professional-looking portraits with minimal equipment.
Split lighting divides the subject’s face into two distinct halves – one illuminated, one in shadow. To achieve this effect, position your light source at a 90-degree angle to your subject’s face. This creates a bold, mysterious look that’s perfect for moody portraits or character studies. While it might seem intense for everyday portraits, split lighting can bring out texture and define facial features in a uniquely compelling way.
Rembrandt lighting, named after the famous painter’s signature style, is characterized by a triangular patch of light on the shadowed side of the face. To create this effect, position your main light source about 45 degrees from your subject and slightly above their eye level. The key is to watch for that distinctive triangle of light on the cheek opposite to the light source – it should be roughly the same width and length as your subject’s nose.
For both techniques, start with a single light source and a reflector. The reflector helps control the intensity of shadows and prevents them from becoming too harsh. Position it on the opposite side of your main light to bounce some fill light back onto your subject.
Here’s a pro tip: When practicing these techniques, use a mannequin head or patient friend. This allows you to experiment with light placement without rushing. Pay attention to how small adjustments in light position can dramatically change the mood of your portrait. Remember that the distance between your light source and subject affects the light’s intensity and shadow definition.
These lighting patterns work particularly well for subjects with defined facial features, but can be adapted for any portrait situation with proper modification of light intensity and reflector positioning.
Butterfly and Loop Lighting
Butterfly and loop lighting are two fundamental portrait lighting patterns that can dramatically enhance your portrait photography. Let’s start with butterfly lighting, named for the distinctive shadow it creates under the subject’s nose.
To achieve butterfly lighting, position your main light source directly in front of and above your subject’s face, pointing downward at roughly a 45-degree angle. This creates a symmetrical shadow under the nose that resembles a butterfly’s wings. This lighting pattern is particularly flattering for subjects with defined cheekbones and is a favorite in beauty and fashion photography.
Pro tip: Watch the depth of the nose shadow – if it’s too dark, use a reflector below the subject’s face to soften the contrast and fill in harsh shadows. This technique is sometimes called “paramount lighting” in classic Hollywood style portraits.
Loop lighting, on the other hand, offers a more natural and versatile approach. Position your light source slightly above and approximately 45 degrees to the side of your subject. This creates a small shadow of the nose that loops down and sideways on the cheek. The key is to ensure the loop shadow doesn’t merge with the cheek shadow, maintaining a clear separation between the two.
Both patterns work well with minimal equipment – a single light source and a reflector can achieve professional results. For butterfly lighting, try positioning your subject near a large window with a reflector below. For loop lighting, place your subject at a 45-degree angle to the window.
Remember to observe your subject’s facial features when choosing between these patterns. Butterfly lighting works beautifully on symmetrical faces, while loop lighting is more forgiving and suits most face shapes. Experiment with the height and angle of your light source to find the most flattering position for your subject.
Common Lighting Mistakes and How to Fix Them
Harsh Shadows and Hot Spots
Every photographer has encountered those frustrating moments when harsh shadows or glaring hot spots threaten to ruin an otherwise perfect shot. These challenging lighting conditions are particularly common during midday shoots or when working with direct artificial lighting, but don’t worry – there are several effective solutions at your disposal.
To manage harsh shadows, start by diffusing your light source. If you’re shooting outdoors, try using a translucent reflector or a white bed sheet as a makeshift diffuser between the sun and your subject. This simple technique can transform harsh, unflattering shadows into soft, even lighting that flatters your subject.
Hot spots – those bright, overexposed areas that can appear on your subject’s face or reflective surfaces – can be equally troublesome. The key to managing these is to adjust your light’s position and intensity. Try moving your light source farther from your subject or adjusting its angle. A good rule of thumb is to position your main light at roughly 45 degrees to your subject, which helps prevent direct reflections while maintaining dimensional lighting.
Another effective technique is to introduce fill light to balance the contrast. This could be as simple as using a white foam board to bounce light back into the shadowed areas. For more control, consider using a second, less powerful light source or a silver reflector to precisely manage where the fill light falls.
Remember that shadows aren’t always the enemy – they can add depth and drama to your images when used intentionally. The trick is learning to control them. Try experimenting with different lighting setups in a controlled environment before tackling more challenging outdoor situations. This practice will help you develop an intuitive understanding of how light behaves and how to manipulate it effectively.
Finally, don’t be afraid to embrace natural solutions like waiting for cloud cover or scheduling shoots during the golden hour, when the sun’s position creates naturally softer lighting conditions.

White Balance and Color Temperature
Getting your white balance right is like ensuring your camera sees colors the way your eyes do. Have you ever taken a photo indoors only to find everything looks oddly orange, or shot under fluorescent lights where everyone appears slightly green? That’s where understanding white balance becomes crucial.
Color temperature, measured in Kelvin (K), ranges from warm (orange-yellow, around 2000K) to cool (blue, around 9000K). Different light sources emit different color temperatures: candlelight sits around 2000K, while bright midday sun reaches about 5500K. Your camera needs to adjust to these variations to reproduce colors accurately.
Most digital cameras offer preset white balance options:
– Auto White Balance (AWB): Works well in most situations
– Daylight: For outdoor shooting in sunny conditions
– Cloudy: Adds warmth to compensate for overcast skies
– Tungsten: Corrects the orange cast from traditional indoor bulbs
– Fluorescent: Adjusts for the green tint of fluorescent lighting
– Flash: Optimized for electronic flash units
For beginners, starting with AWB is perfectly fine. However, learning to manually adjust white balance can dramatically improve your photos. Try this simple exercise: Take the same photo using different white balance settings and compare the results. Notice how the mood changes with each adjustment – warmer tones feel cozy and intimate, while cooler tones can appear more clinical or dramatic.
Pro tip: If you’re shooting in RAW format, don’t stress too much about getting white balance perfect in-camera. RAW files retain all color information, allowing you to adjust white balance later without losing image quality. However, for JPEG shooters, getting it right in-camera becomes more critical since post-processing adjustments can degrade the image.
Remember, sometimes “correct” white balance isn’t always the most artistic choice. Don’t be afraid to experiment with different settings to create the mood you’re after in your photographs.
Mastering photography lighting doesn’t happen overnight, but with the techniques we’ve explored, you’re well-equipped to begin your journey. Remember that good lighting is the foundation of striking photography, whether you’re working with natural light streaming through a window or setting up your first softbox.
Start by practicing the basics: understanding the direction of light, recognizing how shadows affect your subject, and learning to manipulate light intensity. Don’t feel pressured to invest in expensive equipment right away – a simple reflector and natural light can help you create beautiful images while you develop your skills.
Keep experimenting with different setups and techniques we’ve discussed. Try shooting the same subject under various lighting conditions to understand how light shapes your images. Take notes about what works and what doesn’t, and don’t be afraid to make mistakes – they’re valuable learning opportunities.
As you gain confidence, gradually incorporate more advanced techniques and equipment into your workflow. Join local photography groups, share your work, and seek feedback from fellow photographers. Remember that even professional photographers started exactly where you are now.
Most importantly, enjoy the learning process. Photography is both a technical and creative pursuit, and developing your unique style with lighting will take time. Keep practicing, stay curious, and watch as your photography transforms with each new technique you master.