Transform your photography capabilities with 360-degree camera technology, a powerful tool that captures immersive, spherical content from every angle. Before diving into our comprehensive camera selection guide, understand that proper setup is crucial for professional-quality results. Mount your 360-degree camera at chest height (approximately 4-5 feet) to create natural-looking perspectives that mirror human eye level. Position the camera at least three feet away from any walls or obstacles to prevent distortion in the final image. Ensure perfect horizontal alignment using built-in bubble levels or digital indicators – even a slight tilt can compromise the seamless stitching of your panoramic footage. Critical for professional results: calibrate your camera’s sensors before each shooting session, particularly when working in new environments or after traveling. These fundamental setup principles lay the groundwork for creating compelling virtual tours, immersive real estate walkthroughs, and engaging social media content that puts viewers at the center of the action.
Essential Components of a 360-Degree Camera Setup

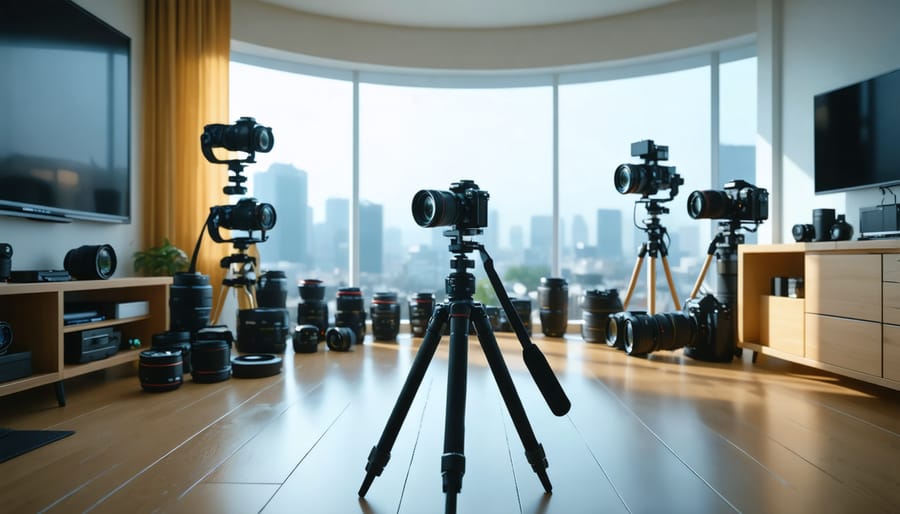
Primary Camera Equipment
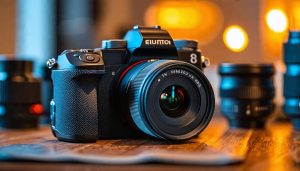
At the heart of any 360-degree camera setup lies your essential photography equipment, starting with the camera body itself. Most professional 360-degree rigs utilize multiple DSLR or mirrorless cameras arranged in a circular pattern. Popular choices include the Sony α7 series or Canon EOS R cameras, thanks to their excellent sensor quality and reliable performance.
For optimal results, you’ll want cameras with full-frame sensors offering at least 24MP resolution. This ensures sufficient detail and smooth stitching between images. The lens configuration is equally crucial – wide-angle lenses between 8mm and 15mm are ideal, providing enough overlap between cameras while maintaining image quality. Prime lenses are preferred over zoom lenses for their consistent performance and reduced potential for calibration issues.
When selecting cameras, matching models is essential to ensure consistent color reproduction and exposure across all angles. Your cameras should support external triggering and offer similar sensor characteristics. Most professional setups use between 6 to 8 cameras for complete spherical coverage, though some configurations may use up to 12 cameras for higher resolution or specialized applications.
Remember to consider factors like sensor sync capability, buffer size, and continuous shooting speed, as these features directly impact the quality and efficiency of your 360-degree captures. Weather-sealed bodies are also worth considering if you plan to shoot outdoors frequently.
Mounting and Stabilization Gear
Proper mounting and stabilization equipment is crucial for capturing smooth, professional-looking 360-degree footage. A sturdy tripod serves as your foundation, ideally one with a leveling head to ensure perfectly horizontal alignment. Look for models with retractable legs that won’t appear in your bottom-view shots.
For dynamic shots, consider investing in a specialized 360-degree gimbal. These devices use advanced stabilization technology to counteract camera movement while keeping the stabilization arms outside your camera’s field of view. The Insta360 Invisible Selfie Stick is particularly clever, as it automatically removes itself from final footage.
Monopods offer a lightweight alternative for run-and-gun shooting, though they require steady hands. When selecting a monopod, ensure it has a robust locking mechanism and a wide base for added stability. For aerial perspectives, extension poles can provide unique vantage points while maintaining a stable shot.
Vehicle mounts deserve special consideration for creating immersive driving footage. Suction cup mounts with multiple points of contact work well, but always use safety tethers as backup. For walking shots, body mounts like chest harnesses can create engaging point-of-view content, though you’ll need to pay attention to stabilization in post-production.
Remember to choose mounts with universal compatibility or specific adapters for your camera model. The investment in quality stabilization gear will significantly impact your final output quality.
Positioning and Environment Considerations
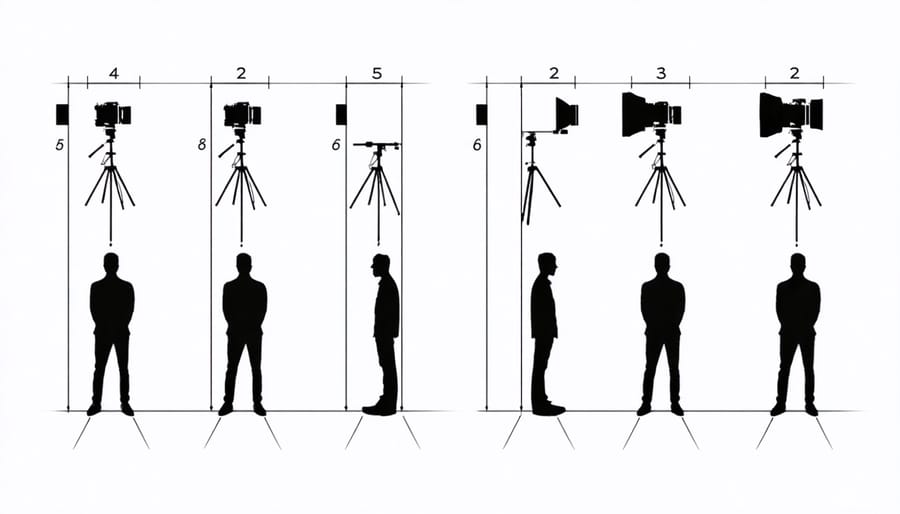
Height and Distance Guidelines
Proper camera height and positioning are crucial factors in capturing high-quality 360-degree footage. For standard room interiors, mount your camera at eye level, typically between 5’6″ and 5’10” from the floor. This creates a natural viewing perspective that feels immersive and comfortable for viewers.
When shooting real estate or architectural spaces, consider these scenario-specific guidelines:
For residential spaces, position the camera 4-6 feet away from walls and corners to capture the room’s full scope. In smaller rooms, center the camera to maintain balanced proportions. For grand spaces like foyers or great rooms, raise the camera height to 6-7 feet to showcase ceiling details while maintaining perspective.
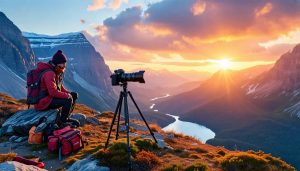
Outdoor environments require different approaches. For landscape photography, elevate the camera to 7-10 feet to capture sweeping vistas while minimizing distortion at the horizon line. In urban settings, street-level shots work best at 6 feet, while elevated positions (10-15 feet) can capture cityscapes more dramatically.
For event coverage, adjust your camera height based on the activity. Position at 6-7 feet for standing crowds, or lower to 4-5 feet for seated audiences. When capturing performances or presentations, place the camera 8-10 feet from the stage at approximately two-thirds of the stage height.
Remember to maintain adequate distance from subjects: at least 3 feet for close-ups, 6-8 feet for group shots, and 10-15 feet for large spaces. This prevents unwanted distortion and ensures smooth stitching between camera sensors.
Always test your setup with preview shots before finalizing the position, as small adjustments can significantly impact the final result.
Lighting and Background Setup
Creating the perfect environment for 360-degree photography requires careful attention to managing lighting conditions and background setup. The key is to achieve consistent, even illumination throughout the entire space while minimizing harsh shadows and hotspots.
Start by positioning multiple light sources at different heights and angles to create balanced illumination. Soft, diffused lighting works best – consider using softboxes or LED panels with diffusion screens. For indoor shoots, place lights at the cardinal points (north, south, east, west) relative to your camera position. This setup helps eliminate dark spots that can appear in your 360-degree captures.
Background considerations are equally important. Choose a location with minimal visual distractions and ensure that any background elements are either intentionally included or completely removed from the frame. If you’re shooting products, consider using a cyclorama or infinity curve to create a seamless background that wraps around the entire scene.
Pay special attention to reflective surfaces and windows, as they can create unwanted glare or expose equipment in the final image. Use black flags or light blockers to control unwanted reflections, and consider scheduling outdoor shoots during the golden hour for naturally balanced lighting.
For consistent results, create a lighting diagram and take test shots from multiple angles. Review your 360-degree captures carefully, looking for any inconsistencies in lighting or distracting elements in the background. Remember that what might seem insignificant from one angle could become prominently visible when viewers explore your 360-degree image from different perspectives.
Camera Configuration and Settings
Resolution and Frame Rate
When setting up your 360-degree camera, choosing the right resolution and frame rate is crucial for achieving optimal results. For still photography, most modern 360 cameras offer resolutions ranging from 5.7K to 8K, which provides ample detail for immersive viewing experiences. However, higher resolutions require more storage space and processing power, so consider your specific needs carefully.
For video recording, the sweet spot typically lies between 4K and 5.7K at 30fps for most applications. This balance ensures smooth playback while maintaining sufficient detail for image quality optimization in post-production. If you’re capturing fast-moving subjects, consider dropping to 4K resolution to achieve 60fps, which delivers smoother motion.
Keep in mind that your output medium plays a significant role in these decisions. For social media sharing, 4K resolution is usually sufficient, while professional applications like virtual tours or real estate photography may benefit from higher resolutions. Storage capacity is another consideration – a 10-minute 5.7K video can consume up to 4GB of space.
For the best results, start with these recommended settings:
– Static scenes: 5.7K/30fps
– Action shots: 4K/60fps
– Virtual tours: 8K still images
– Social media content: 4K/30fps
Remember to test different combinations in your specific shooting environment to find the perfect balance between quality and practicality.
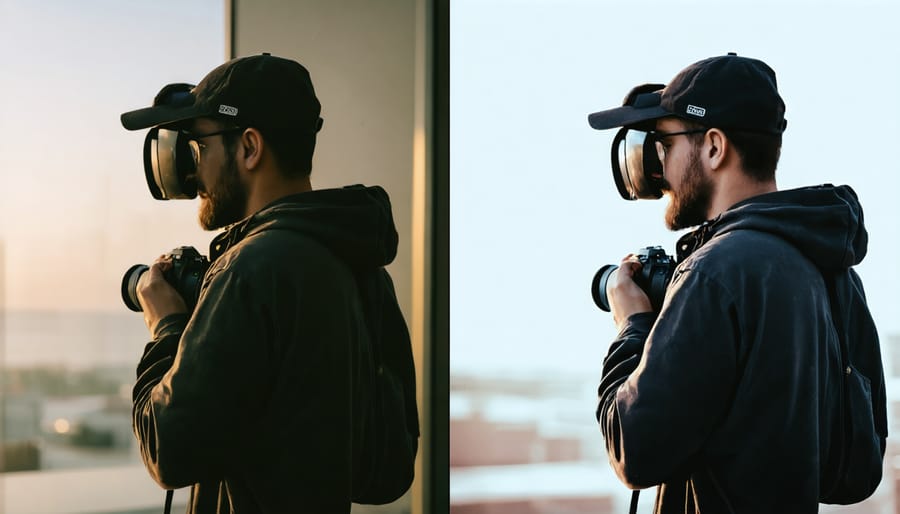
Exposure and White Balance
Getting the right exposure and white balance in 360-degree photography can be tricky since you’re capturing light from all directions simultaneously. The key is to find a balanced exposure that works across the entire sphere without leaving any areas too bright or too dark.
Start by shooting in RAW format to give yourself more flexibility in post-processing. When metering, pay special attention to the brightest and darkest areas of your scene. A good rule of thumb is to expose for the highlights while ensuring shadow details remain visible. This usually means slightly underexposing compared to what you might do for traditional photography.
For white balance, avoid using auto settings as they can create inconsistencies across different angles. Instead, use a gray card or color checker in your scene, making sure it’s visible from at least one angle. Take a reference shot that you can use to set a consistent white balance across all angles in post-processing.
In challenging lighting situations, like shooting indoors with windows, consider using HDR techniques. Take multiple exposures at different settings and blend them in post-processing. This helps manage extreme contrast ranges that are common in 360-degree environments.
Remember that time of day matters significantly. Early morning or late afternoon typically provides the most even lighting, making it easier to achieve balanced exposure across your entire sphere. If shooting midday, watch for harsh shadows that can create uneven results in your final image.
Stitching Parameters
Getting your stitching parameters right is crucial for creating seamless 360-degree images. Start by setting your camera’s overlap percentage between 30-40% for optimal results. This ensures enough matching points between images while maintaining efficient processing times.
Pay attention to your exposure settings across all images. Use manual mode to lock your exposure, ensuring consistent lighting throughout the panorama. This prevents visible seams where images meet. White balance should also be manually set to maintain color consistency.
For the sharpest results, set your aperture between f/8 and f/11, which typically provides the best balance between depth of field and overall image quality. Keep your ISO as low as possible to minimize noise, which can complicate the stitching process.
When it comes to stitching software settings, begin with automatic alignment but be prepared to make manual adjustments. Focus on control points – aim for at least 20-30 matching points between overlapping images for reliable stitching. If you notice ghosting or misalignment, adjust the blending mode settings. “Multi-band blending” usually provides the most natural-looking results.
Remember to enable lens correction in your stitching software to compensate for any barrel or pincushion distortion. This is especially important when working with wide-angle lenses. Finally, set your output resolution to match your intended use – higher for print, lower for web display.
Common Setup Mistakes and Solutions
Alignment Problems
Proper alignment is crucial for creating seamless 360-degree images, but it’s common to encounter several challenges during setup. One of the most frequent issues is parallax error, which occurs when cameras aren’t perfectly aligned around their nodal points. This can result in visible stitching lines or double images in your final output.
To address alignment problems, start by checking each camera’s position using a laser level. Ensure all cameras are mounted at exactly the same height and are perfectly level with the horizon. If you notice misalignment, adjust the mounting brackets incrementally until all cameras are properly positioned.
Another common issue is rotation misalignment, where cameras aren’t pointing at the correct angles relative to each other. For a six-camera setup, each camera should be precisely 60 degrees apart. Use angle markers or a protractor to verify these measurements. If your rig came with alignment guides, double-check that they’re properly calibrated.
Camera synchronization can also affect alignment in moving subjects. If cameras aren’t triggering simultaneously, you might see ghosting or stitching errors. Ensure all cameras are properly connected to your synchronization system and test the timing with a fast-moving object.
Remember that environmental factors like vibration or wind can throw off even a perfectly aligned setup. Consider using stabilization equipment and regularly check your alignment during extended shoots to maintain consistency.
Stitching Errors
Even with the best setup, you might encounter some common stitching issues in your 360-degree photos. Parallax errors often occur when objects appear in multiple camera views, causing misalignment in the final image. To minimize this, ensure your camera array is properly aligned and the nodal points of each lens are as close together as possible.
Ghosting artifacts are another frequent challenge, appearing when moving objects are captured differently by each camera. Combat this by shooting in environments with minimal movement or using faster shutter speeds. If you’re shooting indoors, consider using additional lighting to maintain those faster speeds without compromising image quality.
Color inconsistencies between different cameras can create visible seam lines. This typically happens when cameras have slightly different exposure settings or when lighting conditions vary across the scene. To prevent this, manually set identical exposure settings across all cameras and use the same white balance preset.
Exposure blending issues often show up in high-contrast scenes, particularly where bright skies meet darker foregrounds. Using HDR techniques can help balance these extremes, but be careful with movement between exposures. For optimal results, consider bracketing your shots and combining them in post-processing.
If you notice persistent stitching problems, double-check your camera positioning and ensure all lenses are clean and free from smudges. Sometimes, what appears to be a stitching error might simply be debris on a lens affecting image quality.
Testing and Quality Assurance
Before diving into your 360-degree camera project, it’s essential to verify that everything works as intended. Start by conducting a series of test shots in different lighting conditions to ensure consistent exposure and color balance across all camera angles. Pay special attention to the overlap areas between cameras, as these are crucial for seamless stitching.
Check the synchronization between cameras by recording a quick test video while moving your hand across the field of view. All cameras should capture the motion simultaneously without any noticeable lag. If you notice timing discrepancies, reconfigure your trigger settings and test again.
Review your test footage on both a computer monitor and mobile device to evaluate the stitching quality. Look for any visible seam lines, exposure mismatches, or parallax errors. Common issues include ghosting effects near the stitch lines or objects appearing distorted when too close to the cameras. If you spot these problems, adjust your camera positioning and overlap accordingly.
Audio quality is often overlooked but crucial for immersive 360-degree content. Record a test clip in your intended shooting environment and listen for any inconsistencies in sound levels or unwanted background noise. Consider using external microphones if the built-in audio doesn’t meet your standards.
To ensure optimal output quality, create a pre-shoot checklist that includes:
– Battery levels and backup power
– Memory card capacity and formatting
– Lens cleanliness
– Mount stability
– Level horizon alignment
– WiFi/remote control connectivity
– Proper camera settings across all units
Perform a final walkthrough of your setup using this checklist before any important shoot. Remember that environmental factors like temperature and humidity can affect camera performance, so consider these variables when testing outdoors. Document any issues you encounter and their solutions for future reference, helping you streamline your setup process over time.
Embarking on your 360-degree photography journey opens up a world of creative possibilities and immersive storytelling opportunities. By following the setup guidelines we’ve discussed, you’ll be well-equipped to capture stunning spherical images and videos that transport viewers into your scenes. Remember to take time perfecting your camera positioning, lighting setup, and testing procedures – these fundamental steps will significantly impact your final results. Whether you’re creating virtual tours for real estate, documenting special events, or exploring artistic expression, the skills you’ve learned here will serve as a solid foundation. Don’t be afraid to experiment with different mounting options, lighting configurations, and camera settings to develop your unique style. With practice and patience, you’ll soon be creating professional-quality 360-degree content that stands out in today’s digital landscape. Start small, learn from each shoot, and most importantly, enjoy the creative process of capturing the world in full perspective.