Transform everyday scenes into captivating photographs by mastering foundational techniques that unleash your creative potential. Start with intentional composition: frame subjects through doorways, windows, or natural arches to create compelling layers of depth. Play with perspective by getting low to the ground or shooting from high vantage points, instantly adding drama to otherwise ordinary subjects. Experiment with household items as creative filters—photograph through glass balls, prisms, or even clear plastic wrap to bend light and create otherworldly effects.
Photography isn’t about expensive gear or complex techniques—it’s about training your eye to see the extraordinary in the ordinary. Whether you’re wielding a smartphone or entry-level DSLR, these creative approaches will elevate your images from simple snapshots to striking visual stories. The key lies in mindful observation: notice how light creates shadows, how reflections dance on surfaces, and how different angles reveal new perspectives of familiar subjects.
Each frame becomes an opportunity to craft something unique, proving that compelling photography stems from imagination rather than equipment. These foundational techniques serve as building blocks, enabling you to develop your distinct visual voice while mastering the art of creative expression through your lens.
Master Light and Shadow Play
Window Light Portraits
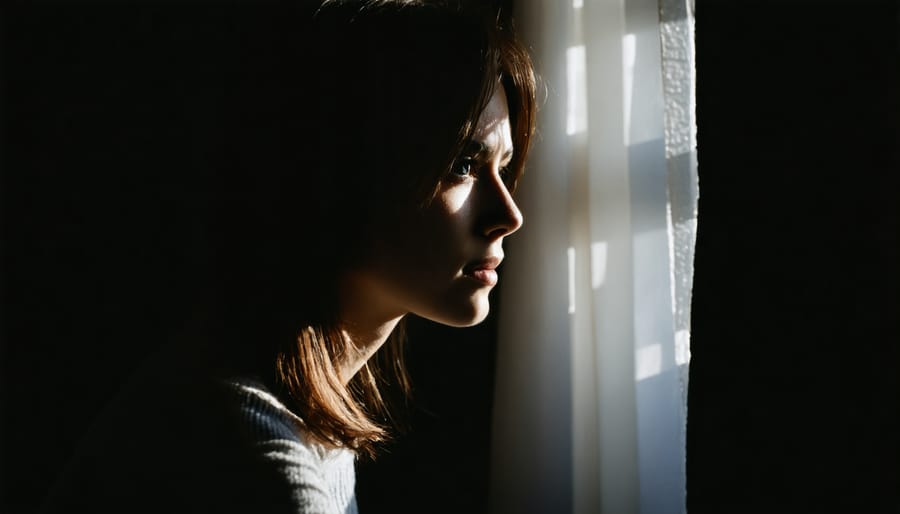
Window light is nature’s softbox, offering a beautiful and cost-free way to create stunning portraits. Position your subject near a large window, ideally on a slightly overcast day when the light is naturally diffused. The way this soft, directional light interacts with your subject can create dramatic shadows and highlight facial features in ways that complement color theory in photography.
For the best results, have your subject face the window at a 45-degree angle. This creates gentle shadows that add depth to their features while maintaining even illumination. Try experimenting with different distances from the window – closer placement creates more dramatic contrast, while stepping back softens the effect.
Don’t be afraid to use reflectors (even a white piece of paper works!) on the shadow side to fill in darker areas. For more moody portraits, position your subject with the window to their side, allowing deeper shadows to form on the opposite side of their face.
Remember to turn off artificial indoor lights to avoid mixing different color temperatures, which can affect skin tones and overall image quality.
Silhouette Magic
Silhouettes offer a dramatic way to capture striking images, and the best part is they’re surprisingly easy to create! The key to perfect silhouettes lies in timing and positioning. Head out during golden hour – that magical period just before sunset or after sunrise – when the sun sits low on the horizon, painting the sky in warm, vibrant colors.
To create a compelling silhouette, position your subject between your camera and the light source. Look for interesting shapes or profiles – people, trees, buildings, or even wildlife make excellent subjects. The secret is to expose for the bright background rather than your subject. This will turn your subject into a dark, mysterious shape against the glowing sky.
For the best results, switch your camera to manual mode or use exposure compensation in automatic mode. Meter for the bright sky, which will naturally underexpose your subject. Keep your composition simple and clean – silhouettes work best when the subject’s outline is clearly defined and uncluttered. Remember to shoot at eye level or slightly below your subject to capture their full shape against the sky.
Perspective Changes Everything
Ground-Level Photography
Getting down to ground level can transform ordinary subjects into extraordinary photographs. This perspective shift creates a dramatic impact by making everyday objects appear larger than life and revealing details often missed from standing height. While mastering various lens techniques is important, sometimes the most impactful change comes simply from where you position yourself.
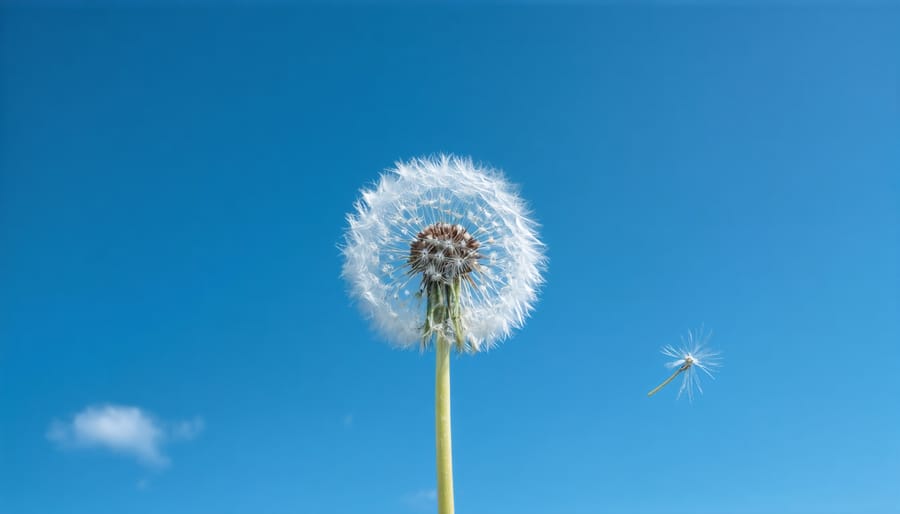
Try lying flat on your stomach to capture flowers from a bee’s-eye view, or get low to photograph pets at their eye level for more engaging portraits. Urban photographers can create striking compositions by shooting upward at architecture from ground level, making buildings appear to touch the sky. When photographing at the beach, position your camera just inches above the sand to capture dramatic wave formations and reflections in tidal pools.
Remember to protect your gear when shooting from ground level. A small towel or foam pad can keep your camera dry and clean. If you’re hesitant to lie on the ground, consider using a tilting LCD screen if your camera has one, or invest in an affordable right-angle viewfinder attachment.
For the most dramatic results, experiment with different focal lengths while maintaining your low position. Wide-angle lenses can create particularly striking perspectives, making foreground elements appear larger while maintaining sharp background details.
Bird’s Eye Views
Taking photographs from an elevated position can transform ordinary scenes into extraordinary compositions. Whether you’re shooting from a balcony, rooftop, or even a simple stepladder, bird’s eye views offer unique aerial perspectives that can make your images stand out.
Start by exploring safe, accessible high points in your environment. A second-floor window, parking garage top level, or pedestrian bridge can serve as excellent vantage points. When composing your shot, look for patterns, symmetry, and leading lines that might not be visible from ground level. Urban environments are particularly rewarding, as you can capture the geometric shapes of buildings, streets, and walkways from above.
Remember to prioritize safety while seeking these elevated shots. Always obtain necessary permissions when accessing rooftops or private properties, and maintain a stable stance while shooting. A wider lens (18-35mm range) often works best for these compositions, allowing you to capture more of the scene below.
Try photographing people going about their daily activities from above – this perspective can turn mundane scenes into compelling visual stories. Morning and evening hours are ideal, as longer shadows add depth and dimension to your aerial compositions. Experiment with different heights and angles until you find the sweet spot that transforms the ordinary into something remarkable.
Everyday Objects, Extraordinary Photos
Glass and Water Effects
Water and glass offer endless possibilities for creating stunning photographic effects without expensive equipment. Start by filling a clear glass with water and placing it in front of your subject. The water acts as a natural lens, creating beautiful distortions and inversions of your background. Try photographing through wine glasses, mason jars, or even drinking glasses to achieve different effects.
For reflections, experiment with a sheet of glass or a large mirror positioned at various angles. Place small objects on top of the glass and spray water droplets around them for an ethereal effect. You can also create dramatic double exposures by capturing both the reflection and the subject in the same frame.
Want to add color? Try placing colored paper behind your glass setup or use food coloring in the water. For extra creativity, introduce bubbles using a straw or capture the moment a drop hits the water’s surface. Remember to use a fast shutter speed to freeze water droplets in motion.
The key is experimentation – each combination of glass, water, and light will create unique results. Don’t forget to adjust your camera’s focus point between the glass surface and your subject to discover different creative effects.
DIY Filters
Transform everyday household items into creative camera filters for unique and artistic photos. Try holding a clear plastic wrap in front of your lens for a dreamy, soft-focus effect, or create a bokeh overlay by cutting shapes in black cardboard. For a vintage look, shoot through colored cellophane or stretch a piece of old pantyhose across your lens for a subtle diffusion effect.
Clear plastic bottles can create fascinating prismatic effects – simply cut out a section and hold it at an angle in front of your lens. Another fun trick is using a CD or DVD as a reflective surface to create rainbow patterns in your images. Even a simple drinking glass can work as an impromptu filter, creating interesting distortions and reflections.
Remember to experiment with different distances between your DIY filter and lens to vary the effect intensity. Keep your filters clean and avoid anything that could scratch your lens. Start with simple materials like clear plastic or tissue paper before moving on to more complex combinations. The best part? If you don’t like the result, you can simply try another household item or remove the filter entirely.
Motion and Movement
Intentional Camera Movement
Intentional Camera Movement (ICM) is a creative technique that transforms ordinary scenes into artistic, abstract compositions by deliberately moving your camera during exposure. Unlike camera shake, which is usually unwanted, ICM is all about controlled movement to create stunning blur effects.
To get started, set your camera to shutter priority mode and experiment with slower shutter speeds, typically between 1/15 and 1 second. The longer the exposure, the more pronounced the blur effect will be. Try different movements: pan horizontally for streaking effects with trees or architecture, move vertically with waterfalls or tall buildings, or create circular motions for more abstract results.
For best results, shoot in conditions with strong contrast or vibrant colors. Trees against a bright sky, city lights at dusk, or colorful flower gardens make excellent subjects. Start with simple left-to-right movements, then progress to more complex patterns as you gain confidence.
A few tips for success: use a neutral density filter in bright conditions to achieve slower shutter speeds, experiment with different movement speeds, and take multiple shots of the same scene. While some images might not work out, the ones that do can be truly spectacular. Remember, there’s no “wrong” way to do ICM – the unpredictability is part of the creative process.

Freezing Action
Capturing split-second moments can transform ordinary scenes into extraordinary photographs. The key to freezing action lies in understanding how to use fast shutter speeds effectively. Start by setting your camera to Shutter Priority mode (usually marked as ‘S’ or ‘Tv’) and experiment with speeds of 1/500th of a second or faster.
Water drops make excellent subjects for practicing freeze-frame photography. Fill a clear glass with water, set up a colored background, and try capturing individual drops as they fall. For best results, use speeds of 1/1000th or higher, and don’t forget to set up proper lighting – natural window light or a basic flash will work well.
Another exciting way to practice freezing action is photographing birds in flight or insects hovering around flowers. Position yourself near a bird feeder or flowering plant, and wait patiently. When using fast shutter speeds, remember to increase your ISO if needed to maintain proper exposure, especially in lower light conditions.
For something more accessible, try photographing people jumping or dancing. Have your subject repeat their movement several times so you can perfect your timing. Start with 1/250th of a second and adjust faster if you notice any motion blur. The key is to anticipate the peak moment of action and press the shutter slightly before it happens.
Remember to keep your camera as steady as possible – even with fast shutter speeds, camera shake can still affect your images. Using burst mode can also increase your chances of capturing that perfect frozen moment.
Photography is an endless journey of discovery, and the techniques we’ve explored are just the beginning of your creative adventure. From experimenting with everyday household items as creative props to playing with natural light and shadows, these beginner-friendly ideas prove that you don’t need expensive equipment to create captivating images.
Remember that the key to developing your photographic style lies in practice and experimentation. Don’t be afraid to make mistakes – they’re often the stepping stones to your most unique shots. Start with the simpler techniques like forced perspective or light painting, then gradually work your way up to more complex compositions as your confidence grows.
Keep in mind that while technical knowledge is important, the most compelling photographs often come from a place of creativity and personal vision. Challenge yourself to try at least one new technique each week, and don’t forget to document your progress. You might be surprised at how quickly your skills develop.
Most importantly, have fun with the process. Photography should be an enjoyable pursuit that allows you to express your unique perspective. Whether you’re capturing reflections in puddles or creating miniature worlds with household objects, each shot is an opportunity to tell your story in a distinctive way.
Now it’s time to grab your camera and put these ideas into practice. The perfect shot is waiting for you – you just need to experiment and find it.