Transform ordinary smartphone photos into striking visual stories with professional-grade editing techniques right from your mobile device. Modern smartphones pack sophisticated editing capabilities that rival desktop software, making it possible to create gallery-worthy images without leaving your pocket. Whether you’re mastering smartphone photography basics or advancing your editing skills, today’s mobile editing apps offer unprecedented creative control over every aspect of your images.
The landscape of mobile photo editing has evolved dramatically, empowering photographers to adjust exposure, fine-tune colors, and apply complex effects with precision previously reserved for professional editing suites. From quick filters that enhance natural beauty to advanced tools for selective adjustments and creative manipulation, mobile editing has become an essential skill for photographers at every level.
This comprehensive guide explores cutting-edge techniques, time-saving workflows, and professional secrets that will elevate your mobile photography from casual snapshots to compelling visual art. Learn how to harness the full potential of your smartphone’s editing capabilities while maintaining image quality and developing your unique creative style.

Essential Mobile Editing Apps Worth Your Time
Free vs. Paid Apps: What You Actually Need
When it comes to mobile photo editing, the choice between free and paid apps often boils down to your specific needs rather than simply choosing the most expensive option. Free apps like Snapseed and VSCO’s basic version offer surprisingly robust editing capabilities that satisfy most casual photographers’ needs, including exposure adjustments, filters, and basic retouching tools.
However, paid apps typically offer advantages that might be worth the investment for serious photographers. Apps like Lightroom Mobile’s premium version provide advanced features such as selective adjustments, RAW processing, and cloud synchronization. These paid options often deliver a more refined user interface and eliminate annoying ads that can disrupt your creative flow.
Before spending money, consider your editing routine. If you mainly apply filters and make basic adjustments, stick with free options. But if you frequently work with RAW files, need precise color control, or want to create presets for consistent editing across multiple photos, a paid app might be worth the investment.
A practical approach is to start with free apps and upgrade only when you find yourself consistently bumping against their limitations. Many premium apps offer free trials, so you can test their advanced features before committing. Remember, the best editing app isn’t necessarily the most expensive one—it’s the one that fits seamlessly into your workflow while helping you achieve your creative vision.
Must-Have Features in Photo Editing Apps
When it comes to mobile photo editing, certain features are non-negotiable for achieving professional-looking results. Just as your smartphone needs essential camera features, your editing app should include fundamental tools for image enhancement.
First and foremost, look for precise exposure and contrast controls. These allow you to fine-tune the overall brightness and dynamic range of your images. Basic color adjustment tools, including temperature and tint controls, help you correct white balance issues or create specific moods in your photos.
Selective editing capabilities are crucial – you’ll want tools that let you adjust specific areas of your image without affecting others. Look for brush tools, gradients, and masking features that enable local adjustments.
Cropping and straightening tools are essential for composition refinement, while healing and clone tools help remove unwanted elements from your shots. A robust curves tool gives you precise control over tones, while HSL (Hue, Saturation, Luminance) adjustments allow for detailed color manipulation.
Don’t overlook the importance of preset management and the ability to create custom filters. These features streamline your workflow and help maintain consistency across your photo series. Finally, ensure your chosen app supports RAW file editing and offers various export options with quality control settings.
Professional Editing Techniques for Mobile
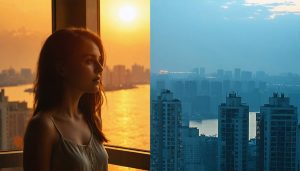
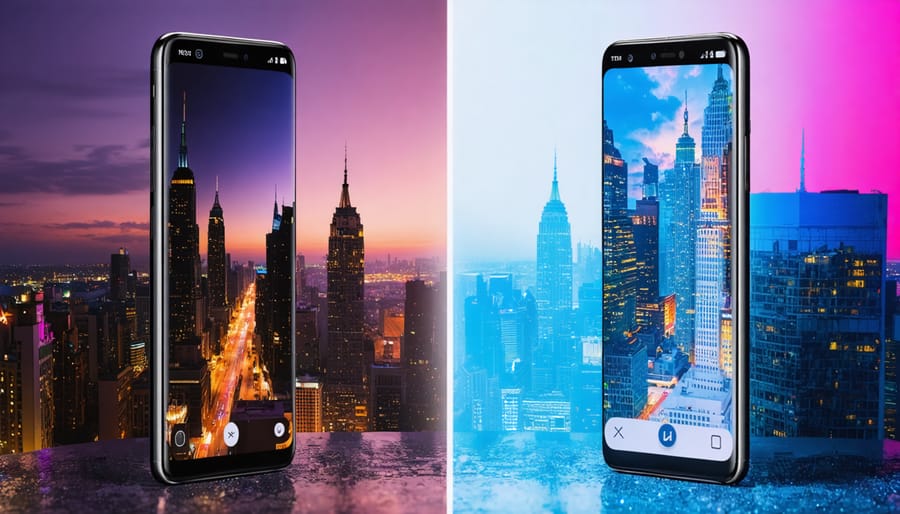
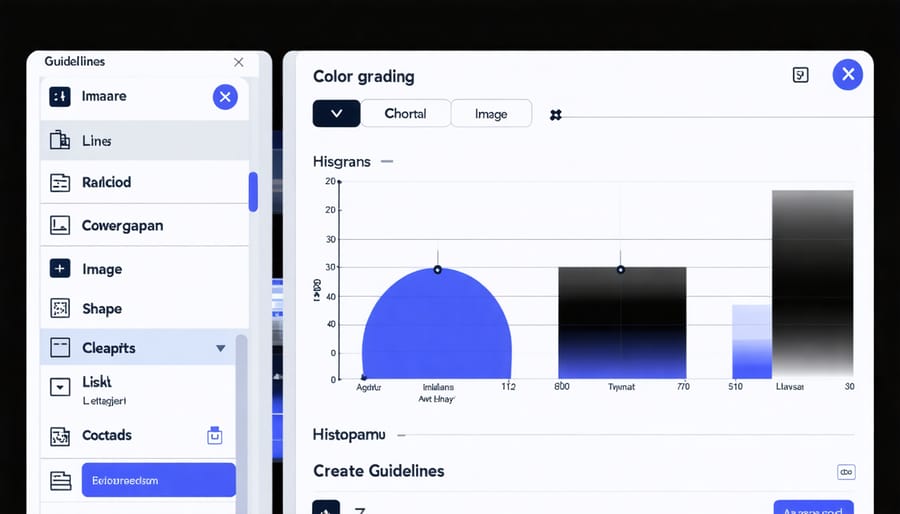
Color Grading on Small Screens
Color grading on small screens presents unique challenges, but with the right approach, you can achieve professional-looking results. The key is understanding how to work around the limitations of mobile displays while maintaining color accuracy.
Start by adjusting your phone’s brightness to around 75% – this provides the best balance for accurate color perception without washing out the details. Avoid editing in direct sunlight or extremely bright environments, as these conditions can skew your perception of colors. Instead, find a consistently lit space with neutral-colored surroundings.
One effective technique is to use reference points in your image. Look for elements you know should be neutral, like white walls or gray pavements, and use these as guidelines for your color adjustments. Many mobile editing apps now include color temperature and tint sliders, which help you fine-tune the overall color balance of your image.
To ensure consistency across different devices, consider using color profiles when available in your editing app. These presets can help maintain color accuracy when your photos are viewed on other screens. It’s also worth occasionally cross-checking your edits on a different device to ensure your adjustments translate well.
Remember that subtle adjustments often work better on mobile screens. Rather than making dramatic color changes, focus on small, incremental adjustments. This approach helps maintain image quality and prevents over-processing, which can be particularly noticeable on smaller displays.
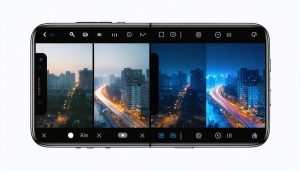
Advanced Selection and Masking
Making precise selections and masks on a mobile device has become remarkably sophisticated, thanks to advanced touch controls and AI-assisted tools. Modern editing apps now offer multiple ways to make detailed selections, from simple finger-based masking to precise edge detection.
Start with the basic fingertip selection tool, using pinch-to-zoom for better accuracy in tight spaces. When working with hair or complex edges, switch to the refined edge brush mode, which intelligently detects boundaries between subjects and backgrounds. Many apps now feature smart selection tools that can identify and select specific objects or people with a single tap.
For more control, use the mask brush with adjustable hardness and flow settings. This allows you to build up selections gradually, perfect for creating subtle vignettes or selective adjustments. The inverse selection option is particularly useful when you want to affect everything except your selected area.
Layer masks are essential for non-destructive editing. Paint with black to hide areas and white to reveal them, using gray values for partial transparency. Most professional editing apps now support pressure sensitivity when used with a stylus, offering even more precise control over your selections.
Remember to regularly zoom in and check your edges for accuracy. Small imperfections in your masks can become obvious in the final image, especially when making dramatic adjustments to exposure or color.
Creating Consistent Editing Styles
Developing a consistent editing style is crucial for creating a cohesive visual narrative across your mobile photography portfolio. Start by identifying the aesthetic elements that resonate with your creative vision, whether it’s warm, moody tones or bright, vibrant colors.
One effective approach is to create custom presets or filters that reflect your preferred style. Most mobile editing apps allow you to save your editing adjustments, making it easier to apply similar effects across multiple photos. However, avoid simply copying the exact settings – each image requires fine-tuning to maintain its unique character while staying within your chosen style parameters.
Pay attention to key elements that define your style: color temperature, contrast levels, shadow treatment, and highlight preservation. Consider maintaining a signature approach to specific aspects, such as consistently gentle contrast in portraits or slightly muted greens in landscape shots.
Keep a editing journal or notes documenting your preferred settings for different types of shots. This helps maintain consistency even when editing sessions are days or weeks apart. Additionally, regularly review your portfolio to ensure your recent edits align with your established style.
Remember that your editing style can evolve over time, but changes should be intentional rather than random. When implementing style changes, consider updating older images to maintain portfolio cohesion, or clearly separate different periods of your work into distinct collections.
Common Mobile Editing Mistakes (And How to Avoid Them)
Over-Processing Warning Signs
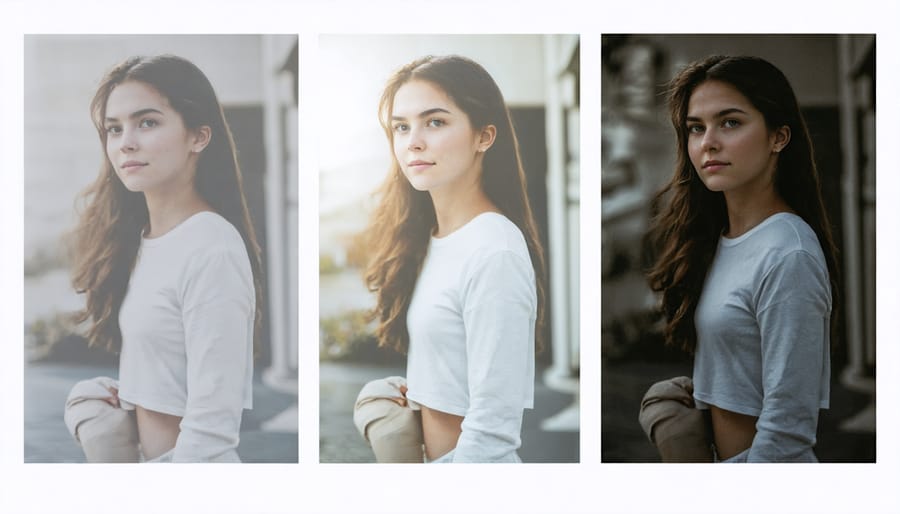
Over-processing is a common pitfall in mobile photo editing that can turn a great shot into an artificial-looking image. The telltale signs include unnaturally vibrant colors, excessive HDR effects that create halos around objects, and skin tones that appear plastic or overly smoothed. Watch out for oversaturated skies that look electric blue or surreal purple, as these are clear indicators you’ve pushed the editing too far.
Another red flag is extreme contrast that eliminates details in shadows and highlights. If you can’t see any texture in dark areas or if bright regions are completely white, you’ve likely crossed the line. Pay attention to noise reduction as well – while it’s tempting to smooth everything out, too much noise reduction can make images appear waxy and lose important details.
To prevent over-processing, follow the “step away” rule: after editing, take a break and return with fresh eyes. Compare your edited version with the original photo side by side. If the difference is jarring, you’ve probably gone too far. Consider using the opacity or intensity sliders in your editing app to dial back effects to 50-70% of their full strength.
Remember, subtle enhancements usually yield more professional-looking results than dramatic transformations. When in doubt, less is more. Your goal should be to enhance the natural beauty of your photos while maintaining their authenticity.
Preserving Image Quality
Maintaining image quality during mobile editing is crucial for achieving professional-looking results. Start by shooting in your phone’s highest resolution setting and, if available, capturing in RAW format. When editing, always work with a copy of your original image to preserve the source file’s quality.
Be mindful of compression when saving your edited photos. Many editing apps automatically compress images to save storage space, but this can result in visible quality loss. Look for settings that allow you to export at maximum quality, even if it means larger file sizes.
Pay attention to your editing sequence to minimize quality degradation. Make major adjustments like exposure and contrast first, followed by fine-tuning details. Each time you save and re-edit an image, you risk introducing compression artifacts, so try to complete your editing in one session when possible.
Watch out for over-editing, particularly with sharpening and noise reduction. While these tools can enhance your images, excessive use can create artificial-looking results and degrade image quality. Instead, apply subtle adjustments and regularly zoom in to check for unwanted artifacts or pixelation.
When sharing your photos, consider the platform’s compression requirements. Some social media platforms heavily compress uploaded images, so you might want to resize your photos to the platform’s recommended dimensions before posting to maintain better control over the final appearance.
Workflow Optimization for Mobile Editing
Creating Custom Presets
Creating your own presets is like developing your signature style in mobile photography. While many photographers rely on pre-made filters, crafting custom presets allows you to maintain consistency across your work while expressing your unique creative vision.
To begin, edit a photo that represents your typical shooting conditions and subject matter. Pay attention to key adjustments like exposure, contrast, color temperature, and saturation. Once you’ve achieved your desired look through various creative editing techniques, save these settings as a preset within your editing app.
Consider creating different presets for various scenarios: one for portraits, another for landscapes, and perhaps a third for indoor shots. This approach helps maintain consistency while adapting to different lighting conditions and subjects. When designing your presets, remember these key principles:
1. Start with subtle adjustments rather than dramatic changes
2. Test your preset across different photos to ensure versatility
3. Keep track of your adjustment values for future refinement
4. Consider seasonal variations in lighting and color
The real power of custom presets lies in their efficiency. Instead of spending several minutes editing each photo, you can apply your preset as a starting point and make minor tweaks as needed. This streamlined workflow not only saves time but also helps develop your distinctive photography style.
Remember to periodically review and update your presets as your style evolves and your skills improve. What works for you today might change as you grow as a photographer, so don’t be afraid to experiment and refine your presets over time.
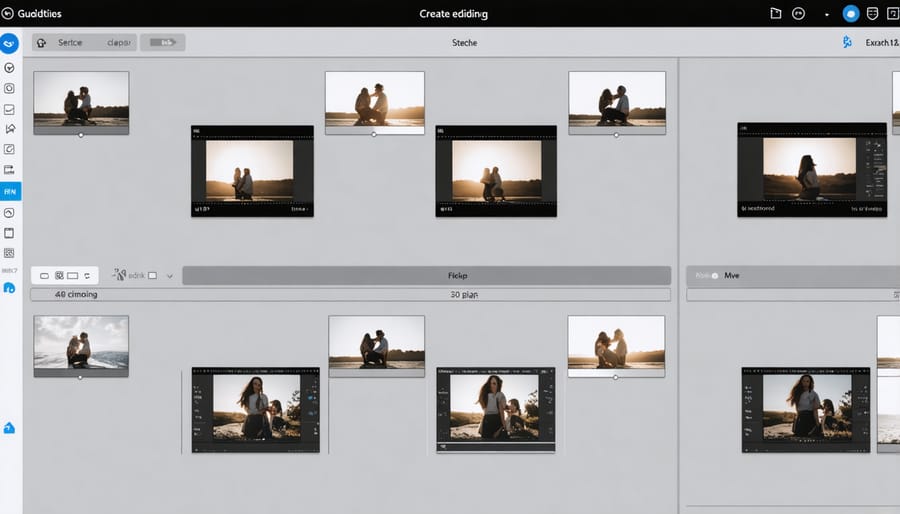
Batch Editing Techniques
When you’re dealing with multiple photos from a shoot or event, batch editing can be a massive time-saver. Most modern mobile editing apps now offer powerful batch processing features that let you apply the same adjustments across multiple images while maintaining consistency in your style.
Start by selecting similar photos that would benefit from the same editing treatment. For instance, photos taken under the same lighting conditions or from the same location work well for batch editing. Apps like Lightroom Mobile and Snapseed allow you to copy and paste editing settings from one photo to others, streamlining your workflow significantly.
A practical approach is to create and save presets of your commonly used adjustments. These might include your signature color grading, exposure adjustments, or specific filters. Once saved, you can apply these presets to multiple photos with just a few taps. Many photographers find it helpful to develop different preset collections for various scenarios – indoor shots, outdoor landscapes, or portraits.
Remember to review each photo individually after batch editing, as some images might need fine-tuning. While batch editing is efficient, each photo is unique and may require subtle adjustments to achieve the best results. Pay special attention to exposure levels and skin tones, as these often need personalized tweaking.
For social media content creators, batch editing becomes particularly valuable when maintaining a consistent feed aesthetic. You can process an entire photo set while ensuring all images share the same visual style, creating a cohesive look across your portfolio or social media presence.
Mobile photo editing has evolved from a simple hobby to a powerful means of creative expression, and mastering these skills can transform your smartphone photography from ordinary to extraordinary. Throughout this guide, we’ve explored essential tools, techniques, and best practices that can elevate your mobile editing game.
Remember that successful mobile photo editing isn’t about applying every filter or effect available – it’s about making thoughtful adjustments that enhance your image while maintaining its natural appeal. Start with the basics like exposure, contrast, and color balance before moving on to more advanced techniques. Pay attention to details like composition cropping and selective adjustments, as these subtle changes often make the biggest impact.
Don’t be afraid to experiment with different apps and techniques, but always keep your original image safe. Developing your unique editing style takes time and practice, so be patient with yourself as you learn. Try to maintain consistency across your edited photos, especially if you’re building a portfolio or social media presence.
Most importantly, remember that mobile photo editing should be enjoyable. While it’s great to learn from others, your creative vision is what matters most. Keep practicing, stay curious, and don’t hesitate to push boundaries with your editing choices. With time and dedication, you’ll develop an intuitive understanding of what works best for your photography style.