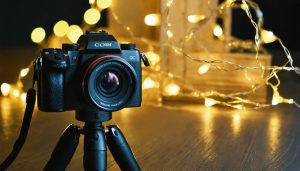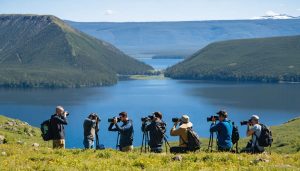
Master evening photography by starting with a base ISO of 800, opening your aperture to f/2.8 or wider, and setting shutter speeds between 1/60 and 1/15 second to capture the rich ambiance of twilight. Position yourself during the golden hour—that magical 30-minute window after sunset—when the sky’s deepening blues create perfect conditions for dramatic urban landscapes and portraits. Advanced night photography techniques demand precise white balance control: set between 3200K and 4000K to maintain natural color temperature, or switch to tungsten mode to neutralize artificial lighting’s orange cast. Stabilize your camera using a sturdy tripod when shooting below 1/60 second, enabling longer exposures that reveal subtle light trails and atmospheric details while maintaining crystal-clear image quality.
Understanding Evening Light Conditions
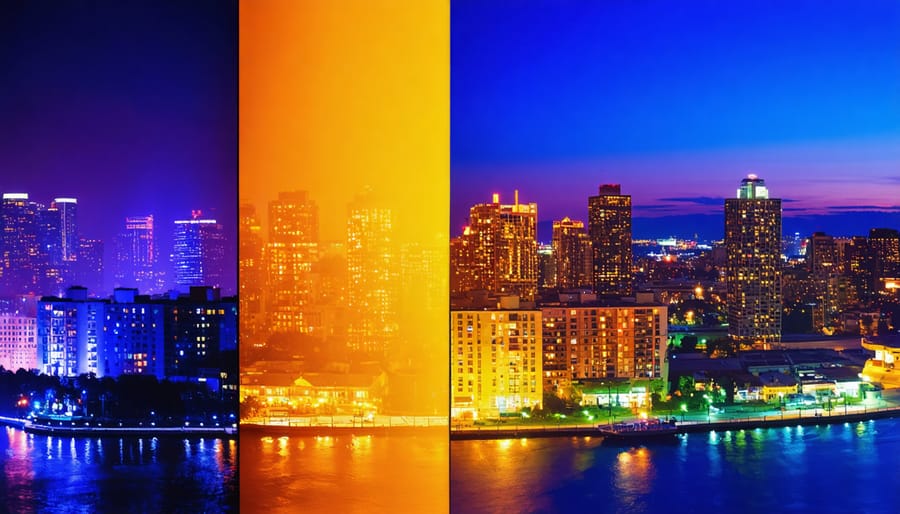
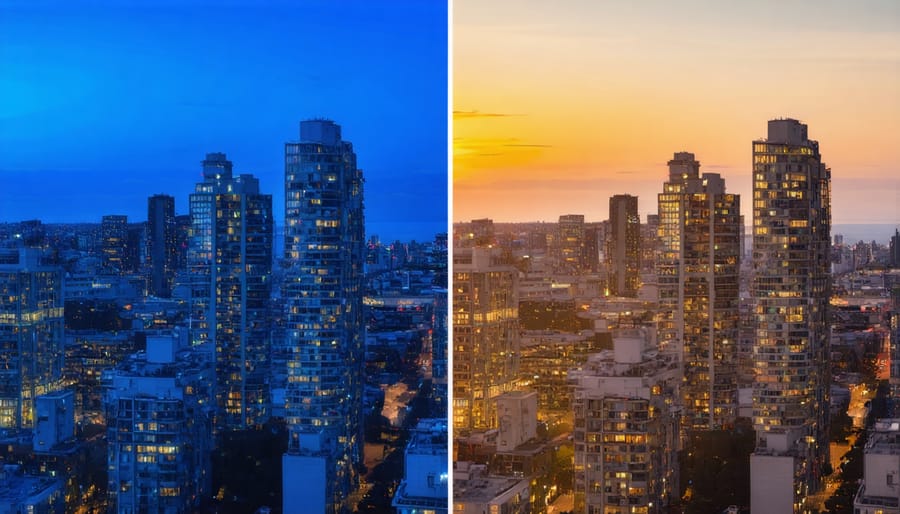
Blue Hour vs. Golden Hour
While both the blue hour and golden hour offer stunning photography opportunities, they require distinctly different camera settings. The golden hour occurs just after sunrise and before sunset, bathing everything in warm, golden light. During this time, you’ll typically want to use slightly lower ISO settings (around 100-400) and wider apertures (f/4-f/8) to capture the rich colors and long shadows.
The blue hour, occurring just before sunrise and after sunset, presents a more challenging yet magical scenario with its cool, ethereal light. You’ll often need to push your ISO higher (400-800) and use wider apertures (f/2.8-f/4) to compensate for the dimmer conditions. White balance becomes crucial during the blue hour – while auto white balance usually works well during golden hour, you might want to switch to the “daylight” or “shade” preset during blue hour to maintain those beautiful blue tones.
For both periods, a tripod is invaluable, especially during the blue hour when slower shutter speeds are often necessary. The transition between these times offers unique opportunities to capture dramatic sky gradients and city lights coming to life, making it worth experimenting with both settings to find your perfect shot.
Urban vs. Natural Settings
Urban and natural environments present distinct challenges and opportunities for evening photography, requiring different approaches to your camera settings. In urban settings, you’ll encounter a mix of artificial light sources – street lamps, neon signs, and building illumination – which often create high contrast scenes. Start with a slightly higher ISO (around 800-1600) to capture the ambient light while maintaining detail in both highlights and shadows. Your white balance might need frequent adjustments to handle the varying color temperatures of city lights.
Natural settings, on the other hand, typically offer more subtle lighting conditions. Without artificial light pollution, you can often use lower ISO settings (400-800) and longer exposures to capture the natural ambiance. Consider using aperture priority mode with a wider opening (f/2.8-f/4) to gather more light while maintaining image quality. The consistent color temperature of twilight means you can usually stick with auto white balance or the “shade” preset.
In both environments, a tripod becomes essential as light levels drop. Urban photographers might prefer faster shutter speeds to capture city movement, while nature photographers can experiment with longer exposures to create smooth water effects or star trails.
Essential Camera Settings for Evening Shots
ISO Management
Managing ISO in evening photography requires a delicate balance between capturing enough light and controlling digital noise. While it’s tempting to crank up your ISO to brighten dark scenes, this can introduce unwanted graininess to your images. Start with the lowest possible ISO that allows for a proper exposure – typically between 800 and 1600 for evening shots.
Modern cameras handle high ISO better than ever, but you’ll still want to find your camera’s “sweet spot.” Test your camera at different ISO settings to determine the highest acceptable level before noise becomes problematic. Generally, full-frame cameras perform better at high ISOs than crop-sensor cameras.
Consider using Auto ISO with a maximum limit set to your camera’s noise threshold. This allows your camera to adjust sensitivity automatically while preventing excessive noise. When shooting static subjects, prioritize a lower ISO by using a longer shutter speed and stable support. For moving subjects, you might need to accept a higher ISO to maintain faster shutter speeds.
Remember that some noise is better than a blurry photo, so don’t be afraid to push your ISO when necessary. Post-processing noise reduction can help clean up minor noise issues while preserving image quality.
Aperture Selection
When shooting in evening conditions, aperture selection plays a crucial role in capturing the right exposure and mood. For most evening photography scenarios, you’ll want to start with a wider aperture (lower f-number) like f/1.8 to f/2.8. These settings allow more light to reach your sensor, which is particularly valuable as natural light diminishes.
However, don’t feel constrained to always shoot wide open. While f/1.8 might be perfect for capturing atmospheric street scenes or portraits in the blue hour, you may want to stop down to f/4 or f/5.6 when photographing cityscapes to ensure buildings remain sharp from foreground to background. The key is balancing your need for light with your creative vision.
Consider your subject matter carefully. For evening portraits, a wide aperture not only helps with light gathering but also creates that sought-after background blur that makes your subject pop. When shooting landscapes at dusk, try f/8 to f/11 if you’re using a tripod – this ensures maximum sharpness across your frame while maintaining that magical evening atmosphere.
Remember that your aperture choice affects both exposure and depth of field, so experiment with different settings to find what works best for your specific scene and artistic vision.
Shutter Speed Techniques
In evening photography, mastering shutter speed is crucial for capturing the perfect balance between light and motion. For static scenes like cityscapes, start with slower shutter speeds around 1/15 to 1/60 second, which allow more light to reach your sensor while maintaining image sharpness when using a tripod. However, if you’re shooting handheld, try not to go below 1/focal length of your lens to avoid camera shake.
For capturing movement in evening scenes, consider two creative approaches. To freeze motion, such as people walking or cars passing, use faster shutter speeds (1/125 to 1/250 second) combined with a higher ISO. Alternatively, experiment with slow shutter speeds (1 second or longer) to create light trails from moving vehicles or capture the smooth flow of water in fountains.
During blue hour, when natural and artificial light blend beautifully, try exposure times between 2-8 seconds to capture rich colors and balanced exposure. Remember that as darkness increases, you’ll need to extend your shutter speed accordingly, sometimes up to 30 seconds for properly exposed nighttime landscapes.
For the sharpest results, always use a remote shutter release or your camera’s self-timer when working with slower shutter speeds to minimize camera movement.
White Balance Control
Evening photography often presents a challenging mix of light sources – street lamps casting warm orange glows, cool blue twilight, and artificial lighting from buildings. Getting your white balance right in these conditions is crucial for capturing the true ambiance of the scene.
Start by avoiding Auto White Balance (AWB), as it can struggle with mixed lighting conditions. Instead, take a custom white balance reading using a gray card in your primary area of interest, or select the appropriate preset (typically “Tungsten” for urban scenes or “Shade” for blue hour).
For more creative control, consider using Kelvin settings. During blue hour, try settings between 6000-7000K for natural-looking results. For scenes dominated by artificial lighting, experiment with 2800-3200K. Remember, there’s no absolute “correct” white balance for evening shots – it’s often about creative interpretation.
Pro tip: When shooting RAW, you have the flexibility to adjust white balance in post-processing. However, getting it right in-camera helps you better visualize your final image while shooting and reduces editing time later.
Advanced Setting Combinations
Cityscapes and Architecture
When photographing cityscapes at dusk, start with an aperture between f/8 and f/11 to ensure sharp details across the urban landscape. Set your ISO to 100-400 to minimize noise, though you may need to increase it as darkness falls. For iconic city lights and star effects around streetlamps, consider narrowing your aperture to f/16.
A sturdy tripod is essential, as you’ll be working with slower shutter speeds, typically ranging from 1/15 to several seconds. Enable your camera’s mirror lock-up feature to reduce vibration, and use a remote shutter or 2-second timer for the crispest results.
For balanced exposures of both buildings and sky, try bracketing your shots with -2/0/+2 EV. This technique is particularly effective during blue hour when the sky retains color but city lights begin to sparkle. White balance settings between 3200K and 4000K usually capture the warm glow of artificial lighting while maintaining natural-looking skies.
Consider shooting in RAW format to preserve maximum detail in both highlights and shadows, allowing you to fine-tune the dramatic contrast typical in urban evening scenes.
Evening Portraits
Evening portraits require a delicate balance between capturing detailed facial features and maintaining the ambiance of low-light conditions. Start with an aperture between f/2.8 and f/4 to allow sufficient light while maintaining acceptable sharpness. Set your ISO between 800-1600, depending on available light, but avoid going higher to prevent excessive noise in skin tones.
For capturing expressions naturally, maintain a minimum shutter speed of 1/60s to prevent motion blur. Using dramatic lighting techniques can add depth to your portraits – consider positioning your subject near ambient light sources like street lamps or storefront windows.
Switch to Aperture Priority mode (A/Av) for consistent exposure, and enable your camera’s face detection AF if available. For optimal results, use spot metering focused on your subject’s face, and consider using exposure compensation of +0.3 to +0.7 to ensure skin tones remain bright and natural without losing the evening atmosphere.
Sunset Landscapes
Capturing dramatic sunset landscapes requires a careful balance of camera settings to preserve both sky detail and foreground elements. Start with aperture priority mode (A/Av) and set your f-stop between f/8 and f/11 for optimal sharpness across the frame. These settings, combined with essential landscape photography tips, will help you achieve stunning results.
For exposure, use exposure compensation (-1 to -2 stops) to prevent washing out the vibrant sky colors. Keep your ISO as low as possible (100-400) to minimize noise, but be prepared to increase it slightly as light fades. A tripod is essential here, allowing you to maintain these optimal settings while using slower shutter speeds.
For the richest colors, shoot in RAW and set your white balance to “cloudy” or around 6500K. This slight warming effect enhances the golden and purple hues typical in sunset scenes. Consider using graduated neutral density filters to balance exposure between bright skies and darker foregrounds, especially during the most dramatic moments of sunset.
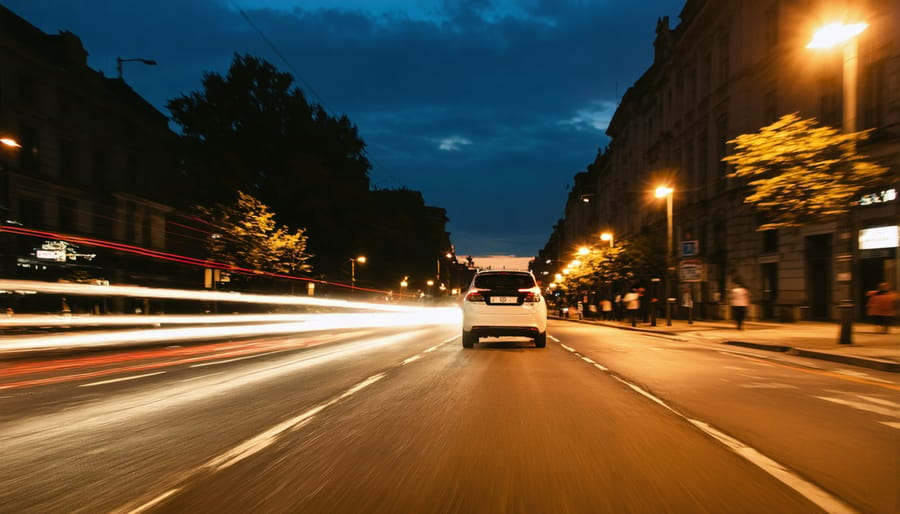
Light Trails and Motion
Capturing light trails and motion during evening hours creates stunning visual effects that can transform ordinary scenes into extraordinary images. Start by setting your camera to manual mode with an ISO between 100-400 to minimize noise. Use a small aperture (f/8 to f/16) to achieve greater depth of field and longer exposure times. The key is selecting a slow shutter speed, typically between 2-30 seconds, depending on your subject’s movement speed.
For best results, mount your camera on a sturdy tripod and use a remote shutter or 2-second timer to avoid camera shake. When photographing car light trails, try exposures around 10-15 seconds during blue hour. For more dynamic shots of moving carnival rides or cityscapes, experiment with 20-30 second exposures. These techniques are perfect for creating creative night photography ideas that capture the energy and movement of evening scenes while maintaining sharp, stationary elements in your composition.
Troubleshooting Common Evening Photography Issues
Focusing in Low Light
Achieving sharp focus in low light can be challenging, but with the right techniques and low-light photography tips, you can capture crisp, clear images even in challenging conditions. Start by switching to your lens’s widest aperture, which allows maximum light to reach your camera’s sensor and helps the autofocus system perform better.
For stationary subjects, use your camera’s single-point AF mode and aim for high-contrast edges where possible. These areas give your autofocus system the best chance of locking on accurately. If you’re struggling with autofocus, try using your camera’s AF assist beam or temporarily illuminate your subject with a flashlight to achieve focus before taking the shot.
Manual focus can be your best friend in extremely low light situations. Use your camera’s live view mode and zoom in digitally to check focus precision. Many modern cameras offer focus peaking, which highlights in-focus areas with bright colors, making it easier to confirm sharp focus.
Remember that stability is crucial for accurate focusing. Use a tripod whenever possible, and if shooting handheld, brace yourself against a stable surface. For moving subjects, pre-focus on the area where your subject will be and use continuous AF mode to track movement. These techniques, combined with practice, will help you nail focus consistently in challenging evening light.
Exposure Compensation Tips
Evening photography often tricks your camera’s light meter, leading to under or overexposed images. Understanding exposure compensation is your secret weapon for perfectly balanced shots in challenging lighting conditions.
When shooting during the blue hour, start by dialing in +1 to +2 stops of exposure compensation. This helps capture the rich colors of the sky while maintaining detail in darker foreground elements. Conversely, if you’re photographing city lights or illuminated buildings, you might need to dial in -1 to -1.5 stops to prevent highlight clipping and preserve the ambiance of artificial lighting.
Remember that different metering modes affect how your camera reads the scene. In high-contrast evening situations, spot metering combined with exposure compensation gives you precise control over your exposure. For instance, when photographing a sunset, meter for the sky and add +1 stop of compensation to maintain detail in both the bright sky and darker landscape elements.
LCD preview can be deceiving in low light, so it’s worth bracketing your shots. Take one photo at your chosen compensation value, then bracket one stop above and below. This technique ensures you capture the perfect exposure, especially in scenes with complex lighting like twilight cityscapes or backlit subjects.
Don’t be afraid to experiment – the beauty of digital photography is the immediate feedback you get from your LCD screen. Start with these suggested values and adjust based on your creative vision and the specific lighting conditions you encounter.
Mastering evening photography settings takes time, patience, and plenty of practice. Remember to start with the fundamental exposure triangle – aperture, shutter speed, and ISO – adjusting each according to your specific scene and creative vision. Don’t be afraid to experiment with different combinations, as each situation may require a unique approach. Keep your camera steady, whether using a tripod or implementing proper handheld techniques, and always shoot in RAW format to give yourself more flexibility in post-processing. Make it a habit to scout locations during daylight hours, so you’re better prepared when the sun sets. With consistent practice and a willingness to learn from both successes and mistakes, you’ll soon develop an intuitive understanding of evening photography settings that will help you capture stunning images in any low-light situation.