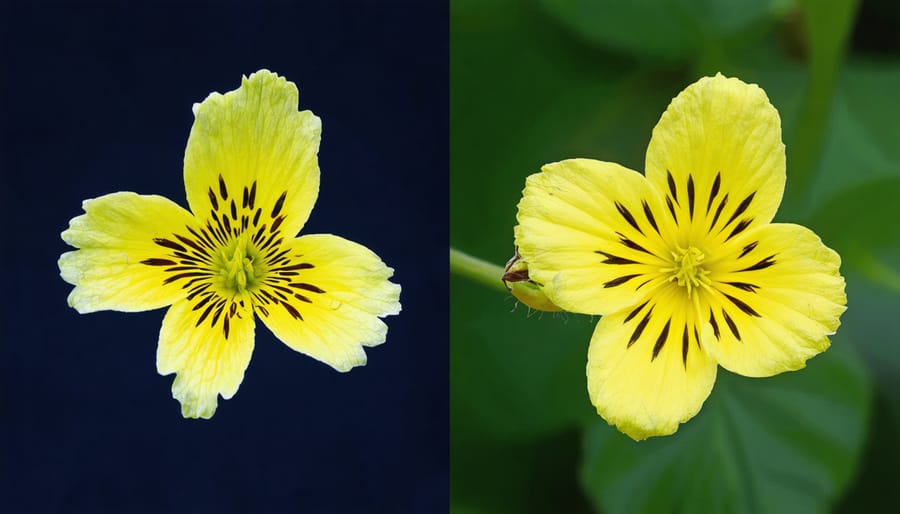
Mastering macro photography techniques demands precision lighting that reveals microscopic details invisible to the naked eye. Transform ordinary subjects into extraordinary images using dedicated macro lighting equipment that puts you in complete control of every shadow and highlight. Whether photographing dewdrops on flower petals or the intricate patterns of insect wings, proper lighting separates amateur close-ups from professional macro masterpieces.
A ring flash wrapping around your lens provides shadowless illumination for 1:1 magnification shots, while flexible dual-arm LED systems offer unlimited positioning options for creative lighting angles. Combined with diffusion panels and reflectors, these tools unlock the hidden world of macro photography – from the metallic sheen of beetle shells to the delicate textures of mineral crystals.
This guide cuts through the complexity of macro lighting equipment, delivering practical solutions for every budget and skill level. From professional-grade flash systems to innovative DIY solutions, discover how to build a versatile lighting kit that elevates your close-up photography to gallery-worthy standards.
Essential Lighting Equipment for Macro Photography
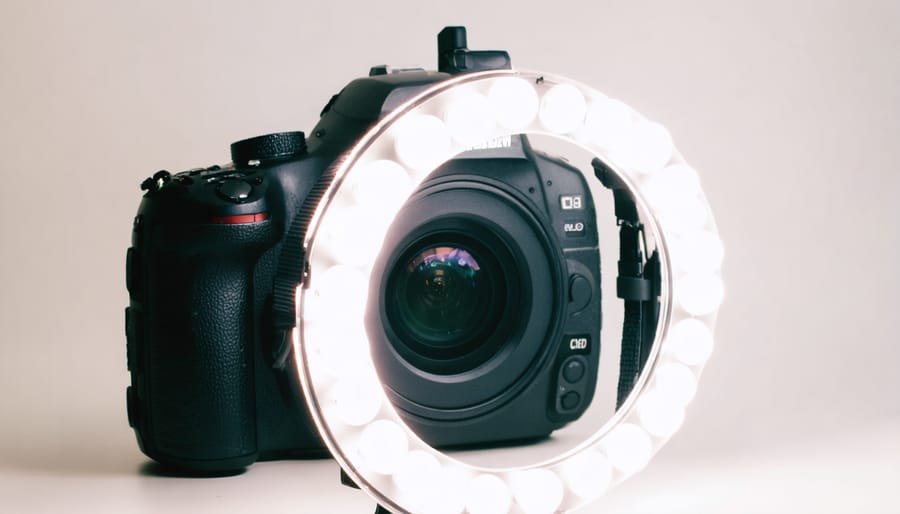
Ring Lights and LED Macro Lights
Ring lights and LED macro lights have become increasingly popular tools for photographers looking to master macro photography basics, offering unique advantages for close-up work. Ring lights, which mount around your lens, provide even, shadowless illumination that’s particularly effective for subjects like flowers, insects, and small products.
The main advantage of ring lights is their ability to eliminate harsh shadows while maintaining consistent lighting across your subject. This makes them ideal for documentary-style macro work where accurate detail reproduction is crucial. However, this same characteristic can sometimes result in flat-looking images lacking dimensional depth.
LED macro lights offer more versatility in positioning and light direction. Many models come with adjustable arms or panels that you can position independently, allowing you to create deliberate shadows and highlights that add depth to your images. Some advanced LED systems even offer color temperature adjustment, helping you match ambient light or create specific moods in your photos.
When choosing between these options, consider your typical subjects and shooting style. Ring lights excel at technical documentation and situations where you need consistent, even lighting. They’re particularly useful for dental photography, coin collecting, and scientific documentation. LED systems, on the other hand, shine in creative macro work where you want to emphasize texture and dimension.
Budget-friendly LED panels have made quality macro lighting more accessible than ever, though professional ring lights still tend to offer superior color accuracy and output consistency. For beginners, a basic LED macro light with adjustable positioning can provide excellent results while you develop your technique.
Flash Systems for Macro Work
Flash systems are essential tools in macro photography, offering powerful and controllable lighting solutions for close-up subjects. Twin flash systems, specifically designed for macro work, consist of two flash units mounted on either side of the lens. This setup provides even illumination and helps eliminate harsh shadows, making them ideal for subjects like insects and flowers.
Traditional speedlights can also be effectively used for macro photography, though they require some modification. By using flash diffusers or bounce cards, photographers can soften the light and create more pleasing results. A popular technique involves using a single speedlight with a DIY diffuser made from white paper or plastic, which helps spread the light more evenly across small subjects.
Ring flashes, while originally designed for dental photography, have become popular among macro photographers. They provide consistent, shadowless lighting that’s particularly useful when working with highly reflective subjects or in situations where you need to maintain a very short working distance.
When choosing between these options, consider your specific needs. Twin flash systems offer the most flexibility in light positioning and control but tend to be more expensive. Speedlights are more versatile since they can be used for other types of photography, making them a cost-effective choice for photographers just starting with macro work.
For best results with any flash system, start with lower power settings and gradually increase the intensity. This approach helps prevent overexposure of delicate details, which is particularly important in macro photography where subtle textures and colors make all the difference.
DIY Lighting Solutions
Homemade Diffusers and Reflectors
Creating your own diffusers and reflectors can be both cost-effective and rewarding. Here’s how to craft professional-quality lighting tools using readily available materials.
For a simple diffuser, start with a white plastic container lid or translucent milk jug. Cut it to size, ensuring it’s large enough to cover your flash head. Sand the surface lightly with fine-grit sandpaper to create an even more diffused effect. Attach it using rubber bands or hook-and-loop fasteners for easy removal.
To make a versatile reflector, grab a piece of foam board from your local craft store. Cover one side with aluminum foil (shiny side out) for strong reflection, and the other with white paper for softer fill light. For added versatility, create a gold reflector by using yellow cellophane over the foil side.
A portable diffusion panel can be fashioned from an old picture frame and white ripstop nylon or parchment paper. Simply stretch the material across the frame and secure it with tape or staples. This creates a larger diffusion surface perfect for soft, even lighting.
For macro ring light diffusion, cut a circle from white plastic milk jugs to fit around your lens. Create small tabs to attach it securely, and you’ll have a professional-looking ring diffuser that softens harsh flash lighting beautifully.
Remember to test your DIY tools in different lighting conditions to understand their effects and make adjustments as needed.
Modified Household Lighting
Don’t let your household lighting collect dust when it can become powerful macro photography equipment with some creative modifications. A desk lamp with an adjustable arm can serve as an excellent directional light source – simply diffuse it with a piece of white paper or a coffee filter to soften harsh shadows. Table lamps with white shades can double as softboxes when positioned correctly, providing a gentle, wraparound light that’s perfect for small subjects.
LED strip lights, commonly used for home decoration, can create interesting circular lighting effects when wrapped around your lens or mounted on a DIY ring light frame. For precise control, consider mounting small battery-operated LED book lights on flexible smartphone tripods, allowing you to position them exactly where needed.
One particularly effective hack involves using a white plastic bottle as a diffuser. Cut it in half lengthwise, mount your flash behind it, and you’ve created a mini softbox perfect for macro work. Similarly, aluminum foil mounted on cardboard makes an excellent reflector for filling shadows, while white foam board can bounce light back onto your subject.
Remember to maintain consistency in color temperature when mixing different light sources. Most household bulbs are either warm (2700K-3000K) or cool white (5000K-6500K), so try to use similar types together for the most natural-looking results. With some experimentation and creativity, these everyday items can yield professional-quality macro lighting.
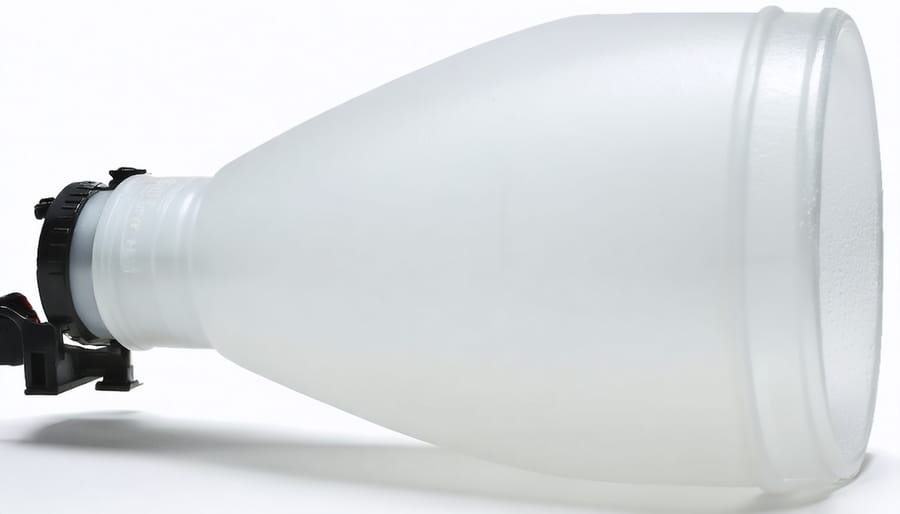
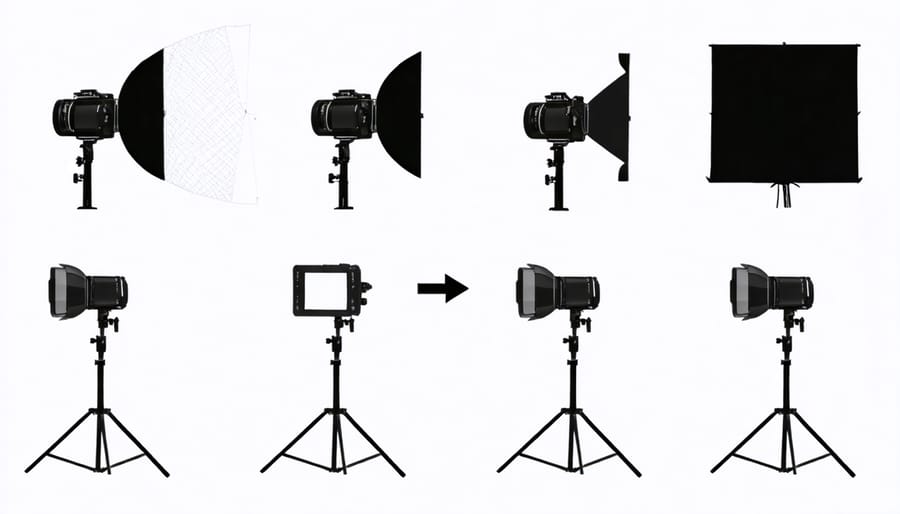
Light Modifiers and Accessories
Diffusers and Softboxes
In macro photography, diffusers and softboxes play a crucial role in creating gentle, even lighting that prevents harsh shadows and unwanted reflections on tiny subjects. These light-modifying tools come in various shapes and sizes, each designed to help you achieve specific dramatic lighting effects while maintaining detail in your close-up shots.
Popular diffusion options include collapsible mini softboxes that attach directly to your flash unit, providing a portable solution for both studio and field work. These typically range from 6 to 12 inches in size and create a wraparound light that’s particularly flattering for insects and flowers. For even softer light, consider using a dome diffuser, which spreads light in a 180-degree pattern, perfect for eliminating hotspots on reflective surfaces like water droplets or metallic subjects.
DIY enthusiasts might appreciate using everyday materials like white plastic bottles, tissue paper, or even milk jug material to create custom diffusers. These homemade solutions can be particularly effective when working with ring lights or traditional flash units, often providing results comparable to commercial products at a fraction of the cost.
When choosing between different diffusion options, consider the size of your subject and working distance. Larger softboxes create softer light but may be unwieldy in tight spaces, while smaller diffusers offer more maneuverability but might produce slightly harder light. The key is finding the right balance for your specific shooting situation and subject matter.
Reflectors and Light Panels
Reflectors and light panels are essential tools in macro photography, offering a cost-effective way to manipulate light and achieve professional-looking results. These versatile accessories help redirect existing light, fill shadows, and create the perfect illumination for your tiny subjects.
A basic 5-in-1 reflector kit is often all you need to get started. These typically include white, silver, gold, black, and translucent surfaces, each serving a specific purpose. White reflectors provide soft, natural-looking fill light, while silver creates brighter, more contrasty effects. Gold reflectors add warm tones, perfect for subjects like flowers or insects with warm coloring. The black panel absorbs light, helping to create dramatic shadows, while the translucent diffuser softens harsh light sources.
Positioning is crucial when working with reflectors. For best results, place them opposite your main light source to bounce light back onto your subject. When photographing small subjects outdoors, a handheld reflector can help fill shadows caused by direct sunlight. Pro tip: mount your reflector on a small articulating arm or stand to keep both hands free for camera operation.
Light panels, particularly LED panels, offer more control over your lighting. These flat light sources provide even illumination and are especially useful when shooting subjects like translucent flowers or water droplets. Many photographers combine reflectors with artificial light sources to achieve the perfect balance of highlights and shadows in their macro work.
Setting Up Your Lighting
Basic Lighting Patterns
When shooting macro subjects, mastering a few fundamental lighting patterns can dramatically improve your results. Let’s explore the most effective setups for different scenarios.
For flat subjects like coins or stamps, direct overhead lighting works well, creating even illumination across the surface. However, to avoid harsh shadows, consider using a diffuser or bouncing the light off a white surface.
For three-dimensional subjects like insects or flowers, side lighting at a 45-degree angle reveals texture and depth. You can achieve stunning results with single light setup techniques, positioning your main light to one side and using a reflector on the opposite side to fill shadows.
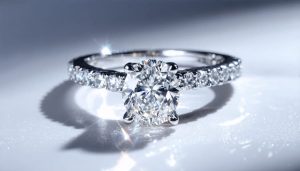
Ring lighting is perfect for subjects requiring consistent illumination from all angles, particularly useful for scientific documentation or jewelry photography. The circular light source eliminates directional shadows and creates attractive catchlights in reflective subjects.
For translucent subjects like leaves or flower petals, backlighting creates a beautiful glow that highlights internal structures. Place your light source behind the subject and use a reflector in front to balance exposure.
Remember to start with these basic patterns and experiment with modifications to develop your unique style. The key is understanding how light interacts with your subject’s surface and adjusting accordingly.
Troubleshooting Common Issues
Even the most experienced macro photographers encounter lighting challenges. Here’s how to tackle the most common issues you’ll face in your macro photography journey.
If you’re getting harsh shadows, try diffusing your light source with a translucent material like a white shower curtain or photography diffuser. For ring lights causing circular reflections on shiny subjects, adjust the angle slightly or switch to a different lighting position.
Dark corners in your images (vignetting) often occur when working at very close distances. Combat this by either adding a secondary fill light or positioning your main light source slightly further back. If your photos appear flat and lifeless, try introducing a subtle second light at a 45-degree angle to create depth and texture.
Focus issues can be exacerbated by poor lighting. When your camera struggles to achieve focus, temporarily increase the lighting intensity during focusing, then adjust to your desired exposure settings before taking the shot. For subjects that move, like insects, use a higher-powered flash with a shorter duration to freeze motion.
Color cast problems are common with LED lights. Use your camera’s custom white balance feature or consider investing in high-CRI lights specifically designed for photography. If you’re working with mixed lighting sources, use color correction gels to maintain consistent color temperature across your setup.
Remember, these solutions might need adaptation based on your specific situation, but they provide a solid starting point for troubleshooting your macro lighting challenges.
Real-World Applications
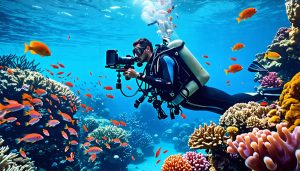
Let’s explore how photographers use macro lighting equipment in various real-world scenarios to capture stunning close-up images. In wildlife photography, many professionals combine ring lights with diffusers when photographing small insects and amphibians. For instance, nature photographer Maria Santos uses this setup to capture tree frogs in Costa Rica’s rainforests, allowing her to illuminate tiny water droplets on their skin while maintaining natural-looking shadows.
In jewelry photography, precision lighting is crucial for highlighting intricate details and precious stones. Professional product photographer James Chen demonstrates this with his three-point lighting arrangement: a main light with a softbox for overall illumination, two small LED panels with honeycomb grids for accent lighting, and a ring light for filling in shadows. This combination helps reveal the fine textures of metal work while minimizing unwanted reflections on gemstones.
Food photographers face unique challenges when shooting extreme close-ups of ingredients and plated dishes. Sarah Miller, a commercial food photographer, uses a flexible arm-mounted LED panel as her main light source, complemented by a small speedlight with a DIY diffuser made from parchment paper. This setup allows her to capture the intricate textures of bread crusts and the delicate crystalline structure of sugar and salt.
In scientific applications, researchers often employ specialized lighting techniques. At the University College London’s botany department, scientists use dual fiber optic lights with polarizing filters to photograph microscopic plant structures. This setup eliminates glare while maintaining the specimen’s natural appearance and revealing previously unseen details in plant cell structures.
For coin and stamp collectors, proper lighting is essential for documenting their collections. Experienced numismatist Robert Taylor uses an adjustable LED desk lamp with a magnifier and a secondary bounce card to capture the subtle details and mint marks on rare coins. This simple yet effective setup helps avoid the harsh reflections that often plague photographs of metallic surfaces.
These real-world examples demonstrate how different scenarios require tailored lighting solutions. Whether you’re photographing jumping spiders in your garden or capturing the intricate details of vintage watches, understanding how to adapt and combine various lighting tools is key to achieving professional-quality macro photographs.
Selecting the right lighting equipment for macro photography doesn’t have to be overwhelming or expensive. Throughout this guide, we’ve explored various options, from professional ring lights and twin flashes to budget-friendly DIY solutions. The key is to understand that successful macro photography relies heavily on controlling your light source, whether you’re capturing delicate flower petals or creating stunning jewelry macro photography.
Remember that diffusion is crucial for achieving soft, even lighting that reveals fine details without harsh shadows. While dedicated macro flashes offer precision and control, you can achieve excellent results with modified speedlights or even continuous LED lighting. For beginners, we recommend starting with a basic ring light or a DIY diffuser setup, then gradually expanding your equipment as you develop your style and technique.
Focus on mastering one lighting setup before investing in additional gear. Experiment with different positions, intensities, and diffusion methods to understand how light affects your subjects. Whether you choose professional equipment or craft your own solutions, the most important factor is understanding how to manipulate light to achieve your creative vision.
Keep in mind that even the most expensive equipment won’t guarantee great results without proper technique. Practice, patience, and understanding the principles of macro lighting will ultimately lead to capturing those stunning close-up images you envision.