Transform your photography workflow from chaotic to streamlined with a well-structured chart that maps every step from capture to delivery. Professional photographers know that a consistent, repeatable process not only saves precious editing time but also ensures consistent quality across all client deliverables. Whether you’re shooting weddings, landscapes, or commercial work, a comprehensive workflow chart serves as your roadmap to photographic excellence.
Creating an effective photography workflow chart isn’t just about organizing files—it’s about building a sustainable system that scales with your business and adapts to your creative evolution. By documenting each step, from memory card backup to final image export, you eliminate guesswork and reduce the risk of missing critical steps in your post-processing routine. This systematic approach becomes particularly crucial when handling multiple projects simultaneously or collaborating with other photographers.
The beauty of a well-designed workflow chart lies in its ability to automate repetitive tasks while preserving creative flexibility. Think of it as your photography command center, where technical precision meets artistic freedom, ensuring that every image receives the attention it deserves without getting lost in the digital shuffle.
Understanding Photography Workflow Basics
Key Components of a Photography Workflow
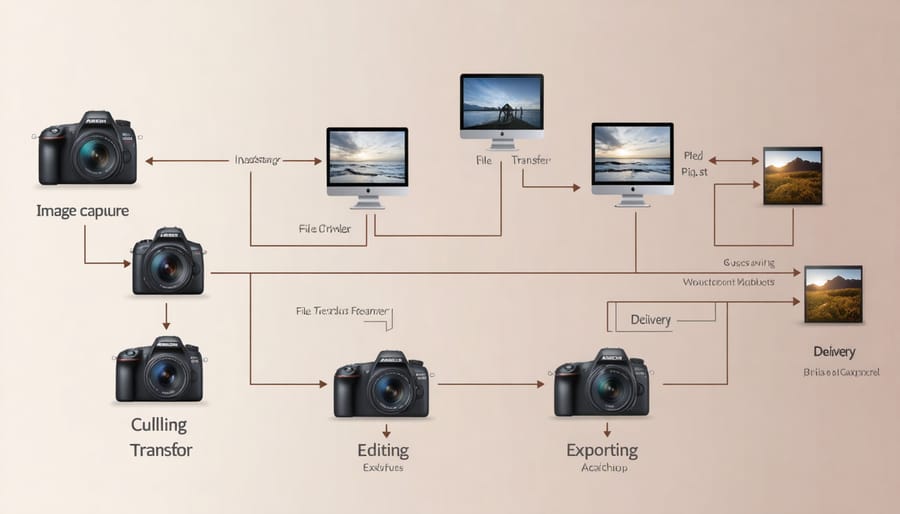
A successful photography workflow consists of several key stages that work together to ensure consistent, high-quality results. The process typically begins with image capture, where proper camera settings and shooting techniques lay the foundation for everything that follows. During this phase, photographers should focus on correct exposure, composition, and file format selection.
Next comes the crucial ingestion stage, where photos are transferred from camera to computer, organized, and backed up. This is followed by culling – the process of selecting the best images from a shoot and removing duplicates or technically flawed shots. Many photographers use rating systems or color coding to streamline this process.
Post-processing forms the heart of most workflows, encompassing basic adjustments like exposure and white balance, followed by more detailed editing such as local adjustments and retouching. Color correction and consistency checks ensure all images maintain a cohesive look across the set.
The final stages involve exporting images in appropriate formats for their intended use, whether for web, print, or client delivery. This includes applying necessary sharpening, resizing, and color space conversions. The workflow concludes with archiving and backing up the final edited images along with their raw files for future reference.
Common Workflow Bottlenecks
Even the most well-planned photography workflows can hit snags that slow down productivity. One common bottleneck occurs during the initial import process, where photographers often waste time manually sorting through hundreds of similar shots. Another frequent holdup happens when files aren’t properly named or organized from the start, leading to time-consuming searches later.
Inefficient backup systems can create significant delays, especially when working with large RAW files. Many photographers find themselves waiting for files to transfer or sync, often because they haven’t implemented automated backup solutions. Color correction and editing can become a major time sink when presets aren’t utilized effectively or when each image is edited from scratch without a consistent approach.
Version control presents another challenge, with photographers sometimes losing track of edited files or accidentally overwriting final versions. Poor file management between devices and inadequate storage planning can lead to frustrating workflow interruptions. Additionally, many photographers struggle with inefficient export settings, repeatedly adjusting parameters for different output requirements instead of creating standardized export presets.
The key to identifying these bottlenecks is to track where you spend most of your time during the editing process and look for repetitive tasks that could be automated or streamlined.
Building Your Workflow Chart
Pre-Processing Steps
Before diving into editing, establishing a solid hassle-free photo organization system is crucial. Start by creating a consistent file naming convention and folder structure for your images. I recommend using a year-month-event format (e.g., “2024-01-WeddingSmith”) to keep everything logical and easy to locate.
Next, implement a reliable backup strategy using the 3-2-1 rule: maintain three copies of your files, store them on two different types of media, and keep one copy off-site. Cloud storage services like Google Drive or Dropbox can serve as your off-site backup solution.
Initial culling is your first pass through the images. Flag obvious deletions like out-of-focus shots, test shots, and duplicate images. Some photographers use color coding or star ratings to mark their selections – choose a system that makes sense to you and stick with it. Tools like Photo Mechanic or FastRawViewer can speed up this process significantly.
Remember to add basic metadata like copyright information, location, and relevant keywords during this stage. This information will prove invaluable for future searches and organization.

Processing and Editing Phase
Once your images are imported and organized, the processing and editing phase begins – this is where your creative vision truly comes to life. Start by developing a systematic approach to your post-processing techniques, beginning with basic adjustments like exposure, contrast, and white balance.
Create a consistent editing sequence that you’ll follow for each batch of photos. This might start with culling, then move to basic corrections, followed by creative adjustments, and finally, local edits. Consider using presets or developing your own to speed up the process, especially when working with images shot under similar conditions.
Batch processing is your friend here – group similar photos and apply consistent adjustments across them. This not only saves time but also ensures consistency across your entire collection. For wedding or event photography, this approach is particularly valuable when dealing with hundreds of images from the same venue and lighting conditions.
Remember to save your work at different stages. Create virtual copies before making significant creative adjustments, and maintain a clear version history. This allows you to return to previous versions if needed and helps track your editing progression.
Finally, establish a quality control checkpoint before finalizing your edits. This might include checking images at 100% zoom for sharpness, reviewing skin tones, and ensuring consistent color grading across your series.
Final Output and Delivery
The final stage of your workflow involves preparing and delivering images to clients while ensuring proper archiving for future reference. For client deliveries, export your images in multiple formats: high-resolution JPEG files for printing (300 DPI), web-optimized versions for digital sharing (72 DPI), and possibly TIFF files for commercial clients requiring maximum quality.
Create a consistent naming convention for your exported files, such as “ClientName_EventDate_ImageNumber.” Consider including both color and black-and-white versions if specified in your client agreement. When delivering digitally, use professional file-sharing platforms like Dropbox or a dedicated client gallery service rather than email attachments.
For archiving, maintain at least two backups of your RAW files and final edits – one on an external hard drive and another on cloud storage. Organize archived projects by year and client name, keeping your catalog’s folder structure intact. Include a text file with relevant project details like camera settings, lighting setup, and specific client requirements for future reference.
Before closing the project, double-check that all deliverables meet client specifications and your quality standards, and update your asset management system accordingly.
Automating Your Workflow
Essential Automation Tools
Automating your photography workflow can save countless hours and ensure consistency across your editing process. Let’s explore some essential tools that can revolutionize your workflow efficiency.
Adobe Lightroom’s built-in presets and sync capabilities form the foundation of most automated workflows. Whether you’re applying basic adjustments or complex digital editing software features, presets can reduce editing time dramatically. Consider creating custom presets for different shooting scenarios or styles you frequently use.
Photo Mechanic excels at rapid culling and metadata handling, making it invaluable for photographers dealing with large volumes of images. Its speed in rendering full-resolution previews surpasses most competitors, allowing for faster selection decisions.
For file management and organization, automation tools like Hazel (Mac) or DropIt (Windows) can automatically sort, rename, and move your photos based on custom rules. These tools work silently in the background, maintaining your folder structure without manual intervention.
BatchPhoto and PhotoBulk are excellent choices for bulk processing tasks like resizing, watermarking, or format conversion. They’re particularly useful when preparing images for different delivery platforms or client requirements.
Don’t overlook keyboard shortcuts and custom actions in your editing software. While simple, these automation elements can significantly speed up repetitive tasks and create a more fluid editing experience.
Preset Integration
Presets are powerful digital photography tools that can dramatically streamline your editing workflow. Think of presets as recipe cards for your photo editing – they store specific adjustment combinations that you can apply with a single click. The key to effective preset integration lies in creating and organizing them strategically within your workflow.
Start by developing a core collection of presets that align with your photography style. Create separate preset categories for different shooting scenarios: one set for portraits, another for landscapes, and perhaps specific ones for challenging lighting conditions. When building your presets, focus on adjustments that you frequently make, such as basic exposure corrections, color grading, or your signature look.
Consider implementing a naming convention that makes sense for your workflow. For example, “Portrait-Soft-Light-01” or “Landscape-Moody-Dawn-02” can help you quickly identify the right preset for each situation. Keep your preset library organized and regularly review it to remove ones you rarely use.
To maximize efficiency, place your most-used presets at the beginning of your editing sequence. Many photographers apply their favorite preset immediately after importing photos, then make minor tweaks as needed. This approach can cut editing time significantly while maintaining consistency across your work.
Remember to periodically back up your preset collection and consider sharing them across devices if you work on multiple computers. This ensures your workflow remains consistent regardless of where you’re editing.
Batch Processing Techniques
Batch processing is a game-changer for photographers dealing with large volumes of images. Instead of editing photos one by one, you can apply consistent adjustments to multiple images simultaneously, saving countless hours in post-processing.
Start by organizing similar images together – whether they’re from the same shoot, share similar lighting conditions, or require similar adjustments. Most professional editing software like Lightroom and Capture One offer robust batch processing capabilities. You can synchronize basic settings like white balance, exposure, and color corrections across multiple images with just a few clicks.
Creating and saving presets is another powerful batch processing technique. Once you’ve perfected the look you want on one image, save those settings as a preset and apply it to other photos instantly. This approach works particularly well for wedding photographers or event photographers who need to maintain consistent styling across hundreds of images.
For maximum efficiency, consider using automated features like AI-powered batch processing tools. These can handle tasks like culling similar images, basic exposure corrections, and even skin retouching across multiple photos simultaneously. However, remember that batch processing isn’t a complete replacement for individual attention – some images will still need fine-tuning to achieve the best results.
Always preview your batch adjustments on a few sample images before applying them to your entire collection, ensuring the changes work well across different lighting conditions and compositions.
Optimizing Your Workflow Chart
Performance Monitoring
Regular performance monitoring of your workflow is essential for maintaining and improving efficiency. Track key metrics like average editing time per photo, client delivery speed, and backup completion rates. Use time-tracking tools to identify bottlenecks in your process, such as spending too long on initial culling or getting caught up in detailed retouching.
Create a simple spreadsheet to log these metrics weekly or monthly, allowing you to spot trends and areas needing attention. Pay special attention to tasks that consistently take longer than expected or cause delays in your workflow. Consider implementing a rating system for your efficiency on different types of shoots or editing styles.
Don’t forget to gather feedback from clients about delivery times and satisfaction levels. This information can help you adjust your workflow to better meet client expectations while maintaining quality. Regular monitoring also helps ensure you’re effectively using automation tools and shortcuts, preventing workflow drift where bad habits might creep in over time.
Adaptation Strategies
While a core workflow provides a solid foundation, different photography genres require specific adaptations. For wedding photography, create separate workflow branches for ceremony, reception, and portrait shots, with clear color-coding for must-have moments. Landscape photographers should prioritize organizing by location and shooting conditions, incorporating metadata for seasonal variations and revisit planning.
Studio photographers can streamline their workflow by creating templates for common lighting setups and post-processing requirements. Event photographers need a fast-track system for quick turnaround, possibly including same-day preview selections. Wildlife photographers should consider organizing by species and behavior types, with specialized backup protocols for remote shooting conditions.
The key is maintaining consistency while allowing flexibility. Start with your basic workflow structure, then add or modify steps based on project requirements. Consider creating mini-workflows for specific scenarios within your main chart, allowing for quick adaptation without losing organizational coherence.
A well-structured photography workflow isn’t just about organization – it’s your pathway to consistent, high-quality results and a more enjoyable creative process. By implementing the workflow steps we’ve discussed, you’ll save countless hours of searching for files, reduce editing inconsistencies, and protect your precious images from loss or corruption.
Remember that your workflow should be flexible enough to adapt to your evolving needs while maintaining a solid foundation of file management, backup procedures, and editing consistency. Start small by implementing one aspect at a time, whether it’s establishing a robust folder structure or creating preset templates for your editing style.
The key is to stick with your chosen workflow and refine it as you go. Don’t be afraid to adjust elements that aren’t working for you – the best workflow is one that you’ll actually use consistently. Consider reviewing and updating your workflow chart quarterly to ensure it continues to serve your needs effectively.
By taking control of your photography workflow now, you’re investing in your future success as a photographer. Your clients will appreciate your professionalism, and you’ll have more time to focus on what truly matters – creating beautiful images.