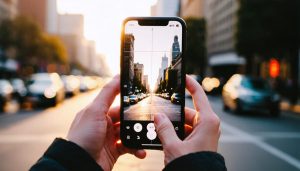
Natural light transforms ordinary product photography into compelling visual stories, especially when capturing the amber elegance of full spectrum CBD oil in Canada and other premium products. Master the interplay of sunlight through glass containers by shooting during golden hour, when soft, directional light creates stunning refractions and highlights the oil’s rich color spectrum. Position products near large windows on overcast days to achieve perfectly diffused lighting that eliminates harsh shadows and accurately represents product clarity. Control light intensity and direction using simple white foam boards as reflectors, strategically placing them to fill shadows and create professional-quality highlights that showcase product authenticity. This natural approach not only reduces equipment costs but also produces more authentic, trustworthy product images that resonate with today’s discerning consumers who value transparency and quality.
Why Natural Light Matters for CBD Oil Photography

Color Accuracy and Product Authenticity
Natural light plays a crucial role in capturing the true essence and color authenticity of CBD oils and their packaging. Unlike artificial lighting, which can introduce color casts and unwanted reflections, natural light provides a balanced spectrum that reveals the genuine amber, golden, or deep green hues characteristic of CBD products.
When photographing CBD oils in natural light, you’ll notice how the sun’s rays interact with the liquid, creating a beautiful transparency that showcases the product’s clarity and quality. This is particularly important for businesses and photographers who need to accurately represent their products online, as customers rely heavily on visual information when making purchasing decisions.
The diffused quality of natural light, especially during golden hour or on an overcast day, helps minimize harsh reflections on glass bottles while maintaining color accuracy. This allows you to capture the subtle variations between different CBD formulations without the color distortion often caused by artificial lighting. Additionally, natural light helps highlight important label details and product information while maintaining consistent color representation across your entire product line.
For the most accurate results, position your products near a large window and use a white reflector to balance shadows, ensuring your CBD photography truly reflects what customers will receive.
Texture and Detail Enhancement
Natural light has an extraordinary ability to reveal the intricate details and textures of CBD oil products that artificial lighting often misses. When sunlight interacts with the oil’s surface, it creates a beautiful interplay of transparency and reflection, highlighting the product’s viscosity and amber hues. This natural illumination helps capture the oil’s true consistency, making it easier for customers to understand the product’s quality visually.
The gentle gradients and soft shadows created by natural light are particularly effective at showcasing packaging details, from embossed logos to subtle label textures. Position your product near a window during golden hour, and you’ll notice how the angled light catches every facet of the glass bottle, creating depth and dimension that feels authentic and premium.
For the best results, try photographing your products on overcast days when the light is naturally diffused. This even lighting helps reveal surface details without harsh shadows or reflections that might obscure important product information. Pay special attention to how natural light catches the measure marks on droppers and highlights the natural variations in the oil’s color – these subtle details can significantly enhance your product’s visual appeal and perceived value.
Best Practices for Natural Light CBD Photography
Finding the Perfect Window Light
Window light is nature’s softbox, offering photographers a perfect balance of directional yet diffused illumination. The key to mastering window light lies in understanding how it changes throughout the day and positioning your subject accordingly.
During the golden hours (early morning and late afternoon), window light takes on a warm, gentle quality that’s ideal for creating mood and depth in your images. Position your subject at a 45-degree angle to the window to achieve dimensional lighting that accentuates form and texture. This setup works particularly well for product photography, as it helps highlight the transparency and color of oils while minimizing unwanted reflections.
Mid-day window light can be surprisingly versatile when properly managed. Use sheer curtains or white sheets as diffusers to soften harsh direct sunlight. For consistent results, north-facing windows (in the Northern Hemisphere) provide steady, indirect light throughout the day, making them a photographer’s best friend.
Distance from the window matters significantly. Placing your subject closer to the window increases contrast and creates more dramatic shadows, while moving it farther away produces softer, more even illumination. Experiment with both approaches – try positioning your subject 2-3 feet from the window as a starting point, then adjust based on your creative vision.
Remember to observe how the light interacts with your subject at different times of day. Keep a log of optimal lighting conditions in your shooting space to streamline future sessions.

Diffusion Techniques
When working with natural light for bottle photography, knowing how to control lighting effectively through diffusion is essential. The transparent nature of CBD oil bottles can create challenging reflections and hotspots that detract from your final image.
One of the simplest diffusion techniques is using a translucent white sheet or photography diffusion fabric between your light source and the subject. Position this material about 2-3 feet from your bottles to create a softer, more even light that minimizes harsh reflections while maintaining the product’s natural shine.
For budget-friendly options, a white bed sheet or frosted shower curtain can work wonderfully. Professional photographers often use specialized diffusion panels, but these DIY alternatives can achieve similar results. The key is maintaining enough distance between the diffuser and your subject to allow the light to spread evenly.
Window light can be diffused using translucent white curtains or by applying frosted window film temporarily. On bright, sunny days, you might need multiple layers of diffusion material to achieve the desired softness. Remember that the closer your diffusion material is to the light source (rather than the subject), the softer and more spread out the light will become.
For precise control, consider using small pieces of diffusion material directly in front of your key lights, especially when working with multiple bottles or creating product series shots.
Background and Staging Considerations
When working with natural light, your background and staging choices can make or break your photos. Start by selecting a location near a large window or glass door that receives consistent, indirect sunlight. North-facing windows are ideal as they provide soft, even light throughout the day without harsh direct rays.
Creating a professional backdrop setup doesn’t require expensive equipment. A simple white foam board or seamless paper can serve as your primary background, while textured fabrics, wooden surfaces, or marble-effect contact paper can add visual interest. Position your backdrop at a 45-degree angle to the window to capture the most flattering light.
Consider using reflectors to control shadows and fill in darker areas. A white foam board placed opposite your main light source can bounce light back onto your subject, creating more balanced illumination. For depth and dimension, maintain adequate distance between your subject and background – typically 2-3 feet works well.
Keep your staging area clean and clutter-free. Remove any distracting elements that might appear in frame, and ensure your background material is wrinkle-free and properly secured. If you’re working with glass products, watch for unwanted reflections and adjust your setup accordingly. Remember, simplicity often yields the most professional results.
Equipment Recommendations
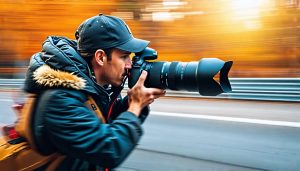
Camera and Lens Selection
When it comes to choosing the right camera equipment for natural light photography, you don’t necessarily need the most expensive gear to achieve stunning results. A camera with good dynamic range and low-light performance is essential, with full-frame sensors typically offering better performance in these areas. The Canon 5D series and Sony A7 lineup are excellent choices, though crop-sensor cameras like the Fujifilm X-T series can also deliver outstanding results.
For lenses, prioritize those with wide maximum apertures (f/2.8 or wider) to capture more light and create beautiful background blur when desired. A versatile 24-70mm zoom lens often proves invaluable for natural light work, while a 50mm f/1.8 prime lens offers excellent light-gathering capabilities at an affordable price point.
Consider investing in a reliable tripod for low-light situations and a reflector to help manage shadows. These accessories are often more crucial than upgrading your camera body. Remember, it’s not just about the gear’s specifications – the best camera is one that feels comfortable in your hands and allows you to work efficiently with natural light.
A quality LCD screen with good brightness and accurate color reproduction will help you evaluate your shots in the field, especially when working in varying lighting conditions outdoors.
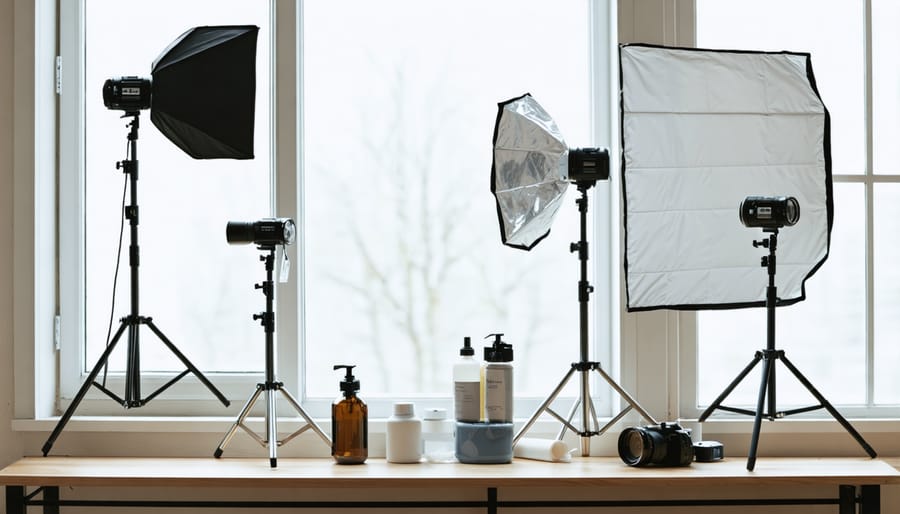
Light Modification Tools
You don’t need expensive equipment to effectively control natural light in your photography. A few affordable tools can make a significant difference in your shots. Start with a simple white foam board reflector – available at any craft store for under $10. This versatile tool bounces light back onto your subject, softening shadows and creating more balanced exposure.
A translucent white bed sheet or shower curtain makes an excellent diffuser, softening harsh sunlight when hung between your light source and subject. For more portable options, consider investing in a collapsible 5-in-1 reflector kit, which typically includes white, silver, gold, black, and translucent surfaces for various lighting situations.
Window light can be easily modified using sheer curtains or frosted window film. These materials create beautiful, soft light that’s perfect for product photography. For more precise control, pick up some black foam board or cardboard to create negative fill, which helps deepen shadows and add contrast where needed.
DIY light modifiers can be just as effective as professional gear. A piece of white poster board curved into a sweep creates a perfect bounce surface, while aluminum foil attached to cardboard makes an excellent silver reflector. These simple tools, when used thoughtfully, can help you achieve professional-looking results without breaking the bank.
Common Challenges and Solutions
While natural light photography offers numerous benefits, it also comes with its share of challenges. One common hurdle is inconsistent lighting throughout the day, which can affect the color accuracy of CBD products. To overcome this, try shooting during the “golden hours” – early morning or late afternoon – when the light is more stable and warm.
Harsh shadows can be particularly problematic when photographing CBD oil bottles, as they create unwanted reflections and obscure product details. Using a simple white reflector or bounce card positioned opposite your light source helps fill in these shadows and creates more balanced illumination. For those on a budget, a piece of white foam board works perfectly.
Weather conditions can also be unpredictable, potentially disrupting your shooting schedule. Having a backup plan is essential – set up your shooting area near a large window and keep a translucent curtain handy to diffuse harsh direct sunlight. This creates a makeshift softbox effect that’s ideal for product photography.
Glass bottles and droppers present unique challenges with natural light, often creating unwanted glare or reflections. Position your products at a slight angle to the light source, and experiment with black cards on the opposite side to control reflections. For particularly troublesome spots, a polarizing filter can help manage unwanted shine.
Color temperature variations throughout the day can affect how your CBD products appear in photos. Using a gray card for white balance reference ensures consistent coloring across your image series, especially important when showcasing the natural amber hues of CBD oils.
Natural light photography offers an incredible combination of accessibility, authenticity, and artistic potential that’s hard to match with artificial lighting. From the soft, flattering qualities of diffused window light to the dramatic possibilities of golden hour, embracing natural light can transform your photography while keeping your workflow simple and cost-effective. As you’ve learned, understanding light direction, timing, and diffusion techniques will help you capture stunning images that resonate with viewers.
Don’t be afraid to experiment with different times of day, weather conditions, and shooting locations. Each scenario presents unique opportunities to create compelling photographs. Remember that mastering natural light photography is a journey of observation and practice. Start with the fundamentals we’ve discussed, and gradually develop your own style and preferences. Your camera is waiting – step into the light and start creating!