Explore your AI camera’s shooting modes to unleash its full potential. Experiment with features like Portrait Mode, Night Sight, and HDR to capture stunning photos in various lighting conditions. Master composition techniques such as the rule of thirds and leading lines to create visually compelling shots, even letting your AI camera guide you with its built-in framing assistance. Utilize AI-powered editing tools to fine-tune exposure, color, and sharpness for professional-looking results, leveraging presets and filters for creative flair. Push the boundaries of your photography with cutting-edge mirrorless cameras that offer advanced AI capabilities like subject tracking, eye detection, and intelligent scene recognition.
Understanding AI Camera Modes and Settings
Portrait Mode
Portrait mode uses AI algorithms to analyze the scene and automatically apply a shallow depth of field effect, blurring the background while keeping the subject sharp. This mimics the look of portraits shot with expensive DSLR cameras and wide aperture lenses. The AI detects faces and edges, then intelligently separates the subject from the background. It can even apply realistic bokeh effects, simulating the pleasing out-of-focus light circles created by professional lenses. With portrait mode, you can capture stunning headshots, couple photos, or pet portraits with a tap, letting the AI handle the complex technicalities of creating a professional-looking shallow depth of field effect.
Night Mode
Night mode on AI cameras uses advanced algorithms to brighten and clarify photos taken in dimly lit environments. By intelligently analyzing the scene, the camera can boost shadows, reduce noise, and sharpen details that would otherwise be lost in the darkness. This allows you to capture stunning low-light images without the need for a tripod or additional lighting equipment.
To get the best results, experiment with different compositions and camera angles. Look for interesting light sources, such as street lamps or neon signs, to add a creative flair to your shots. When framing your subject, consider the balance of light and shadow to create a moody, atmospheric feel. With a bit of practice and the help of your AI camera’s night mode, you’ll be able to capture beautiful, dramatic photos even in the darkest conditions.
HDR Mode
HDR mode is a game-changer for capturing high-contrast scenes. By snapping multiple exposures and intelligently blending them, AI algorithms in HDR mode preserve details in both bright and dark areas that would otherwise be lost. The result? Stunningly vivid images with a wide dynamic range that closely mimics what the human eye perceives. Whether you’re shooting landscapes with bright skies and shadowy foregrounds or portraits in harsh midday sun, HDR mode ensures every element is properly exposed. The AI intelligently assesses the scene and determines the optimal number of exposures to take and how to merge them for natural-looking results, taking the guesswork out of HDR photography.
Scene Optimizer
The Scene Optimizer is one of the most powerful features of AI cameras. By analyzing the subject matter, lighting conditions, and composition, the camera can intelligently adjust its settings to capture the best possible shot. Whether you’re photographing landscapes, portraits, or action scenes, the Scene Optimizer takes the guesswork out of choosing the right mode. It can detect if you’re shooting in low light and boost the ISO sensitivity, or if you’re capturing a fast-moving subject and increase the shutter speed. This allows you to focus on framing your shot and let the camera handle the technical details, resulting in stunning images with minimal effort.
Composing Shots with an AI Camera
Rule of Thirds Grid
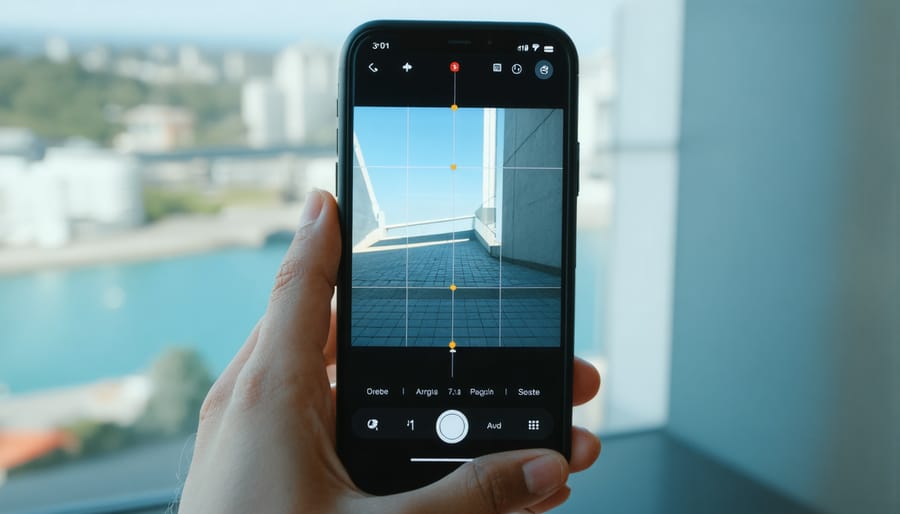
The Rule of Thirds grid is a powerful tool in your AI camera’s arsenal. This overlay divides the frame into nine equal parts, creating a 3×3 grid. The key is to position important elements along these gridlines or at their intersections. By aligning your subject off-center, you create a more balanced and dynamic composition that naturally draws the viewer’s eye.
Imagine photographing a landscape with a lone tree as the focal point. Instead of placing the tree dead-center, try positioning it along the left or right vertical gridline. This adds visual interest and depth to your shot. Similarly, when capturing a horizon, align it with the top or bottom horizontal line for a more engaging perspective.
Your AI camera simplifies this process by providing a built-in grid overlay. Enable this feature in your camera settings, and watch as the gridlines appear on your screen in real-time. As you compose your shot, adjust your framing until key elements snap into place along the grid. With practice, the Rule of Thirds will become second nature, elevating your photography skills to new heights.
Leading Lines and Shapes
Engage your AI camera’s intelligent composition tools to capture shots with dynamic leading lines and shapes that guide the viewer’s eye through the frame. Seek out strong geometric elements like roads, bridges, or architectural features converging towards a vanishing point. The AI can analyze the scene and offer guided overlays to help you position these lines for maximum impact. Rule of thirds grids and golden ratio spirals are common AI-generated guides that work beautifully with leading lines.
Experiment with positioning your main subject at the intersection points of these guiding lines and shapes. The AI may even suggest the optimal placement, ensuring your composition is balanced and visually compelling. Keep an eye out for naturally occurring curves, patterns, and repetition that can add depth and texture to your images. With your AI camera’s intuitive suggestions, you’ll soon be crafting striking shots that artfully leverage the power of leading lines and shapes.
Editing AI Photos for Maximum Impact
Artificial Bokeh Effects
Artificial bokeh effects allow you to creatively adjust background blur without changing lenses or aperture settings. AI cameras use depth mapping to identify foreground subjects and intelligently apply soft, defocused backgrounds. Experiment with different levels of blur, from subtle to dreamy, to guide the viewer’s eye and make your subject pop. For stylized looks, try applying custom bokeh shapes like hearts or stars in editing. The portrait mode on many smartphones uses artificial bokeh to mimic the shallow depth-of-field of larger cameras. Have fun exploring this AI feature to add an artistic flair to your people pictures!
AI Filters and Presets
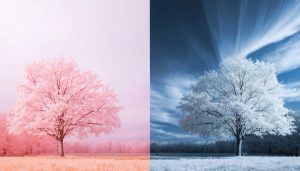
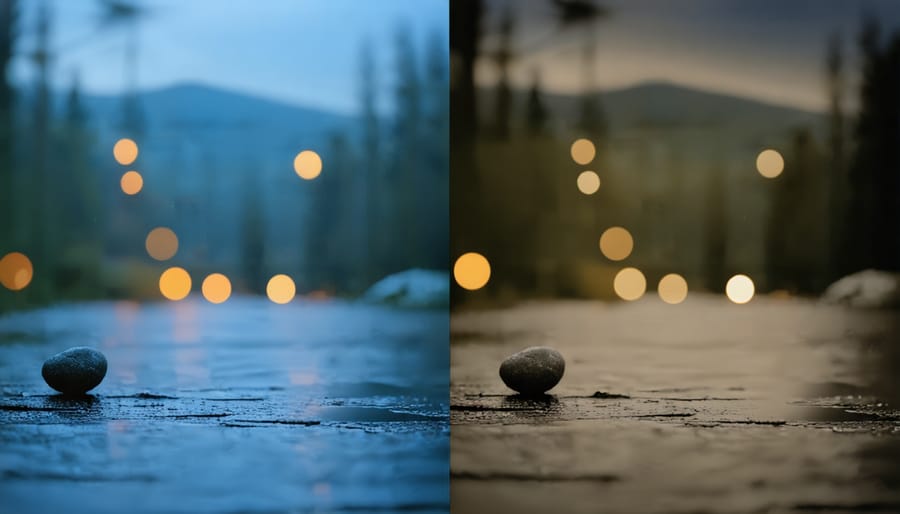
One of the most exciting aspects of AI cameras is the ability to instantly apply artistic filters and presets optimized for your specific photo. These AI-powered tools analyze the content, lighting, and composition of your image to recommend the perfect filter or preset to enhance its visual appeal. Whether you’re aiming for a vintage look, a dramatic monochrome effect, or a vibrant pop of color, AI cameras make it easy to achieve professional-looking results with just a tap. As AI is transforming photography, these intelligent filters and presets are becoming increasingly sophisticated, allowing you to unleash your creativity and develop your unique style without spending hours in post-processing.
Selective Adjustments with AI
AI camera apps offer powerful selection tools that let you make precise, targeted adjustments to specific areas of your photos. For instance, you can select a person’s face and adjust the exposure, contrast, or even skin smoothness without affecting the rest of the image. This granular control is made possible by the AI’s ability to recognize and isolate different elements like faces, objects, and backgrounds.
Other handy AI-powered selection features include the ability to change specific colors in the photo, like turning a red car blue while preserving the other hues. Some apps even let you alter the depth of field by computationally blurring the background or foreground. With these intelligent selection capabilities, AI cameras provide a new level of creative flexibility right on your smartphone, allowing you to fine-tune your images with professional-style edits.
Correcting Exposure and Color
Most AI cameras offer suggestions to optimize exposure, white balance, and color settings based on the scene. These intelligent features analyze the image data to determine the ideal adjustments for achieving balanced, vibrant results. By accepting the AI’s recommendations, you can fine-tune your photos with just a few taps, ensuring proper exposure and natural-looking colors.
For example, if a portrait appears slightly underexposed, the AI may suggest brightening the subject’s face while maintaining the background exposure. Similarly, it can automatically detect and correct color casts caused by different lighting conditions, such as the warm glow of sunset or the cool tones of a cloudy day. Advanced AI-powered editing tools can even selectively adjust specific colors within an image, allowing you to enhance certain elements without affecting the overall balance.
Getting Creative with AI Camera Features
AI Timelapse and Hyperlapse
With AI timelapse and hyperlapse modes, your smartphone camera becomes a powerful tool for capturing captivating sequences. Timelapse condenses long periods of time into short, mesmerizing videos by taking photos at set intervals and stitching them together. AI stabilization ensures smooth, professional-looking results even if your phone moves slightly during the process. Hyperlapse, on the other hand, combines timelapse with motion, allowing you to create dynamic, fast-paced videos while moving through a scene.
To set up an AI timelapse or hyperlapse, choose your composition carefully and secure your phone on a tripod or stable surface. Select the appropriate mode in your camera app, adjust settings like interval and duration, and let the AI work its magic. Experiment with different speeds to showcase the passage of time in creative ways – from the hustle and bustle of a city street to the serene movement of clouds across the sky. With a little practice and imagination, you’ll be creating stunning timelapse and hyperlapse videos that add a unique dimension to your visual storytelling.
3D Photos Using AI
Immerse yourself in the world of 3D photography with your AI camera’s depth sensor. This innovative feature captures multiple layers of depth information, allowing you to create stunning, lifelike images that seem to pop off the screen. By analyzing the distance between the camera and various elements in the scene, the AI camera generates a depth map, which it then uses to simulate a 3D effect.
To capture the perfect 3D photo, experiment with different angles and distances from your subject. The AI camera’s depth sensor works best when there’s a clear separation between the foreground and background. Look for scenes with interesting textures, patterns, or contrasting colors to enhance the 3D effect.
Once you’ve taken your 3D photo, you can adjust the intensity of the effect using your camera’s editing tools. Play around with the depth slider to find the perfect balance between subtlety and drama. You can also add creative touches, such as bokeh or selective focus, to draw attention to specific elements in the scene.
In conclusion, learning how to use your AI camera can open up a world of creative possibilities and help you capture stunning photos with ease. By understanding the different AI modes, mastering composition techniques, and exploring the powerful editing tools, you’ll be well on your way to elevating your photography game. Remember to experiment with unique perspectives, play with lighting, and don’t be afraid to think outside the box. With practice and persistence, you’ll develop your own signature style and create images that truly stand out. So grab your AI camera, get out there, and start capturing the world through your lens. The possibilities are endless, and the only limit is your imagination.

